Author: SABIA

  • How to Appoint a Foreign Director in South Africa Using a Passport: Step-by-Step CIPC Guide

    How to Appoint a Foreign Director in South Africa Using a Passport: Step-by-Step CIPC Guide

    Learn how to appoint a foreign passport holder as a director in South Africa through CIPC, including passport verification, Foreigner Assurance, OTP consent and COR39.

    Appointing a foreign national as a director of a South African company requires more than simply adding the person’s details to the company record. Where the proposed director is a passport holder rather than a South African ID holder, the Companies and Intellectual Property Commission (CIPC) requires the foreign person’s passport details to be verified through its Foreigner Assurance process before the director amendment can proceed.

    CIPC’s step-by-step guide for appointing a passport holder explains how companies and authorised filers can complete the director amendment process through the CIPC online platform. The process is integrated with foreigner verification, electronic consent, OTP authentication and final submission.

    This guide explains the process in practical terms, including what information should be prepared, how passport verification works, what the proposed director and filer need to do, and what happens after everyone has provided the required consent.

    Important: The procedure described here is based on the CIPC Director Amendment Step-by-Step Guide for appointing a passport holder. CIPC’s online systems and requirements can change, so applicants should verify the current requirements before submitting an amendment.


    What Is a Director Amendment?

    A director amendment is an official change to the directors recorded for a registered company.

    Depending on the circumstances, a company may need to use the CIPC director amendment process to:

    • Appoint a new director
    • Resign an existing director
    • Update information relating to an existing director
    • Remove a director where applicable
    • Record certain changes to a director’s status
    • Add a foreign national who holds a passport as a director

    When the proposed director is a foreign passport holder, the process includes an additional verification requirement.

    The purpose of this requirement is to ensure that the passport holder can be verified before the person is appointed as a director.


    Appointing a Foreign Director With a Passport

    A company wanting to appoint a foreign national as a director should understand that there are essentially two connected processes:

    1. Foreigner Assurance and passport verification
    2. Director Amendment application

    The passport holder must be verified before the director appointment can proceed.

    This makes passport verification one of the most important parts of the application.

    If the passport cannot be verified, the applicant may need to follow the Foreigner Assurance process and wait for confirmation before continuing with the director amendment.


    What You Should Prepare Before Starting

    Although the CIPC system guides the applicant through the process, preparing the required information beforehand can make the application considerably easier.

    For a foreign director appointment, consider having the following information available:

    • Company registration number
    • Foreign director’s passport number
    • Passport expiration date
    • Proposed director’s personal information
    • Director’s cellphone number
    • Director’s email address
    • Correct contact details for existing directors
    • Filer’s email address
    • Access to the email accounts of affected directors
    • Access to the cellphone numbers required for OTP verification
    • Any supporting documents that may be required

    The passport should also be valid and its details should be captured accurately.


    Step-by-Step: How to Appoint a Passport Holder as a Director

    Step 1: Log Into CIPC

    Begin by logging into the CIPC online platform.

    Once logged in, navigate to the transaction area.

    Select:

    Transact

    The director amendment process is accessed through the transaction functionality.


    Step 2: Select More Services

    After selecting Transact, proceed to:

    More Services

    This section provides access to additional company-related services available through the CIPC system.


    Step 3: Select Director Amendments

    Under the available services, select:

    Director Amendments

    The system will then take you into the director amendment process.

    At this point, you should be prepared to work through the company’s existing director information and any new appointments or changes that need to be recorded.


    Step 4: Accept the Terms and Conditions

    The system will present the relevant terms and conditions.

    Select the agreement checkbox and then choose:

    Select and Continue

    You may then be prompted to continue to the next stage.

    Select Continue where required.


    Step 5: Enter the Company Registration Number

    The next step is to identify the company for which the director amendment is being submitted.

    Enter the company’s registration number.

    CIPC allows the company registration number to be entered in either the short or long format.

    After entering the registration number:

    1. Enter the company registration number.
    2. Click the Search button.
    3. Locate the relevant company.
    4. If the company appears in your list of companies, select the File button.

    Why the Company Registration Number Matters

    The registration number ensures that the amendment is submitted against the correct legal entity.

    Companies should therefore check the registration number carefully before continuing.

    An incorrect company selection can result in an application being submitted against the wrong entity, creating unnecessary administrative complications.


    Step 6: Complete the Foreign Director Quiz

    If you are appointing a passport holder, CIPC asks whether you will be appointing a foreigner.

    Select:

    Yes

    for the Director Foreigner Quiz.

    This tells the system that the proposed director is a passport holder and that foreigner verification is required.


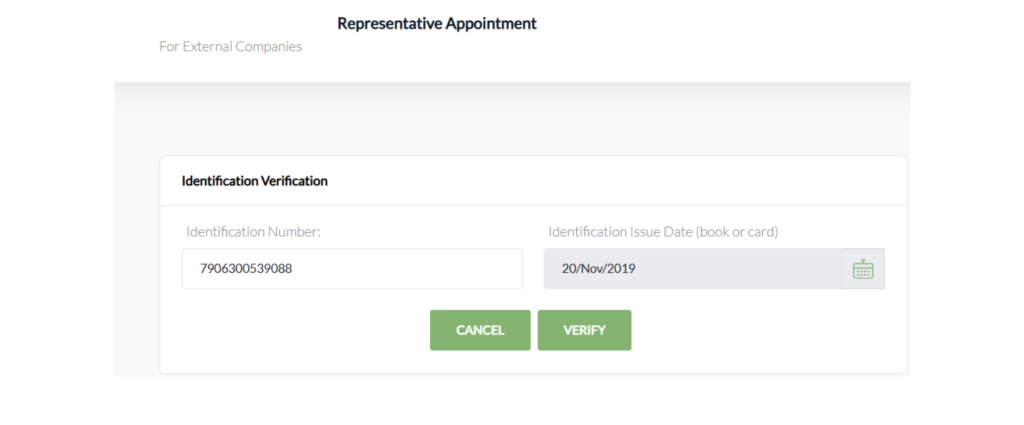
    Step 7: Verify the Passport Number

    You will then be asked to capture the passport number of the proposed foreign director.

    Enter the passport number and select:

    Verify

    This is an important stage of the application.

    The foreign director’s passport needs to be verified before the person can be appointed as a director through the process.


    What If the Passport Is Not Verified?

    A passport may not immediately pass verification.

    If the passport is not verified, the CIPC guide instructs the applicant to select the relevant here link.

    This redirects the applicant to the Foreigner Assurance process.

    The passport must then go through that verification process.

    Do Not Continue Prematurely

    One of the most important practical points in the CIPC procedure is that applicants should not simply continue with the director amendment application when the passport has not yet been verified.

    Instead, the foreigner’s passport should be processed through Foreigner Assurance.

    The applicant should then wait for the email confirming that the passport submitted through Foreigner Assurance has been successfully verified.

    Only after successful verification should the director amendment application proceed.


    Step 8: Verify Every Passport Holder

    If more than one foreign passport holder is being appointed, each person needs to be verified.

    After a passport has been successfully verified, select:

    OK

    The applicant should then verify every passport holder who will be appointed.

    Once all the proposed passport holders have been verified, select:

    Continue

    Practical Tip

    Do not assume that verifying one foreign director automatically verifies all foreign directors.

    Each passport holder should be checked individually.


    Step 9: Confirm the Company’s Contact Details

    The system will then display the enterprise contact details.

    Review the information carefully.

    If necessary, update the company’s:

    • Contact information
    • Telephone details
    • Email details
    • Other enterprise contact information requested by the system

    Once the information is correct, select:

    Continue

    Keeping company contact details current is important because electronic communication is an important part of the CIPC amendment process.


    Step 10: Review the Existing Directors

    The next stage involves reviewing the company’s current directors.

    CIPC provides an Edit option for each director.

    Select Edit for the relevant directors and check their information.

    Particular attention should be given to:

    • Cellphone numbers
    • Email addresses
    • Director status
    • Other displayed director information

    The CIPC guide specifically highlights the importance of ensuring that the cellphone numbers and email addresses are correct for directors who are being appointed or resigned.


    Step 11: Select “No Change” Where Appropriate

    If an existing director is not being changed, select:

    No Change

    Then select:

    Save

    Repeat this process for all directors whose information remains unchanged.

    This is important because the application is designed to capture only the amendments that need to be made while retaining the correct information for directors who are not affected.

    After completing the relevant director records, select:

    Continue


    Step 12: Select “New Director”

    To add the foreign national as a new director, select:

    New Director

    This opens the section where the details of the proposed director can be captured.


    Step 13: Confirm That the New Director Is a Passport Holder

    When asked whether the person being appointed is a passport holder, select:

    Yes

    This tells CIPC that the appointment concerns a foreign national whose identity is being verified using passport information.


    Step 14: Enter and Verify the Passport Information

    Capture the proposed director’s:

    • Passport number
    • Passport expiration date

    Then select:

    Verify

    The passport verification stage is particularly important because the appointment of the foreign director depends on the required verification being completed.

    Make sure that the passport information corresponds exactly with the person’s valid passport.


    Step 15: Capture the Required Director Information

    Once the passport has been verified, the applicant must complete the remaining information requested on the form.

    Carefully enter all required information.

    Do not rush through this section.

    Errors in personal information can result in delays, requests for correction or difficulties during the consent and verification stage.

    After completing the visible portion of the form, move down the page to identify any additional fields.

    Continue capturing the required information.

    When everything has been completed, select:

    Save


    Step 16: Continue With the Application

    After saving the new director’s information, select:

    Continue

    The system will then move to the supporting-document stage.


    Step 17: Attach Supporting Documents Where Required

    CIPC provides an option to attach documents to the application.

    According to the guide, supporting documents are optional for certain director amendments, including:

    • Updating director details
    • Appointing a director
    • Resigning a director

    However, documents become mandatory for certain other status changes, including:

    • Removal
    • Deceased
    • Term expired

    This distinction is important.

    Documents May Still Be Useful

    Even where documents are not mandatory for an appointment, applicants should consider whether supporting documentation is appropriate for their particular circumstances.

    The key point is not to assume that every director amendment has identical document requirements.

    Once the relevant documents have been attached, or if no documents are required, select:

    Continue


    Step 18: Confirm the Application

    The next stage is the confirmation of the application.

    Select:

    Confirm

    Important: Click Confirm Only Once

    The CIPC guide specifically warns applicants to click the Confirm button only once.

    This is a small but important instruction.

    Repeatedly clicking a submission or confirmation button can potentially create confusion about the application’s status or result in duplicate processing attempts.

    After selecting Confirm, allow the system to process the application.


    Step 19: Finalise the Application

    The system will then provide an option to finalise the application.

    Select:

    OK

    The application will then proceed to the submitted stage.


    Step 20: Understand the “Submitted – OTP” Status

    After submission, the application will show a status associated with OTP.

    This means that the electronic consent and verification process is not yet complete.

    The process does not end simply because the filer has submitted the initial application.

    The relevant people must still review and approve the proposed director changes electronically.


    Step 21: Watch for the CIPC “Proposed Changes” Email

    The filer and the directors affected by the amendment will need to check their email.

    This includes:

    • The filer
    • Directors being appointed
    • Directors being resigned

    They should look for the Proposed Changes email from CIPC.

    The email contains the information and link required to complete the consent process.


    Step 22: Review the Proposed Changes

    The filer and affected directors should review the proposed changes document attached to the email.

    This is an important safeguard.

    Before submitting an electronic consent, each person should confirm that the proposed amendment accurately reflects the intended company changes.

    Check details such as:

    • Company information
    • Director names
    • Appointment details
    • Resignation details
    • Contact information
    • Other relevant amendment information

    If something is incorrect, it is better to address the issue before providing final consent.


    Step 23: Use the Link in the Email

    After reviewing the proposed changes, the relevant person should click the link provided in the CIPC email.

    The person will then be required to capture the requested verification information.

    This includes information associated with:

    • Identification
    • SMS OTP
    • Email OTP

    Step 24: Select the Red Consent Button

    On the relevant page, select the:

    Red Consent button.

    The user will then need to move down the form and complete the required verification fields.


    Step 25: Enter the Identification and OTP Details

    The affected person must capture:

    1. Identification information
    2. SMS OTP
    3. Email OTP

    The person must also select the relevant agreement checkbox.

    After checking that the information is correct, select:

    Submit

    This completes that person’s electronic consent stage.


    Step 26: Every Affected Person Must Complete the Process

    This is one of the most important aspects of the procedure.

    The process does not necessarily become complete after the filer submits their OTPs.

    All relevant people must complete the electronic consent process.

    Depending on the amendment, this can include:

    • The filer
    • Newly appointed directors
    • Directors being resigned

    Each affected person should therefore monitor their email and complete their consent request.


    Step 27: The Last Submitter Can Finalise the Application

    Once all required people have submitted their OTP information, the final person who submits will see a:

    Finish

    button.

    Select Finish to finalise the application.

    The CIPC guide also indicates that a person who has already submitted their OTPs can complete the finalisation step if the Finish button becomes available to them.

    Therefore, the person who completes the final submission does not necessarily have to be a different person from the person who originally submitted their OTP information.


    Step 28: CIPC Issues the COR39

    After the director amendment process has been finalised, active directors will receive an email containing the:

    COR39

    The COR39 is an important company record relating to the director amendment.

    Companies should keep this document safely with their corporate records.


    Why Passport Verification Is So Important

    The integration between director amendments and Foreigner Assurance is one of the defining features of the passport-holder appointment process.

    A foreign national cannot simply be added as a director by entering a passport number into the director amendment application.

    The passport must first be verified.

    This creates an important distinction between:

    Passport information captured in the system

    and

    Passport information successfully verified through the required process.

    The two should not be treated as the same thing.


    Common Mistakes to Avoid

    1. Starting the Amendment Before Passport Verification

    One of the biggest mistakes is attempting to proceed with the director amendment when the foreign passport has not been verified.

    If the passport fails verification, use the Foreigner Assurance route provided by CIPC and wait for successful verification.


    2. Entering an Incorrect Passport Number

    A single incorrect character can potentially prevent successful verification.

    Always compare the information entered into the CIPC system with the passport itself.

    Pay attention to:

    • Letters
    • Numbers
    • Passport expiry date
    • Spacing
    • Similar-looking characters

    3. Using Outdated Contact Details

    Email and cellphone information becomes particularly important later in the process because electronic consent and OTP verification are involved.

    A director who cannot access the relevant email address or cellphone number may experience difficulty completing the application.


    4. Forgetting About the OTP Stage

    Submitting the director amendment application is not necessarily the end of the process.

    The affected parties must monitor their email for the proposed changes communication.

    Ignoring these emails can leave the application incomplete.


    5. Failing to Review the Proposed Changes

    Electronic consent should not be treated as a formality.

    Each person should review the proposed changes before submitting their identification and OTP information.

    If the proposed appointment or resignation contains an error, it should be addressed rather than blindly approved.


    6. Clicking Confirm More Than Once

    The CIPC guide specifically instructs applicants to click the Confirm button only once.

    Follow this instruction carefully.


    7. Assuming One Person’s Consent Is Enough

    Where multiple people are affected, all required parties need to complete their respective consent steps.

    A company should therefore coordinate with all relevant directors and the filer before starting the application.


    A Practical Checklist for Appointing a Foreign Director

    Before starting the CIPC application, use the following checklist.

    Company information

    • Company registration number available
    • Correct company selected
    • Enterprise contact details reviewed
    • Existing directors reviewed

    Foreign director information

    • Valid passport available
    • Passport number confirmed
    • Passport expiration date confirmed
    • Required personal information available
    • Correct cellphone number available
    • Correct email address available
    • Passport successfully verified

    Application

    • Director Amendment service selected
    • Foreigner quiz completed
    • Passport verified
    • Existing directors checked
    • New director added
    • Required information saved
    • Supporting documents attached where necessary
    • Application confirmed once
    • Application finalised

    Electronic consent

    • Proposed Changes email received
    • Proposed changes reviewed
    • Filer completed OTP process
    • Appointed director completed OTP process
    • Resigning director completed OTP process where applicable
    • Identification information submitted
    • SMS OTP submitted
    • Email OTP submitted
    • Consent submitted
    • Finish button selected
    • COR39 received

    How Long Does the Process Take?

    The CIPC guide does not establish a guaranteed processing time for every foreign director appointment.

    One factor that can affect the process is passport verification.

    If a passport is not immediately verified, the applicant must use the Foreigner Assurance process and wait for confirmation before proceeding.

    The electronic consent stage can also depend on how quickly the filer and affected directors respond to their emails and OTP requests.

    Therefore, a company should avoid leaving the amendment until the last minute where the appointment is needed for an important business transaction.


    What If a Director Does Not Receive the Email?

    If an affected person does not receive the Proposed Changes email, several practical checks should be made.

    Check the email address

    First confirm that the director’s email address recorded in the application is correct.

    Check spam or junk folders

    Automated emails can sometimes be filtered into spam or junk folders.

    Check whether the application was actually submitted

    Confirm that the application reached the submitted stage and that the relevant email process was triggered.

    Confirm that all affected people are included

    If several people are involved in the amendment, verify that each required person has been properly captured.

    If the issue persists, the applicant may need to contact CIPC through its official support channels.


    Why Companies Should Keep the COR39

    The COR39 should be retained as part of the company’s corporate records after the amendment has been completed.

    It provides useful evidence of the updated director information and can form part of the company’s administrative documentation.

    Companies should maintain an organised corporate file containing documents relating to:

    • Company registration
    • Directors
    • Shareholders
    • Director amendments
    • Company resolutions
    • Regulatory filings
    • Tax registrations
    • Other statutory records

    Maintaining accurate records becomes particularly important when the company later deals with banks, investors, auditors, accountants, lawyers, government departments or other third parties.


    Foreign Directors and South African Companies

    Foreign nationals can play an important role in South African businesses, particularly where companies have international shareholders, overseas founders, foreign investors or cross-border operations.

    However, appointing a foreign director requires careful attention to the company’s corporate records and regulatory requirements.

    A company should distinguish between:

    • Being a foreign shareholder
    • Being a foreign director
    • Holding a passport
    • Having a passport successfully verified
    • Having the director appointment successfully recorded by CIPC

    These are separate matters and should not automatically be treated as interchangeable.


    Does Appointing a Foreign Director Automatically Give the Person the Right to Work in South Africa?

    No.

    A corporate director appointment and immigration or employment permission are separate issues.

    Being recorded as a director of a South African company does not, by itself, establish that a foreign national has every immigration or work-related right required to perform activities in South Africa.

    Companies should therefore consider whether separate immigration, visa, employment, tax or regulatory requirements apply to the foreign individual and the person’s intended activities.

    Where those questions are material to the business, professional advice should be obtained.


    Final Thoughts

    The CIPC process for appointing a passport holder as a director is relatively structured, but there are several stages that companies need to complete correctly.

    The most important points are to verify the foreign director’s passport, accurately capture the director’s information, maintain correct contact details, review the proposed amendment carefully and ensure that every required person completes the OTP consent process.

    The process can be summarised as:

    1. Log into CIPC.
    2. Go to Transact.
    3. Select More Services.
    4. Choose Director Amendments.
    5. Accept the terms and continue.
    6. Search for the company using its registration number.
    7. Select the company.
    8. Indicate that a passport holder is being appointed.
    9. Verify the passport.
    10. Use Foreigner Assurance if the passport is not verified.
    11. Wait for successful verification where required.
    12. Review the company’s existing directors.
    13. Select New Director.
    14. Capture and verify the passport details.
    15. Complete the required director information.
    16. Save and continue.
    17. Attach documents where required.
    18. Confirm the application only once.
    19. Finalise the application.
    20. Wait for the Proposed Changes email.
    21. Review the proposed changes.
    22. Complete identification and OTP verification.
    23. Obtain consent from all required affected parties.
    24. Select Finish.
    25. Keep the COR39 received after completion.

    The most important lesson is that passport verification and electronic consent are not minor administrative steps. They are central components of the process for appointing a foreign passport holder as a director.

    A company that prepares the passport information, contact details and consent requirements in advance can reduce avoidable delays and make the CIPC director amendment process much smoother.

    This article is an informational guide based on the CIPC Director Amendment Step-by-Step Guide for appointing a passport holder. It should not be treated as legal advice. Always check the latest CIPC requirements before submitting a company amendment.

    #CIPC, #SouthAfricaCompany, #ForeignDirector, #DirectorAmendment, #CompanyRegistration, #ForeignerAssurance, #CIPCOnline, #BusinessInSouthAfrica, #CompanyDirectors, #SouthAfricanBusiness


  • How to Update the Name of a South African ID Holder as a Company Director: CIPC Step-by-Step Guide

    Learn how to update a South African ID holder’s name as a company director through CIPC, including DHA verification, director amendments, OTP consent, finalisation and COR39.

    Updating a director’s name on a South African company record is an important corporate administration task. A director’s name may need to be updated after a legal name change, marriage, correction of personal information, or another change reflected in the records of the South African Department of Home Affairs (DHA).

    The Companies and Intellectual Property Commission (CIPC) provides an automated process for updating the names of South African ID holders who are registered as company directors. However, the process depends on DHA being online and available for verification at the time the amendment is submitted.

    This guide explains the CIPC director amendment process based on the official step-by-step procedure for updating the name of a South African ID holder.

    Important: This process is specifically concerned with updating the name of a South African ID holder who is already recorded as a director. It should not be confused with appointing a new director, removing a director, or changing the details of a foreign director.

    What Is a Director Name Amendment?

    A director name amendment is an administrative update to a company’s CIPC records where the registered name of an existing director needs to be changed.

    The objective is to ensure that the company’s director information corresponds with the verified identity information held by the South African Department of Home Affairs.

    For example, a director may have been registered as:

    Jane Smith

    but her South African identity records may subsequently reflect:

    Jane Smith-Jones

    If the relevant requirements are satisfied, the CIPC automated system can use DHA’s online verification service to validate the director’s updated full name.

    Why Is Keeping Director Information Updated Important?

    Accurate director information is important because CIPC records are used for corporate compliance, company administration and various business transactions.

    An outdated director name can potentially create inconsistencies between:

    • CIPC records;
    • the director’s South African identity information;
    • company certificates;
    • banking records;
    • contracts and corporate documents; and
    • other compliance records.

    Keeping company information current can therefore reduce administrative complications when the company later needs to provide proof of its directors or amend other company information.


    Before You Start the CIPC Name Update

    Before beginning the process, it is useful to understand several important requirements.

    1. The Director Must Be a South African ID Holder

    The procedure is designed for updating the names of South African ID holders.

    The automated DHA verification step is therefore central to the process.

    2. DHA Must Be Online

    The CIPC guide specifically states that DHA needs to be online at the time of the update.

    This is important because CIPC needs to verify the director’s information electronically.

    If the DHA service is unavailable, the automated name-verification step may not work as expected.

    3. You Need the Company Registration Number

    You will need the company’s CIPC registration number to search for the relevant company.

    The system allows the registration number to be captured in either its short or long format.

    4. You Need Access to the Relevant Email Addresses

    The later stages of the process involve proposed changes emails and OTP verification.

    The filer and impacted directors therefore need to be able to access their relevant email accounts and complete the required verification.

    5. Review the Information Carefully

    Because the process involves confirmation of proposed changes, the filer and affected directors should carefully review the information before submitting OTPs.

    A mistake in the information captured during the amendment could result in unnecessary delays or require further corrective action.


    How to Update a Director’s Name on CIPC

    The process can be broken down into several stages.

    Step 1: Log in to CIPC

    Begin by logging into the CIPC online platform.

    Once logged in, select:

    Transact

    This takes you into the transaction area where company amendments and other services can be accessed.


    Step 2: Select More Services

    From the available options, select:

    More Services

    This section provides access to additional company-related transactions.


    Step 3: Select Director Amendments

    Agree to the applicable terms and conditions and select:

    Director Amendments

    This opens the director amendment process.

    The purpose of this service is not limited to name changes. Director amendments can also relate to other director-related changes, depending on the available CIPC options.

    For this particular process, the relevant amendment is the update of the name of an existing South African ID holder.


    Step 4: Agree and Continue

    On the next screen:

    1. Select the Agree checkbox.
    2. Select Continue.
    3. Select Continue again where prompted.

    This moves the filer into the company selection and director amendment section.


    Step 5: Search for the Company

    You will then need to capture the company’s registration number.

    The registration number can be entered using either the:

    • Short format, or
    • Long format.

    After entering the company registration number, click the Search button.

    The relevant company should appear in the searched company information list if it is available under your profile or access.

    Select the Company

    Once the company appears, click the File button.

    The File option allows you to proceed with the amendment for that particular company.


    Step 6: Complete the Director Foreigner Quiz

    The CIPC procedure then asks you to deal with the director foreigner quiz.

    For the South African ID holder name-update process described in the guide:

    Select No on the Director Foreigner Quiz.

    You can also update the enterprise contact details if they need to be changed.

    Once the necessary information has been reviewed, click:

    Continue


    Step 7: Select the Director Whose Name Must Be Updated

    The system will display the company’s directors.

    Select the director whose name needs to be updated.

    This is an important step because the amendment must be applied to the correct director.

    Before proceeding, carefully verify that you have selected the correct person.


    Step 8: Select Status Change

    After selecting the relevant director, select:

    Status Change

    The system will then provide the appropriate options for updating the director information.


    Step 9: Use the DHA FullName Update Option

    Select:

    DHA FullName Update

    This is the key part of the automated name-update procedure.

    If DHA is online, the system will attempt to verify the information through the Department of Home Affairs.

    What Happens During DHA Verification?

    The CIPC system uses the DHA verification functionality to confirm the director’s full name.

    If the information is successfully verified, you can proceed with capturing the required information.

    The CIPC guide also instructs the filer to ensure that the director’s status is selected as:

    ACTIVE

    This is particularly important because the procedure is intended to update the name of an existing active director rather than remove or otherwise change the director’s status.

    An Important Point About the Updated Name

    The CIPC guide specifically notes that the updated name will reflect only on the Certificate.

    This is an important distinction for anyone expecting every possible company record or document to automatically change in the same way.


    Step 10: Capture the Required Information

    After the DHA FullName Update has been processed, capture all required information displayed by the system.

    Take care when entering the information.

    Check the Form Before Saving

    Do not rush through the form.

    Review:

    • the director selected;
    • the updated name;
    • director status;
    • identification information;
    • contact information where applicable; and
    • any other mandatory fields.

    Then move down the form to continue capturing the required information.

    Once everything has been entered, click:

    Save


    Step 11: Review All Directors

    The next stage requires the filer to ensure that all directors have been reviewed.

    This is an important checkpoint before continuing with the application.

    Once the director information has been reviewed, click:

    Continue

    Then click Continue again when prompted.

    The purpose of this stage is to make sure that the proposed amendment is ready for submission.


    Step 12: Attach Documents Where Required

    The CIPC procedure provides an option to attach documents.

    For the specific process of updating director details, documents are described as optional.

    This also applies to certain other director transactions, including:

    • appointing a director; and
    • resigning a director.

    However, the guide makes an important distinction for certain status changes.

    When Are Documents Mandatory?

    Documents are mandatory for the following director status changes:

    • Remove
    • Deceased
    • Term Expired

    Therefore, it is important not to assume that documents are optional for every director amendment transaction.

    For a straightforward name update through the DHA FullName Update process, the guide identifies documents as optional.

    After dealing with attachments, click:

    Continue


    Step 13: Confirm the Application

    The system will then present a confirmation stage.

    Click:

    Confirm

    Important: Click Confirm Only Once

    The CIPC guide specifically warns users to:

    ONLY CLICK ONCE

    This is an important practical instruction.

    Avoid repeatedly clicking the confirmation button if the system appears to be processing slowly. Repeated submissions can potentially create confusion about the status of the transaction.

    Wait for the system to process the request before taking further action.


    Step 14: Finalise the Initial Submission

    After confirming the application, finalise it by clicking:

    OK

    The application will then move into a submitted state.


    Step 15: Understand the OTP Submission Process

    After submission, the application will appear in:

    Submitted Status with Type OTP

    This means the process is not necessarily complete simply because the filer has submitted the application through the CIPC system.

    There is an additional consent and verification stage.

    The relevant individuals must check their email.

    Who Needs to Check Their Email?

    The CIPC procedure states that the following people need to review the proposed changes:

    • the filer;
    • directors being appointed, where applicable; and
    • directors being resigned, where applicable.

    For a simple director name amendment, the relevant affected parties should carefully follow the instructions in the email received from CIPC.


    Step 16: Review the Proposed Changes Email

    The filer and applicable directors should open the Proposed Changes email received from CIPC.

    The email contains the proposed changes document and provides a link that must be used for the next stage.

    Before proceeding, review the proposed changes carefully.

    This is an opportunity to identify incorrect information before completing the OTP consent process.


    Step 17: Capture the Required OTPs

    The relevant parties must use the link provided in the CIPC email.

    They will be required to capture information including:

    • identification number;
    • SMS OTP; and
    • email OTP.

    The purpose of this process is to confirm consent to the proposed changes.


    Step 18: Select the Red Consent Button

    After accessing the relevant consent page, select the:

    Red Consent Button

    This opens the section where the identification and OTP information must be entered.


    Step 19: Enter Identification and OTP Information

    Move down the form and enter the required information.

    This includes:

    1. Identification number
    2. SMS OTP
    3. Email OTP

    Then select the:

    Agree checkbox.

    Finally, click:

    Submit

    The affected parties must complete the applicable consent process.


    Step 20: Wait for All Required Submissions

    The process involves multiple parties where applicable.

    Once the required individuals have submitted their OTP information, the finalisation stage becomes available.

    The CIPC guide explains that the last submitter will see a:

    Finish

    button after submitting.

    This button is used to complete the application.


    Step 21: Click Finish to Finalise the Application

    Once the Finish button becomes available, select:

    Finish

    This finalises the application.

    An important detail in the CIPC procedure is that any person who has already submitted their OTPs can complete the Finish step, even if that person has already captured and submitted their OTP information.

    Therefore, the person who sees the Finish button does not necessarily need to be someone who has not previously submitted.


    Step 22: Confirmation Through the COR39 Certificate

    After the process has been successfully completed, the CIPC guide states that:

    All active directors will receive an email with the COR39 attached.

    The COR39 is therefore an important document to retain after completing the amendment.

    It can provide evidence of the updated director information reflected following the amendment process.


    Why the COR39 Matters

    The COR39 is particularly useful because companies frequently need documentary evidence of their registered directors.

    After receiving the updated certificate, the company should keep a copy with its corporate records.

    Depending on the company’s circumstances, an updated certificate may be useful when dealing with:

    • banks;
    • accountants;
    • auditors;
    • lawyers;
    • government departments;
    • business partners;
    • compliance providers; and
    • other organisations requesting proof of company information.

    It is good corporate administration practice to retain important CIPC documents rather than relying exclusively on online access.


    Common Mistakes to Avoid

    Although the procedure is relatively structured, several mistakes can make the process more difficult.

    1. Starting When DHA Is Offline

    The automated name update relies on DHA verification.

    If DHA is unavailable, the process may not work as intended.

    Practical advice: If the DHA FullName Update option cannot verify the information, check whether the DHA service is online before repeatedly attempting the transaction.


    2. Selecting the Wrong Director

    Companies may have several directors with similar names.

    Always verify the director before selecting the amendment option.

    A careful review at this stage can prevent errors later.


    3. Forgetting to Select ACTIVE

    The CIPC guide specifically instructs users to ensure that the director is selected as ACTIVE during the name update.

    Do not overlook the director status field.


    4. Entering Incorrect Information

    A name amendment is an official corporate record update.

    Review the information carefully before saving and submitting it.

    Pay particular attention to:

    • spelling;
    • names;
    • identification information;
    • director status; and
    • company registration details.

    5. Repeatedly Clicking Confirm

    The CIPC instructions explicitly state:

    Click Confirm only once.

    If the system takes time to respond, avoid repeatedly clicking the button.


    6. Ignoring the Proposed Changes Email

    Submitting the initial application does not necessarily mean the entire process is finished.

    The OTP stage is an important part of completing the transaction.

    Check the relevant email inboxes and follow the instructions in the Proposed Changes email.


    7. Failing to Complete OTP Verification

    If the required OTP submissions are not completed, the amendment process may remain incomplete.

    Make sure the relevant parties have access to:

    • their identification information;
    • mobile phone for SMS OTPs; and
    • email account for email OTPs.

    8. Forgetting the Finish Button

    After the required submissions have been completed, the application still needs to be finalised.

    Watch for the Finish button.

    According to the CIPC procedure, the person who has completed the last required submission will see this option.


    Director Name Update vs Other Director Amendments

    It is important to distinguish a name update from other types of director amendments.

    Name Update

    The director remains the same person, but their registered name is updated using the applicable DHA verification process.

    Director Appointment

    A new individual is added to the company’s director records.

    Director Resignation

    An existing director leaves the company and their status is amended accordingly.

    Director Removal

    A director’s status is changed to reflect removal.

    Deceased Director

    The company’s records are amended to reflect the death of a director.

    Term Expired

    The director’s status is updated because the relevant term has expired.

    These transactions may have different documentation requirements. The CIPC guide specifically identifies Remove, Deceased and Term Expired as cases where supporting documents are mandatory.


    What If the DHA Verification Does Not Work?

    One of the most important practical issues is DHA availability.

    The CIPC process is designed around online verification. Consequently, a filer should not immediately assume that there is a problem with the director’s information simply because the automated verification does not work.

    There can be a difference between:

    incorrect information, and

    an unavailable verification service.

    Recommended Approach

    If the automated verification does not work:

    1. Check that the correct director has been selected.
    2. Verify that the director is a South African ID holder.
    3. Check the information being entered.
    4. Confirm that the director status is correctly selected.
    5. Try again when the DHA service is available.
    6. Avoid making unnecessary changes to the company record simply because an automated verification attempt failed.

    If the problem persists, the appropriate next step is to consult CIPC’s current support or service channels for guidance.


    Practical Checklist for a CIPC Director Name Amendment

    Before starting, use this checklist.

    Company Information

    • Company registration number available
    • Correct company selected
    • Company contact information reviewed

    Director Information

    • Correct director selected
    • Director is a South African ID holder
    • Director’s information checked
    • Director status selected as ACTIVE
    • DHA verification available

    Application

    • Terms and conditions accepted
    • Director Amendments selected
    • DHA FullName Update selected
    • Required information captured
    • Information saved
    • All directors reviewed
    • Documents attached if required
    • Confirm clicked only once
    • Application finalised

    OTP Stage

    • Proposed Changes email received
    • Proposed changes reviewed
    • Identification number entered
    • SMS OTP entered
    • Email OTP entered
    • Agree checkbox selected
    • Submission completed
    • Finish button selected
    • COR39 received and saved

    How Long Does a Director Name Update Take?

    The actual time can vary depending on the CIPC system, DHA availability, email delivery and completion of the OTP process.

    The automated nature of the procedure can make the amendment relatively straightforward when:

    • DHA is online;
    • the director’s information matches the relevant records;
    • the filer has the required access;
    • OTP emails and SMS messages arrive promptly; and
    • all parties complete their required steps.

    However, delays can occur if any of these stages fail.

    For this reason, it is better to treat the transaction as a multi-stage process rather than assuming that the name changes immediately after clicking the initial submission button.


    What Businesses Should Do After the Name Is Updated

    Receiving the COR39 should not necessarily be treated as the end of the administrative exercise.

    A company should consider whether the director’s updated name also needs to be reflected across other records.

    For example, the company may need to review its:

    • bank records;
    • shareholder and corporate records;
    • contracts;
    • accounting records;
    • tax-related records;
    • employment-related records;
    • licences;
    • professional registrations;
    • internal resolutions; and
    • compliance files.

    The exact requirements depend on the organisation and the nature of the name change.

    The key principle is simple: a CIPC update does not automatically mean every other organisation has updated its own records.


    Why Accurate Company Records Matter

    Company information is not merely administrative paperwork.

    For businesses operating in South Africa, accurate corporate records can support:

    • corporate transparency;
    • compliance;
    • banking relationships;
    • due diligence;
    • contract execution;
    • business transactions;
    • regulatory applications; and
    • proof of authority.

    Director information is particularly important because directors are closely connected with the management and legal administration of a company.

    An apparently small discrepancy in a director’s name can therefore become inconvenient when the company later enters into a significant transaction.


    Final Thoughts

    Updating the name of a South African ID holder who is registered as a company director is a structured CIPC process involving CIPC’s director amendment system and online verification through the Department of Home Affairs.

    The most important points to remember are:

    1. Log in to the CIPC platform and access Transact.
    2. Select More Services and Director Amendments.
    3. Search for the company using its registration number.
    4. Select the correct director.
    5. Use the DHA FullName Update option.
    6. Ensure DHA is online for verification.
    7. Keep the director’s status as ACTIVE.
    8. Capture and save the required information.
    9. Review all directors before continuing.
    10. Attach documents where the transaction requires them.
    11. Click Confirm only once.
    12. Complete the Proposed Changes OTP process.
    13. Use the Finish button to finalise the application.
    14. Keep the COR39 received by the active directors.

    The most important practical lesson is that the process has two distinct parts: the initial amendment submitted through CIPC and the subsequent consent/OTP process. Completing only the first part does not necessarily mean the amendment has been fully finalised.

    Businesses should also retain the final COR39 and review other corporate records after the amendment to ensure that the director’s updated name is consistently reflected wherever necessary.

    #CIPC, #SouthAfrica, #CompanyRegistration, #DirectorAmendment, #CIPCAmendment, #CompanyDirectors, #DHA, #BusinessCompliance, #CorporateGovernance, #COR39

  • How to Update an Invalid South African ID Number for a Director: Step-by-Step CIPC Guide

    How to Update an Invalid South African ID Number for a Director: Step-by-Step CIPC Guide

    Updating an invalid South African ID number for a company director is an important CIPC compliance task. An incorrect or invalid identification number can cause problems when a company needs to maintain accurate director records, obtain updated company documents, or complete other corporate changes.

    The Companies and Intellectual Property Commission (CIPC) provides an online director amendment process that allows eligible users to correct an invalid South African ID number linked to a director.

    According to the CIPC step-by-step guide, the correction process involves searching for the company, selecting the affected director, changing the director’s status information, verifying the correct ID number against the Department of Home Affairs (DHA), submitting the amendment, and completing an OTP consent process.

    A particularly important requirement is that DHA must be online when the ID number is verified. The CIPC system uses this verification step to confirm the information before the amendment can proceed.

    This guide explains the entire process in practical terms and highlights important points to consider when submitting the amendment.


    What Is an Invalid South African ID Number?

    An invalid South African ID number is an identification number recorded against a director that CIPC’s system does not recognize as valid.

    The problem may arise because:

    • The ID number was captured incorrectly.
    • An incorrect identification number was previously submitted.
    • The director’s information does not correspond with Department of Home Affairs records.
    • The company has an outdated or incorrect director record.
    • Historical company information contains an invalid South African ID number.

    Not every director amendment can be used to change an ID number. The CIPC guide specifically indicates that only invalid ID numbers can be updated using this process.

    Therefore, this procedure should not be treated as a general mechanism for changing a valid director ID number.


    What You Need Before Starting

    Before beginning the online amendment, it is advisable to have the following information available:

    • The company’s CIPC registration number.
    • The director’s correct South African ID number.
    • The ID issue date.
    • Access to the company’s CIPC online services.
    • Access to the relevant email accounts.
    • Access to the mobile phone numbers needed for SMS OTP verification.
    • The necessary company and director information.
    • Supporting documents, if CIPC requires them for the particular amendment.

    Most importantly, the Department of Home Affairs verification service must be online when the correct ID number is verified.

    If DHA is offline, the verification step may not be completed and the application may not proceed as expected.


    Step-by-Step Process to Update an Invalid South African ID Number

    Step 1: Log in to CIPC

    Begin by logging into the CIPC online services platform.

    Once logged in, select:

    Transact

    The Transact section provides access to various company-related services.


    Step 2: Select More Services

    From the available options, select:

    More Services

    This will take you to additional services available through the CIPC online platform.


    Step 3: Select Director Amendments

    Agree to the applicable terms and conditions.

    Then select:

    Director Amendments

    This is the service used for making changes to information relating to company directors.


    Step 4: Agree and Continue

    Click the Agree checkbox to confirm that you accept the terms and conditions.

    Then select:

    Continue

    This takes you further into the director amendment application.


    Step 5: Select Continue

    When the next screen appears, select Continue again to proceed with the application.

    Although this may seem repetitive, it forms part of the CIPC online workflow.


    Step 6: Search for the Company

    You will need to provide the company’s registration number.

    The CIPC guide indicates that the company registration number can be entered in either:

    • Short format, or
    • Long format.

    After entering the registration number, click:

    Search

    The system will search for the company.

    If the company appears in your list of companies, select the File button associated with the company.


    Step 7: Select the Company File

    From the searched company information list, select the relevant File button.

    This opens the company information required for the director amendment process.

    Make sure you have selected the correct company before continuing.

    Entering the wrong company registration number or selecting the wrong company could result in an amendment being initiated against the wrong company.


    Step 8: Complete the Director Foreigner Quiz

    The next stage involves the director foreigner quiz.

    For the procedure covered by this guide, select:

    No

    on the Director Foreigner Quiz.

    You will also have an opportunity to update the company’s enterprise contact details if necessary.

    If the company’s contact information is outdated, this is a useful point at which to review it.

    Once the relevant information has been checked, click:

    Continue


    Step 9: Select the Director With the Invalid ID Number

    The system will display the company’s directors.

    Select the director whose South African ID number needs to be corrected.

    This is a critical part of the process.

    The CIPC guide states that only invalid ID numbers can be updated through this procedure.

    If the director’s existing ID number is valid, this particular correction process should not be used simply to replace it.


    Step 10: Select Status Change

    After selecting the affected director, select:

    Status Change

    This takes you into the section where the director’s relevant information can be amended.


    Step 11: Confirm Citizenship

    Under the citizenship section, select:

    Yes

    This confirms that the director is a South African citizen for the purposes of the relevant information being captured.


    Step 12: Enter and Verify the Correct ID Number

    This is one of the most important steps in the entire process.

    Enter the director’s correct South African ID number.

    You must also select the ID Issue Date using the calendar function provided by the system.

    After entering the information, click:

    Verify

    DHA Must Be Online

    The CIPC guide specifically highlights that the Department of Home Affairs must be online during this verification process.

    The system uses DHA information to verify the submitted ID details.

    If DHA is online and the information is successfully verified, you can continue with the application.

    If the verification cannot be completed, it may be necessary to try again when the DHA service is available.

    Select ACTIVE Status

    When capturing the information, make sure that the director’s status is selected as:

    ACTIVE

    This is particularly important because the procedure is intended to update the invalid ID number associated with the director while retaining the appropriate active status.


    Important: Where Will the Updated ID Number Appear?

    One of the notable points in the CIPC guide is that the updated ID number will reflect only on the certificate.

    This means users should not necessarily expect every historical record, document, or system display associated with the company to immediately behave as though every historical occurrence has been rewritten.

    Understanding this distinction can prevent confusion after completing the amendment.


    Step 13: Capture the Required Director Information

    After the ID number has been verified, capture all the required information requested by the CIPC form.

    Carefully review every field before saving.

    Errors at this stage can create additional administrative work later, particularly if the incorrect information is submitted and the amendment has already entered the processing workflow.


    Step 14: Move Down the Form and Save

    Continue moving down the form.

    Complete any additional required information.

    Once everything has been captured, select:

    Save

    Do not rush through this section.

    A good practice is to review:

    • Director name
    • Correct ID number
    • ID issue date
    • Citizenship
    • Director status
    • Other required personal information

    before saving the information.


    Step 15: Review All Directors

    The application does not only require you to focus on the director whose ID number is being corrected.

    You should ensure that all directors have been reviewed.

    After completing the review, click:

    Continue

    This review stage is important because the application may contain information relating to multiple directors.


    Step 16: Continue With the Application

    Click:

    Continue

    again to proceed to the document section.

    At this stage, the system moves the application toward final submission.


    Step 17: Attach Supporting Documents Where Required

    The next stage allows you to attach documents.

    According to the CIPC guide, documents are optional when:

    • Updating director details
    • Appointing a director
    • Resigning a director

    However, supporting documents are mandatory for certain status changes, including:

    • Status Remove
    • Deceased
    • Term Expired

    For an invalid South African ID number update, documents may therefore not necessarily be mandatory under the procedure described in the guide.

    Nevertheless, applicants should always consider whether additional documentation may be useful or requested in their particular circumstances.


    Step 18: Confirm the Application

    After completing the required information and document section, click:

    Confirm

    Important: Click Confirm Only Once

    The CIPC guide specifically warns users to click the Confirm button only once.

    This is an important practical instruction.

    Avoid repeatedly clicking the button if the system appears slow to respond. Multiple clicks could potentially create confusion about whether the transaction has already been submitted.

    Once the confirmation has been processed, continue to the next stage.


    Step 19: Finalise the Application

    Click:

    OK

    This finalises the initial submission process.

    The application should then move into its submitted stage.


    Step 20: Check the Application Status and Email

    After submission, the application will have a:

    Submitted

    status with the type:

    OTP

    This indicates that the process has moved into the consent and verification stage.

    The relevant parties must now check their email accounts for the Proposed Changes email from CIPC.

    This is a particularly important stage because submitting the amendment through the online portal does not necessarily mean the entire process is finished.

    The required people must still complete their OTP consent.


    Step 21: Review the Proposed Changes Email

    The filer and directors who are being appointed or resigned, where applicable, must navigate to their email applications and locate the proposed changes email from CIPC.

    The email contains the proposed changes document.

    The relevant individuals should carefully review the proposed changes.

    After reviewing the document, they must click the link provided in the email.

    The link takes them to the section where they can capture the required verification information.


    Step 22: Select the Red Consent Button

    Once the relevant link has been accessed, select the:

    Red Consent button.

    This begins the consent process associated with the proposed amendment.


    Step 23: Enter Identification and OTP Information

    Move down the form and capture the required information.

    This includes:

    1. Identification number
    2. SMS OTP
    3. Email OTP

    You must also select the:

    Agree

    checkbox.

    Once all the information has been entered correctly, click:

    Submit

    The relevant person has now completed their portion of the consent process.


    Step 24: Every Impacted Person Must Complete the OTP Process

    This is one of the most important practical aspects of the CIPC procedure.

    The process does not necessarily end after one person submits their OTPs.

    The CIPC guide states that all impacted directors and the filer must complete the process.

    Once all required parties have submitted their OTP information, the final submitter will see a:

    Finish

    button.

    The person who sees the Finish button should select it to finalise the application.

    Can Someone Else Click Finish?

    Yes.

    An important detail in the CIPC guide is that any person who has already submitted their OTPs can complete the finalisation step, even if that person has already captured and submitted their OTP information.

    Therefore, the person who submitted first does not necessarily have to wait for the others to finish before the application can eventually be finalised.


    Step 25: Active Directors Receive the COR39

    Once the process has been successfully finalised, all active directors will receive an email containing the COR39.

    The COR39 is an important company document relating to the company’s director information.

    This email provides confirmation that the director amendment process has reached its final stage.

    The company should retain the document for its records.


    What Is COR39?

    COR39 is associated with changes to company director information.

    When director information is amended, the resulting company documentation can be important for demonstrating the company’s current registered director information.

    For that reason, businesses should keep the COR39 received after completing the amendment.

    It can be useful when dealing with:

    • Banks
    • Government departments
    • Auditors
    • Accountants
    • Lawyers
    • Compliance providers
    • Business partners

    • Other institutions requesting proof of company information

    Common Mistakes to Avoid

    Updating a director’s ID number may appear straightforward, but several mistakes can interrupt the process.

    1. Trying to Update a Valid ID Number

    The procedure described by CIPC is specifically intended for invalid South African ID numbers.

    If the ID number is already valid, do not assume this workflow can be used simply to replace it.


    2. Starting the Verification When DHA Is Offline

    The ID verification depends on the Department of Home Affairs being online.

    If DHA is unavailable, the verification may not work.

    Before repeatedly entering information or assuming the ID number is incorrect, consider whether the verification service itself is available.


    3. Entering the Wrong ID Issue Date

    The process requires the ID issue date to be captured.

    An incorrect date can interfere with verification.

    Always compare the information being entered against the director’s official documentation.


    4. Selecting the Wrong Director

    Companies with multiple directors should take particular care when selecting the director whose information needs to be amended.

    Review the director’s details before proceeding.


    5. Forgetting to Select ACTIVE

    The CIPC guide instructs users to select ACTIVE on status when completing this particular update.

    This should be checked before saving the form.


    6. Not Reviewing All Directors

    The CIPC process requires all directors to be reviewed before continuing.

    Do not assume that because you are only correcting one ID number, the other director records can simply be ignored.


    7. Clicking Confirm More Than Once

    The guide expressly says:

    Click Confirm only once.

    If the system takes a moment to respond, avoid repeatedly clicking the confirmation button.


    8. Ignoring the OTP Email

    Submitting the online application is only one part of the process.

    The affected parties must check their emails for the proposed changes notification and complete the required OTP process.

    Failing to complete the OTP stage can prevent the application from being finalised.


    9. Forgetting the Final Finish Button

    After the relevant people have submitted their OTPs, the final submitter will see the Finish button.

    Selecting this button is necessary to finalise the application.


    Practical Tips for a Smooth CIPC Director Amendment

    Prepare the Information First

    Before logging into CIPC, gather the correct information.

    This can reduce delays and prevent mistakes caused by having to search for documentation while the application is open.


    Verify the ID Information Before Starting

    Make sure the correct South African ID number and issue date are available.

    The objective is to correct an invalid record with accurate information, not to guess what the correct information might be.


    Check Email Access for All Relevant People

    The OTP process depends heavily on communication with the relevant parties.

    Before submitting the amendment, make sure the affected people can access:

    • Their email accounts
    • Their mobile phones
    • Their identification information

    This can prevent the application from becoming stuck after submission.


    Monitor the Application After Submission

    Do not simply submit the application and assume everything is complete.

    Monitor:

    1. The CIPC application status.
    2. The proposed changes email.
    3. OTP completion.
    4. Finalisation through the Finish button.
    5. Receipt of the COR39.

    This creates a simple checklist for confirming that the process has actually reached completion.


    Why Correct Director Information Matters

    Accurate director information is an important component of corporate compliance.

    Director records can be used by various organisations when verifying the people associated with a company.

    Incorrect identification information can therefore create unnecessary complications when a company needs to prove who its directors are.

    Keeping CIPC records accurate can help businesses avoid problems involving:

    • Corporate banking
    • Regulatory compliance
    • Contracting
    • Government processes
    • Company amendments
    • Due diligence
    • Legal documentation
    • Corporate transactions

    A seemingly small data error can become a much bigger administrative problem if it remains unresolved.


    What Happens After the ID Number Is Updated?

    After the amendment has been completed and finalised, the active directors should receive the COR39 by email.

    At this point, the company should:

    1. Download the COR39

    Keep a copy of the document in the company’s corporate records.

    2. Check the Director Information

    Confirm that the corrected ID number and other relevant director information appear correctly.

    3. Store the Document Securely

    Corporate documents should be stored somewhere accessible to authorised company representatives.

    4. Use the Updated Certificate When Necessary

    If a bank, government institution, professional adviser, or another organisation requests proof of the company’s updated director information, the relevant CIPC certificate can be provided where appropriate.


    Frequently Asked Questions

    Can I update any South African ID number using this process?

    No. The CIPC guide specifically states that only invalid ID numbers can be updated through this procedure.

    If the existing ID number is valid but another type of correction is required, a different process may apply.


    Does DHA need to be online?

    Yes. The CIPC guide states that the Department of Home Affairs needs to be online at the time of the update, particularly for the ID verification stage.


    Do I need to upload documents?

    Documents are not automatically mandatory for every director amendment.

    According to the guide, documents are optional for updating director details, appointing directors, and resigning directors. They become mandatory for certain status changes, including removal, deceased, and term-expired status changes.


    What happens after I submit the application?

    The application enters Submitted status with an OTP type.

    The filer and other impacted individuals must then check their emails for the CIPC proposed changes notification and complete the required identification, SMS OTP, and email OTP process.


    Who must complete the OTP process?

    The CIPC guide states that all impacted directors and the filer must complete the applicable OTP consent process.


    Who can click Finish?

    The last person to submit the required OTP information will see the Finish button. However, the guide states that any person who has already submitted their OTPs can complete the finalisation step.


    What document do active directors receive after completion?

    The guide states that all active directors will receive an email with the COR39 attached after the process has been finalised.


    Final Checklist for Updating an Invalid South African ID

    Before considering the process complete, use this checklist:

    • Log into CIPC.
    • Select Transact.
    • Select More Services.
    • Agree to the terms and select Director Amendments.
    • Search for the company using its registration number.
    • Select the company’s File button.
    • Select No on the Director Foreigner Quiz where applicable.
    • Review enterprise contact details.
    • Select the director with the invalid South African ID.
    • Select Status Change.
    • Select Yes for citizenship.
    • Enter the correct ID number.
    • Enter the ID issue date.
    • Verify the ID number while DHA is online.
    • Select ACTIVE status.
    • Complete the required information.
    • Save the information.
    • Review all directors.
    • Continue through the application.
    • Attach documents where required.
    • Click Confirm only once.
    • Click OK to finalise the submission stage.
    • Monitor the application for OTP status.
    • Check the CIPC proposed changes email.
    • Review the proposed changes document.
    • Select Red Consent.
    • Enter identification details.
    • Enter the SMS OTP.
    • Enter the email OTP.
    • Agree to the consent.
    • Submit the OTP information.
    • Ensure all impacted parties complete their OTP submissions.
    • Select Finish to finalise the application.
    • Check for the COR39 email.
    • Save the updated COR39 for company records.

    Conclusion

    Correcting an invalid South African ID number recorded against a company director is a structured CIPC online process. The procedure begins with the company’s director amendment service and ends with OTP consent by the relevant parties and the issuance of the updated COR39.

    The most important points to remember are that only invalid ID numbers are eligible for this particular update process, the Department of Home Affairs must be online for verification, and the correct ID number and issue date must be entered accurately.

    Applicants should also remember that the process does not necessarily end when the online application is submitted. The proposed changes email, OTP consent, final Finish button, and COR39 are all important parts of completing the process.

    For companies maintaining their corporate records, correcting invalid director identification information is more than a simple administrative exercise. Accurate director information helps ensure that the company’s official records remain reliable and can reduce potential complications when the business later needs to deal with banks, government departments, professional advisers, or other organisations requiring verified company information.

    #CIPC, #CIPCOnline, #DirectorAmendment, #SouthAfricanID, #CompanyDirectors, #CompanyRegistration, #CIPCCompliance, #CorporateCompliance, #COR39, #SouthAfricaBusiness

  • How to Update a Director’s Passport on CIPC

    CIPC Director Amendment Step-by-Step Guide: How to Update an Expired Passport

    Learn how to update an expired foreign director passport with CIPC, including Foreigner Assurance verification, Director Amendments, OTP consent, submission and COR39 finalisation.

    Updating the passport details of a foreign director is an important company administration task in South Africa. When a director’s old passport has expired and the director has received a new passport, the company must ensure that the new passport is properly verified before the director’s information is amended through the Companies and Intellectual Property Commission (CIPC).

    The CIPC’s Director Amendment Step-by-Step Guide – Update Passport provides a detailed process for updating an expired passport through the CIPC online platform. The procedure involves accessing the Director Amendments service, verifying the new passport through the Foreigner Assurance process, updating the director’s details, submitting the application, and obtaining the required electronic consents.

    This guide explains the process in practical terms and highlights important points that companies, directors, and authorised filers should understand before starting the application.

    Why Update a Director’s Passport Details?

    A company’s director information must remain accurate and up to date. For a foreign national, passport information is particularly important because the passport is used as an identification document associated with the director’s company record.

    When a director receives a new passport after the previous passport has expired, the company’s CIPC records may still contain the old passport number and expiry date. Updating these details helps ensure that the company’s official records correspond with the director’s current identification document.

    An outdated passport record can also create problems when dealing with other corporate, banking, regulatory, or compliance processes.

    The CIPC procedure therefore requires the new passport to be verified before it is used to update the expired passport information.


    Important Requirement: Verify the New Passport First

    One of the most important points in the CIPC procedure is that a new passport belonging to a foreign director must be verified through the Foreigner Assurance process before the director amendment is filed.

    The CIPC guide specifically indicates that the passport holder’s new passport must be successfully verified before it can be used to update an expired passport.

    This means that simply entering the new passport number into the Director Amendments application may not be sufficient.

    What happens if the passport is not verified?

    During the application process, the CIPC system provides an option to verify the passport.

    If the passport cannot be verified, the filer can follow the provided link to the Foreigner Assurance process.

    The filer should then wait for confirmation by email that the passport submitted through Foreigner Assurance has been successfully verified.

    Only after successful verification should the filer continue with the Director Amendment application.

    Practical advice

    Do not rush through this step.

    If several foreign directors are being appointed or their details are being updated, each relevant passport holder should be verified before continuing with the amendment application.

    This can help prevent delays later in the process.


    CIPC Director Passport Update: Step-by-Step Process

    The following steps are based on the CIPC Director Amendment Step-by-Step Guide for updating an expired passport.

    Step 1: Log in to the CIPC System

    Begin by logging into the relevant CIPC online platform using the credentials of the person authorised to file the application.

    After logging in, select Transact.

    The Transact section provides access to various company-related transactions and services.


    Step 2: Select More Service

    After entering the Transact section, select More Service.

    This takes you to the additional services available through the CIPC system.


    Step 3: Select Director Amendments

    Agree to the applicable terms and conditions and select Director Amendments.

    This is the service used to amend information relating to directors recorded against a company.


    Step 4: Agree and Continue

    The system will present an agreement or confirmation screen.

    Select the Agree checkbox and then select Continue.

    Make sure you understand the terms before proceeding with the application.


    Step 5: Select Continue

    Continue through the next screen to begin the actual company and director amendment process.

    At this point, the filer will proceed to identify the company whose director information needs to be updated.


    Step 6: Search for the Company

    Enter the company’s registration number.

    The CIPC guide indicates that the registration number can be entered in either the short or long format.

    After entering the registration number, click the Search button.

    If the company appears in the list of companies associated with the filer, select the appropriate company.


    Step 7: Select the File Button

    From the searched company information list, select the File button associated with the relevant company.

    This opens the Director Amendments application for that company.

    It is important to confirm that you have selected the correct company before continuing.


    Passport Verification for Foreign Directors

    The passport verification stage is particularly important when dealing with foreign directors.

    Step 8: Complete the Director Foreigner Quiz

    If a passport holder is being appointed, select Yes on the Director Foreigner Quiz.

    This informs the system that the application involves a foreign director or passport holder.

    The next stage involves entering and verifying the passport information.


    Step 9: Enter the Passport Number

    Capture the passport number and select Verify.

    If the passport has already been successfully verified, the system can proceed.

    However, if the passport is not verified, select the here link provided by the system.

    You will then be redirected to the Foreigner Assurance process.

    Do not proceed before verification

    This is one of the most important instructions in the CIPC guide.

    The filer should wait until an email confirms that the passport submitted through the Foreigner Assurance process has been successfully verified.

    Only then should the filer continue with the Director Amendment application.

    This is particularly important because attempting to proceed with an unverified passport can interrupt the amendment process.


    Step 10: Confirm Verified Passports

    If the passport is verified, click OK.

    If multiple passport holders are being appointed, verify each passport holder before proceeding.

    Once all relevant passport holders have been verified, select Continue.

    Why verifying every passport matters

    The verification process is not necessarily limited to one foreign director.

    If the application involves several passport holders, each relevant passport should be verified before the application continues.

    A filer should therefore check the status of every foreign director rather than assuming that verification of one passport covers all passport holders.


    Updating Enterprise Contact Details

    Step 11: Review Enterprise Contact Details

    The system will display the enterprise contact information.

    Review the information carefully.

    If necessary, update the enterprise contact details and then select Continue.

    Keeping company contact information current is good administrative practice because CIPC communications may rely on the information recorded against the company.


    Reviewing the Company’s Directors

    Step 12: Review Existing Director Information

    The application will display the company’s current director information.

    Select the Edit button for each director to review their details.

    Pay particular attention to the contact information of directors who are being appointed or resigned.

    The CIPC guide specifically instructs filers to ensure that the cellphone number and email address are correct for directors being appointed or resigned.

    This is important because the subsequent electronic consent process requires communication with the affected parties.


    Step 13: Select No Change Where Appropriate

    If an existing director’s status and other details do not need to be changed, select No Change.

    Then select Save at the bottom of the screen.

    This prevents unnecessary amendments from being made to directors whose information is already correct.

    A useful principle

    Only amend information that actually needs to be changed.

    For example, if three directors are already correctly recorded and only one director needs a passport update, there is no reason to alter the other directors’ information simply because their profiles are displayed during the application.


    Selecting the Director Whose Passport Must Be Updated

    Step 14: Select the Director

    Select the director whose expired passport needs to be updated.

    The correct director should be identified before making the amendment.

    This is especially important for companies with several foreign directors.


    Step 15: Select Status Change

    After selecting the relevant director, select Status Change.

    The system will then provide the appropriate fields for changing the director’s recorded information.


    Step 16: Select No for Citizenship

    When prompted about citizenship, select No if you are not changing the director’s citizenship information.

    The objective in this procedure is to update the passport details rather than unnecessarily changing other aspects of the director’s record.


    Step 17: Enter the New Passport Information

    Capture the director’s new passport number.

    Select the passport’s expiration date using the calendar provided by the system.

    Then click Verify.

    This is another important verification point in the application.

    The new passport details should be entered carefully because errors in the passport number or expiry date can result in inaccurate company records.


    Completing the Director’s Information

    Step 18: Capture the Required Information

    Enter all required information requested by the system.

    The fields displayed may require information relating to the director’s updated identification and other company-record information.

    Review each field carefully before saving.


    Step 19: Complete the Remaining Fields

    Move further down the form and continue entering the required information.

    Once all relevant information has been captured, select Save.

    Before saving, check:

    • Passport number
    • Passport expiry date
    • Director’s name
    • Contact information
    • Email address
    • Cellphone number
    • Status
    • Any other required fields

    A careful review at this stage can help prevent avoidable corrections later.


    Reviewing the Application

    Step 20: Review All Directors

    After saving the updated information, ensure that all directors have been reviewed.

    Do not focus only on the director whose passport is being updated.

    The application requires the filer to review the director information before proceeding.

    Once the review is complete, select Continue.


    Step 21: Continue With the Application

    Select Continue again to proceed to the document attachment and confirmation stage.

    At this point, the director information should already have been reviewed and saved.


    Attaching Supporting Documents

    Step 22: Attach Documents Where Required

    The CIPC guide explains that supporting documents may be attached at this stage.

    For ordinary director-detail updates, appointments, and resignations, documents are described as optional.

    However, supporting documents are mandatory for certain status changes, including:

    • Status Remove
    • Deceased
    • Term Expired

    Therefore, the document requirements depend on the type of amendment being submitted.

    Should you attach supporting documents when they are optional?

    Although the guide indicates that documents are optional for updating director details, filers should still consider whether supporting documentation may be useful for their particular circumstances.

    The key point is to distinguish between an application where documentation is optional and one where the CIPC system requires documentation.

    After attaching any required or relevant documents, select Continue.


    Confirming the Application

    Step 23: Click Confirm Only Once

    The next stage is confirmation.

    Click the Confirm button.

    The CIPC guide gives an especially important warning:

    ONLY CLICK ONCE.

    This instruction should be taken seriously.

    Avoid repeatedly clicking the confirmation button if the system appears slow to respond. Multiple submissions or repeated clicks can potentially cause confusion during the filing process.

    Wait for the system to process the request.


    Finalising the Application

    Step 24: Click OK

    After confirming the application, finalise the application by clicking OK.

    The application will then move into its submitted stage.


    The OTP Consent Process

    The next part of the procedure is particularly important because submitting the amendment application is not necessarily the end of the process.

    Step 25: Check the Application Status

    After submission, the application will appear in Submitted Status with Type OTP.

    The filer and the directors being appointed or resigned must check their email applications for a Proposed Changes email from CIPC.

    The email contains the information needed to complete the consent process.


    Step 26: Review the Proposed Changes

    The filer and the relevant directors must review the proposed changes.

    This includes:

    • The filer
    • Directors being appointed
    • Directors being resigned

    The proposed changes document attached to the CIPC email should be reviewed carefully.

    After reviewing the proposed changes, the recipient must click the link provided in the email.

    The link allows the person to capture the required:

    • Identification number
    • SMS OTP
    • Email OTP

    Why this step matters

    The amendment process involves electronic consent from the relevant parties.

    Therefore, completing the initial online application does not necessarily mean that the process is finished.

    The required people must complete their OTP submissions.


    Completing the Red Consent Button Process

    Step 27: Select the Red Consent Button

    After opening the relevant link from the CIPC email, select the Red Consent button.

    This takes the participant to the consent submission form.


    Step 28: Enter Identification and OTP Details

    Move down the form and enter the required information.

    This includes:

    1. Identification number
    2. SMS OTP
    3. Email OTP

    After entering the information, select the Agree checkbox.

    Finally, select Submit.

    Each person whose consent is required must complete this process.


    The Final Submitter and Finish Button

    Step 29: Finalise the Application

    All impacted directors and the filer must complete the OTP consent process.

    Once everyone has submitted their required information, the last submitter will see a Finish button.

    The person should select Finish to finalise the application.

    An important point in the CIPC guide is that any person who has already submitted their OTPs can complete this final step, even if that person was not the last person to enter their OTPs.

    This provides some flexibility when finalising the application.


    Receiving the Updated COR39

    Step 30: Active DirectorsReceive the COR39

    Once the process has been finalised, all active directors will receive an email containing the COR39.

    The COR39 is an important company record reflecting the company’s director information.

    It should be retained with the company’s corporate records.


    CIPC Passport Update Process at a Glance

    The entire process can be summarised as follows:

    1. Log in to the CIPC system.
    2. Select Transact.
    3. Select More Service.
    4. Agree to the terms and select Director Amendments.
    5. Continue through the application.
    6. Enter the company registration number.
    7. Search for the company.
    8. Select File.
    9. Complete the Director Foreigner Quiz where applicable.
    10. Enter and verify the foreign director’s passport.
    11. Use Foreigner Assurance if the passport is not verified.
    12. Wait for successful passport verification.
    13. Continue with the application.
    14. Review enterprise contact details.
    15. Review all existing directors.
    16. Select No Change where appropriate.
    17. Select the director whose passport is being updated.
    18. Select Status Change.
    19. Select No for citizenship if citizenship is not being changed.
    20. Enter the new passport number.
    21. Enter the new passport expiry date.
    22. Verify the passport.
    23. Complete the required director information.
    24. Save the changes.
    25. Review all directors.
    26. Continue.
    27. Attach documents where required.
    28. Confirm the application once.
    29. Finalise the application.
    30. Monitor the CIPC email for the Proposed Changes notification.
    31. Review the proposed changes.
    32. Follow the email link.
    33. Select the Red Consent button.
    34. Enter identification and OTP information.
    35. Agree and submit.
    36. Allow all impacted parties to complete their OTP submissions.
    37. Select Finish.
    38. Retain the COR39 received by the active directors.

    Common Mistakes to Avoid

    Updating a foreign director’s passport may appear straightforward, but there are several points where an application can be delayed or incorrectly completed.

    1. Trying to Use an Unverified Passport

    One of the biggest mistakes is proceeding before the new passport has been verified.

    If the passport is not verified, use the Foreigner Assurance process and wait for the confirmation email.


    2. Entering the Wrong Passport Number

    Passport numbers should be entered exactly as they appear on the new passport.

    A single incorrect character can result in incorrect information being submitted.

    Always compare the information entered into the CIPC system against the actual passport document.


    3. Entering the Wrong Expiry Date

    The passport expiry date is another critical field.

    When selecting the date from the calendar, make sure the correct day, month, and year are selected.


    4. Ignoring Director Contact Details

    The CIPC guide specifically highlights cellphone numbers and email addresses for directors being appointed or resigned.

    Do not assume that these details are automatically correct.

    Review them before submitting the application.


    5. Forgetting the OTP Stage

    A submitted application is not necessarily a completed application.

    The relevant people must follow the Proposed Changes email and complete the OTP consent process.

    Failure to complete the required OTP steps can prevent the application from being finalised.


    6. Clicking Confirm Multiple Times

    The CIPC guide specifically warns users to click the Confirm button only once.

    If the system takes time to respond, avoid repeatedly clicking the button.


    7. Failing to Review the Proposed Changes

    The proposed changes document should be reviewed by the relevant participants before they provide their electronic consent.

    This provides an opportunity to identify incorrect information before the process is finalised.


    What If the Passport Is Not Verified?

    If the passport verification fails, the CIPC guide directs the filer to the Foreigner Assurance process.

    The practical sequence is:

    Passport not verified → Select the Foreigner Assurance link → Submit/complete the verification process → Wait for confirmation email → Confirm successful verification → Return to Director Amendments → Continue with the application.

    The important lesson is not to treat the verification step as something that can simply be bypassed.

    For foreign directors, passport verification is an integral part of the process.


    What Happens After the OTP Submissions?

    After the filer and affected directors have completed their respective OTP submissions, the application can be finalised.

    The person who sees the Finish button can select it to complete the application.

    According to the CIPC guide, a person who has already submitted their OTPs may also complete the finalisation step.

    Once the process has been successfully completed, active directors receive the COR39 by email.


    Why the COR39 Should Be Kept Safely

    The COR39 should be retained as part of the company’s corporate records.

    A company may need evidence of its current director information when dealing with matters such as:

    • Corporate administration
    • Banking requirements
    • Compliance checks
    • Regulatory matters
    • Contracting
    • Due diligence
    • Changes to company ownership or management
    • Other official company transactions

    It is therefore good practice to keep the electronic COR39 together with the company’s other important statutory documents.


    Practical Checklist for a Foreign Director Passport Update

    Before beginning the application, make sure you have the following information available:

    Company information

    • Company registration number
    • Current company contact information
    • Access to the relevant CIPC filing account

    Director information

    • Director’s full details
    • New passport number
    • New passport expiry date
    • Current email address
    • Current cellphone number

    For the verification process

    • New passport information
    • Access to the relevant email account
    • Ability to complete the Foreigner Assurance process if required

    For the final consent process

    • Identification information
    • Access to SMS OTPs
    • Access to email OTPs
    • Proposed Changes email

    Having these details ready can make the process considerably easier.


    How to Make the CIPC Process Easier

    Although the CIPC online system provides a structured process, preparation can reduce unnecessary delays.

    Prepare the new passport before starting

    Have the new passport available before beginning the application.

    You should be able to confirm the passport number and expiry date accurately.

    Check email access

    The process relies heavily on email communication.

    The filer and affected directors should have access to their email accounts throughout the process.

    Check cellphone numbers

    Because the consent process involves SMS OTPs, the relevant cellphone numbers should be active and accessible.

    Verify passports early

    If the passport has not yet been verified, complete the Foreigner Assurance process before attempting to finalise the Director Amendment.

    Review before submitting

    Take time to review every relevant field before confirming the application.

    It is much easier to identify a mistake before submission than to discover it after the application has progressed.


    Updating an Expired Passport Is More Than Simply Changing a Number

    A common misconception is that updating an expired passport simply involves replacing an old passport number with a new one.

    The CIPC process demonstrates that there are several interconnected stages.

    The system must first establish that the foreign passport holder can be verified. The director’s information then needs to be reviewed and updated, after which the affected parties must provide the required electronic consent.

    This makes the process more than a basic data-entry exercise.

    For companies with foreign directors, it is best treated as a formal corporate-record amendment.


    Final Thoughts

    Updating an expired passport for a foreign director through CIPC requires careful attention to verification, director information, electronic consent, and finalisation.

    The most important points are to verify the new passport before using it for the amendment, carefully review the director’s information, ensure that the relevant email and cellphone details are correct, complete the OTP consent process, and retain the resulting COR39.

    The CIPC process also demonstrates why companies should keep their statutory information current. A company record that accurately reflects the identification information of its directors can make future administrative, compliance, and corporate transactions easier.

    If you are completing the process yourself, work through the application methodically rather than rushing through the screens. In particular, pay attention to the passport verification stage and the later Proposed Changes/OTP process, because both are essential parts of successfully completing the amendment.

    Important: This article is based on the CIPC Director Amendment Step-by-Step Guide – Update Passport. CIPC online procedures, system interfaces, requirements, and administrative practices can change. Always confirm the current requirements on the official CIPC platform before submitting an application.

    #CIPC, #DirectorAmendment, #SouthAfricaCompanyRegistration, #CIPCOnlineServices, #ForeignDirector, #PassportUpdate, #CompanyDirectors, #ForeignerAssurance, #COR39, #CompanyCompliance

  • How to Change a Director Type on CIPC: A Step-by-Step Guide

    How to Change a Director Type on CIPC: A Step-by-Step Guide

    Learn how to change a director type on CIPC step by step, including company selection, status changes, supporting documents, OTP consent, finalisation and COR39.

    Changing the type or status of a director on a company record is one of the corporate administration tasks that businesses may need to complete when their director information changes. In South Africa, this process can be completed electronically through the Companies and Intellectual Property Commission (CIPC) online platform.

    A director amendment should be handled carefully because information submitted through CIPC becomes part of the company’s official corporate records. An incorrect director type, incomplete information, or failure by the relevant parties to complete the required confirmation process can delay the application.

    This guide explains the CIPC process for changing a director type, from logging into the CIPC platform to completing the required OTP confirmations and receiving the final COR39 document.

    Important: The steps below are based on CIPC’s official “Director Amendment Step by Step Guide – Change Director Type.” CIPC may update its online platform, terminology, or requirements from time to time, so users should always follow the instructions displayed on the CIPC portal when submitting an application.

    What Is a Director Type Change?

    A director type change is an amendment to the classification or type of a director recorded against a company’s CIPC registration.

    Companies may need to update director information when circumstances affecting the director’s classification change. Because director information forms part of a company’s statutory records, it is important that the CIPC information remains accurate and consistent with the company’s actual circumstances.

    The CIPC process allows the filer to:

    • Locate the relevant company.
    • Select the director whose information needs to be changed.
    • Access the director status-change functionality.
    • Change the director type.
    • Capture the required information.
    • Review all directors.
    • Submit the amendment.
    • Allow affected directors and the filer to complete the required OTP verification.
    • Finalise the application.
    • Receive the updated COR39 document.

    Before You Start the CIPC Director Amendment

    Before beginning the application, it is advisable to have the company’s information readily available.

    You should generally have:

    1. The company registration number
    2. The relevant director’s information
    3. The new director type that needs to be recorded
    4. The director’s identification information where required
    5. The enterprise contact details
    6. Access to the relevant email accounts
    7. Access to the mobile phone numbers required for SMS OTP verification
    8. Any supporting documents that may be required

    It is also important to make sure that the information entered on the application is accurate before submitting it.

    Why Accurate Information Matters

    A director amendment is not simply an administrative formality. CIPC records may be used when companies interact with banks, government institutions, regulators, investors, customers, suppliers and other third parties.

    An incorrect director record can therefore create unnecessary complications when a company needs to prove who its directors are.

    For this reason, the safest approach is to review the company’s director information carefully before submitting the amendment.

    Step-by-Step Process to Change a Director Type on CIPC

    Step 1: Log in to the CIPC Platform

    Begin by logging into the CIPC online platform using your CIPC credentials.

    Once you have successfully logged in, navigate to the transaction section.

    Step 2: Select “Transact”

    After logging into your account, select Transact.

    This takes you into the section where various CIPC transactions and company-related services can be initiated.

    Step 3: Select “More Service”

    Within the transaction area, select More Service.

    This will provide access to additional services available through the CIPC platform.

    Step 4: Accept the Terms and Select Director Amendments

    The system will display the applicable terms and conditions.

    Review the terms and conditions and proceed by agreeing to them.

    Then select Director Amendments.

    This is the service used to make amendments relating to company directors.

    Step 5: Agree and Continue

    Click the Agree checkbox and then select Continue.

    The system will take you to the next stage of the director amendment process.

    At this point, make sure that you are proceeding with the correct company and the correct type of amendment.

    Step 6: Enter the Company Registration Number

    You will need to identify the company for which the director amendment is being made.

    Capture the company’s registration number.

    CIPC allows the company registration number to be entered in either the short format or long format, according to the options available on the system.

    After entering the registration number, click the Search button.

    Step 7: Select the Company

    The system will display the searched company information.

    If the correct company appears in your list of companies, select the File button.

    It is important to verify that you have selected the correct company before continuing.

    Check the Company Details Carefully

    Before proceeding, check the available company information and make sure that it corresponds with the company whose director records you want to amend.

    Submitting an amendment against the wrong company can result in unnecessary administrative complications.

    Director Information and Enterprise Contact Details

    Step 8: Complete the Director Foreigner Quiz

    The next stage includes the director foreigner quiz.

    According to the CIPC guide for this process, select No on the Director Foreigner Quiz.

    You can then review and update the Enterprise Contact Details if necessary.

    Once the contact information has been checked, click Continue.

    Keep Enterprise Contact Details Updated

    Companies should pay particular attention to their contact information.

    If the enterprise’s email address or other contact information is outdated, important communications relating to the application may not reach the appropriate person.

    Before continuing, therefore, check whether the enterprise contact details displayed by the system are still correct.

    Selecting the Director to Be Updated

    Step 9: Select the Relevant Director

    The system will display the company’s directors.

    Select the director whose information needs to be updated.

    This is an important stage because the amendment must be applied to the correct individual.

    If a company has several directors, carefully check the director’s name before proceeding.

    Step 10: Select “Status Change”

    After selecting the relevant director, choose Status Change.

    This takes you into the section where the director type can be amended.

    Step 11: Change the Director Type

    Change the director type to the required classification.

    The system will also require you to capture the relevant information associated with the change.

    Complete all applicable fields carefully.

    Do not leave required fields incomplete, and make sure that the information entered corresponds with the company’s intended amendment.

    Completing the Director Amendment Form

    Step 12: Continue Capturing the Required Information

    Move down through the form and continue capturing the required information.

    Review the information as you go.

    Once all applicable information has been captured, click Save.

    Saving the information gives you an opportunity to ensure that the director amendment has been properly captured before proceeding with the next stage.

    A Practical Tip

    Do not rush through the director amendment form.

    A useful approach is to check the information in three stages:

    • Identity: Is the correct director selected?
    • Classification: Is the correct director type selected?
    • Details: Has all required information been captured accurately?

    This simple review can help prevent avoidable errors.

    Reviewing All Directors

    Step 13: Review the Directors

    CIPC requires the directors to be reviewed before proceeding.

    Ensure that all directors have been reviewed.

    Once the review has been completed, click Continue.

    This step is particularly important for companies with multiple directors because the application may involve more than simply changing one field.

    Reviewing the complete director list helps ensure that the company’s records remain consistent.

    Step 14: Click Continue

    The system will present another continuation step.

    Click Continue to proceed with the application.

    At this stage, you are moving toward the supporting-document and confirmation portions of the application.

    Attaching Supporting Documents

    Step 15: Attach Documents Where Required

    The CIPC guide indicates that documents can be attached where required.

    For the relevant director amendment process, supporting documents are generally optional when:

    • Updating director details
    • Appointing a director
    • Resigning a director

    However, CIPC indicates that documents are mandatory for certain other director-status changes, including:

    • Status Remove
    • Deceased
    • Term Expired

    After attaching any required documents, click Continue.

    Why Supporting Documents Should Be Prepared in Advance

    Even when supporting documents are optional for a particular transaction, having relevant documentation available can make the process easier if CIPC requires additional information or clarification.

    Businesses should keep corporate records organised and readily accessible, particularly when dealing with changes involving directors.

    Confirming the Application

    Step 16: Click Confirm Only Once

    The next stage requires you to click the Confirm button.

    CIPC’s guide specifically warns users to click the button only once.

    This is an important instruction.

    Repeatedly clicking a submission or confirmation button can potentially create confusion about the status of a transaction or result in duplicate actions.

    Once you have confirmed the application, wait for the system to process the transaction.

    Step 17: Finalise the Application

    After confirming the application, finalise the application by clicking OK.

    The application will then move into the submitted stage.

    However, the process is not necessarily complete at this point.

    The OTP Verification Process

    One of the most important aspects of the CIPC director amendment process is the electronic consent and verification stage.

    Step 18: Application Moves to Submitted Status

    The application will appear in Submitted status with the type OTP.

    At this stage, the filer and the directors involved in the relevant amendment will need to check their email accounts.

    The CIPC guide states that the filer and directors being appointed or resigned must navigate to their email applications to find the Proposed Changes email from CIPC.

    Although the specific amendment in this guide concerns a director type change, the broader OTP workflow is an important part of CIPC’s electronic director amendment process.

    Step 19: Review the Proposed Changes Email

    The filer and relevant directors must review the proposed changes document attached to the CIPC email.

    The email contains a link that allows the relevant person to complete the required verification process.

    The person must use the link provided and capture the required:

    • Identification number
    • SMS OTP
    • Email OTP

    This verification process helps confirm that the relevant individuals have participated in the amendment.

    Completing Director Consent

    Step 20: Select the Red Consent Button

    After accessing the relevant link, select the Red Consent button.

    This opens the section where the required identification and OTP information must be entered.

    Step 21: Enter Identification and OTP Information

    Move down through the form and capture the required information.

    This includes:

    1. Identification number
    2. SMS OTP
    3. Email OTP

    You must also select the Agree checkbox.

    Once the required information has been entered and reviewed, click Submit.

    Why OTP Verification Is Important

    The OTP process adds an additional level of verification to the director amendment.

    Rather than allowing a filer to complete the entire process without involvement from the relevant parties, the electronic consent process requires affected individuals to interact with the CIPC notification and confirm the proposed changes.

    This is particularly important where a company’s director records are being changed.

    The Last Submitter and Finalisation

    Step 22: Complete the Final Submission

    All impacted directors and the filer must complete the OTP process described above.

    Once everyone has submitted their required information, the last submitter will see a Finish button.

    Select Finish to finalise the application.

    An important point in the CIPC guide is that any person who has already submitted their OTP information can complete the finalisation step, even if they were not the last person to capture and submit their OTPs.

    This means that the person finalising the transaction does not necessarily have to be the individual who submitted the final OTP response.

    Do Not Assume the Process Is Complete After OTP Submission

    One common mistake with electronic applications is assuming that submitting the OTP information automatically completes the transaction.

    According to the CIPC process described in the guide, the application still needs to be finalised using the Finish button.

    Therefore, applicants should monitor the application until the finalisation stage has been completed.

    Receiving the COR39

    Step 23: Receive the Updated COR39

    After the process has been completed, all active directors will receive an email containing the COR39 document.

    The COR39 is an important company document because it reflects the company’s registered director information.

    Businesses should retain this document with their corporate records.

    Why You Should Keep the COR39

    A company should maintain an organised corporate file containing important CIPC records.

    The COR39 may be useful when:

    • Opening or updating a business bank account

    • Applying for certain licences or registrations
    • Updating information with government institutions
    • Dealing with professional advisers
    • Demonstrating the company’s current director information
    • Completing compliance processes
    • Responding to requests for corporate documentation

    Keeping the latest CIPC documents available can make future administrative processes significantly easier.

    Common Mistakes to Avoid When Changing a Director Type

    Although the CIPC process is electronic, applicants can still encounter problems if they overlook one of the required steps.

    Here are several mistakes worth avoiding.

    1. Selecting the Wrong Company

    Always verify the company registration number and company information before starting the amendment.

    If you manage multiple companies through the same CIPC account, pay particular attention to the company you select.

    2. Selecting the Wrong Director

    Where a company has several directors, carefully verify the director’s name before selecting the amendment option.

    Changing the wrong director’s information can create a serious corporate-record problem.

    3. Entering Incorrect Director Information

    Make sure that all information captured in the director amendment corresponds with the company’s records.

    Incorrect identification or personal information can create problems during the verification process.

    4. Ignoring Enterprise Contact Details

    Check the enterprise contact information before continuing.

    An outdated email address can cause problems when important CIPC communications need to reach the filer.

    5. Failing to Review All Directors

    The CIPC process requires directors to be reviewed before proceeding.

    Do not treat this step as unnecessary.

    Use it as an opportunity to verify that the company’s overall director information is correct.

    6. Uploading Documents Incorrectly

    Where supporting documents are required, make sure that the appropriate documents are attached before continuing.

    For transactions where supporting documents are mandatory, failing to provide them can prevent the process from being completed successfully.

    7. Clicking Confirm More Than Once

    CIPC’s guide specifically instructs applicants to click the Confirm button only once.

    After clicking it, allow the system to process the transaction instead of repeatedly clicking the button.

    8. Ignoring the Proposed Changes Email

    The application does not simply end when the filer submits the initial transaction.

    The relevant parties must monitor their email accounts for the proposed changes communication from CIPC.

    9. Failing to Complete OTP Verification

    If a required filer or director does not complete the OTP process, the application may not progress to finalisation.

    Therefore, everyone involved should check their email and mobile phone for the required verification information.

    10. Forgetting the Finish Button

    After the relevant parties have submitted their OTP information, the application still needs to be finalised.

    The person who can see the Finish button should use it to complete the process.

    How Businesses Can Make the CIPC Process Easier

    Changing a director type may appear straightforward, but corporate administration becomes much easier when companies maintain accurate records.

    Maintain an Updated Director Register

    Companies should maintain their own internal record of directors and compare it against their CIPC records.

    The company’s internal records should ideally include information such as:

    • Full director names
    • Identification information
    • Appointment dates
    • Relevant director classifications
    • Resignation dates where applicable
    • Supporting resolutions and documentation
    • CIPC confirmation documents

    Keep Corporate Documents Organised

    Do not wait until a bank, investor, government department or professional adviser asks for corporate documents before trying to locate them.

    Create a structured electronic corporate folder containing:

    • CIPC registration documents
    • COR39 documents
    • Director amendments
    • Shareholder documentation
    • Company resolutions
    • Tax documents
    • Licence documents
    • Other statutory records

    Use a Dedicated Company Email Address

    Companies should consider using a reliable business email address for corporate administration.


    Important CIPC notifications can become difficult to manage when company-related communications are sent to an email address that is rarely monitored.


    Check the Application Before Submission

    A final review can prevent many administrative problems.

    Before clicking Confirm, check:

    • Company registration number
    • Company name
    • Director selected
    • Director type
    • Identification details
    • Enterprise contact information
    • Supporting documents
    • Email addresses
    • Other required information

    What Happens After the Director Type Change?

    Once all relevant parties have completed the required OTP process and the application has been finalised, the process moves toward completion.

    The CIPC guide indicates that all active directors will receive the COR39 by email.

    The COR39 should then be reviewed to confirm that the company’s director information reflects the intended amendment.

    If there is an apparent discrepancy between the requested amendment and the information reflected in the final documentation, the company should investigate the issue rather than simply assuming that the change was successful.

    Frequently Asked Questions

    Can I change a director type online through CIPC?

    Yes. The CIPC director amendment process described in the official guide can be completed electronically through the CIPC online platform.

    The process involves locating the company, selecting the relevant director, choosing Status Change, changing the director type, completing the required information and submitting the application.

    Are supporting documents always required?

    No. According to the CIPC guide, supporting documents are optional for certain director transactions, including updating director details, appointing a director and resigning a director.

    However, documents are indicated as mandatory for specific status changes such as Status Remove, Deceased and Term Expired.

    Applicants should always follow the document requirements displayed by CIPC for the particular transaction.

    Do directors need to complete OTP verification?

    The CIPC process requires the relevant parties involved in the applicable transaction to respond to the proposed changes communication and capture the required identification and OTP information.

    The filer and affected directors should therefore monitor their email accounts and complete the required consent process.

    What is the COR39?

    The COR39 is a CIPC company document reflecting registered company information relating to directors.

    Following completion of the relevant process, CIPC indicates that all active directors will receive the COR39 by email.

    What should I do if I do not receive the CIPC email?

    First, check the email address associated with the CIPC process and review the spam or junk folder.

    You should also verify that the relevant contact details were captured correctly during the application.

    If the communication still cannot be located, consider checking the application status through the CIPC platform and contacting CIPC through its official support channels if necessary.

    Final Thoughts

    Changing a director type on CIPC is an important corporate-record amendment that should be completed carefully.

    The process can be summarised as follows:

    1. Log into CIPC.
    2. Select Transact.
    3. Select More Service.
    4. Accept the terms and select Director Amendments.
    5. Agree and continue.
    6. Search for the company using its registration number.
    7. Select the correct company.
    8. Complete the foreigner quiz and review enterprise contact details.
    9. Select the relevant director.
    10. Select Status Change.
    11. Change the director type and capture the required information.
    12. Save the amendment.
    13. Review all directors.
    14. Continue with the application.
    15. Attach documents where required.
    16. Confirm the application only once.
    17. Finalise the application.
    18. Monitor the CIPC Proposed Changes email.
    19. Review the proposed changes.
    20. Select Red Consent.
    21. Enter identification and SMS/email OTP information and submit.
    22. Allow all impacted parties to complete their submissions.
    23. Select Finish to finalise the application.
    24. Keep the resulting COR39 for the company’s records.

    The most important lesson is that submitting the initial application is only part of the process. The affected parties must complete the required verification steps, and the application must ultimately be finalised.

    For businesses, keeping CIPC information accurate is an important part of good corporate governance. A company should not wait until it needs a bank account, licence, tender, investment, tax registration or other business service to discover that its director information is outdated.

    By maintaining accurate company records and carefully following the CIPC amendment process, businesses can reduce unnecessary delays and keep their statutory information properly aligned with their actual corporate structure.

    #CIPC, #CIPCRegistration, #DirectorAmendment, #SouthAfricaBusiness, #CompanyRegistration, #CompanyDirectors, #CIPCOnline, #CorporateCompliance, #BusinessCompliance, #COR39

  • CIPC Director Resignation: Step-by-Step Guide to Removing a Director from a Company

    CIPC Director Resignation: Step-by-Step Guide to Removing a Director from a Company

    Learn how to resign a company director through CIPC with this detailed step-by-step guide covering director amendments, status changes, OTP verification, supporting documents, confirmation and COR39.

    A change in a company’s directors is an important corporate administration matter. In South Africa, companies registered with the Companies and Intellectual Property Commission (CIPC) can process director amendments through the CIPC online system. One of the common changes is the resignation of a director.

    CIPC’s Director Amendment Step-by-Step Guide explains how a filer can submit a director resignation online. The same general process is also used for other director status changes, including circumstances such as a director being deceased or a director’s term expiring. However, the supporting-document requirements can differ depending on the type of status change.

    This guide explains the CIPC director resignation process in detail, from logging into the CIPC platform to completing the required OTP verification and finalising the application.

    Important: This article is based on the CIPC Director Amendment Step-by-Step Guide supplied for this article. CIPC procedures, system interfaces and requirements can change, so applicants should verify the current requirements on the official CIPC platform before submitting an application.

    What Is a CIPC Director Resignation?

    A director resignation is the formal recording of a change in the status of a company director with CIPC.

    When a director resigns, the company needs to ensure that its CIPC records accurately reflect the change. Simply having a director submit a resignation letter internally does not necessarily mean that the CIPC register has been updated.

    The CIPC process allows the relevant director amendment to be captured electronically. The application then goes through an OTP-based confirmation process involving the relevant parties.

    According to the CIPC guide, the resignation process requires an OTP from the resigning director.

    This is an important feature of the process because the affected individuals must participate in confirming the proposed changes.

    When Would a Company Need to Amend Its Directors?

    Companies may need to update their director information for several reasons.

    Common examples include:

    • A director voluntarily resigns.
    • A new director is appointed.
    • A director’s status changes.
    • A director passes away.
    • A director’s term expires.
    • A director needs to be removed in circumstances permitted by the applicable corporate law and CIPC procedures.
    • Existing director information needs to be updated.

    The CIPC guide specifically notes that other director status changes can follow the same general process, including deceased and term expired statuses.

    However, the supporting-document requirements are not necessarily identical for every type of amendment.

    CIPC Director Resignation Process at a Glance

    The process can be broadly divided into several stages:

    1. Log into the CIPC online platform.
    2. Open the transaction area.
    3. Select the relevant service.
    4. Accept the applicable terms and conditions.
    5. Select Director Amendments.
    6. Search for the company.
    7. Open the company file.
    8. Confirm the relevant company and contact information.
    9. Select the director who is resigning.
    10. Select Status Change.
    11. Change the director’s status to the appropriate status.
    12. Capture the required information.
    13. Review all directors.
    14. Attach documents if required.
    15. Confirm the application.
    16. Finalise the application.
    17. Complete the OTP verification process.
    18. Submit the identification, SMS OTP and email OTP.
    19. Allow all impacted parties to complete their confirmations.
    20. Select Finish to finalise the application.
    21. Receive the updated COR39.

    The process is therefore more than simply changing a director’s status on an online form. The OTP confirmation stage is particularly important.

    Step-by-Step CIPC Director Resignation Guide

    Step 1: Log In to the CIPC System

    The first step is to access the CIPC online platform and log in.

    After logging in, the applicant must navigate to the transaction functionality.

    The CIPC guide identifies the first action as:

    Log in and select “Transact”.

    The person completing the application should make sure they are using the appropriate CIPC account and have the information necessary to identify the company.

    Step 2: Select “More Services”

    After entering the transaction area, select:

    More Services

    This provides access to additional CIPC services, including director amendments.

    Step 3: Accept the Terms and Conditions and Select Director Amendments

    The applicant must agree to the applicable terms and conditions and then select:

    Director Amendments

    This is the section used for making changes to company director information.

    At this point, applicants should make sure that they are using the correct service before proceeding.

    Step 4: Agree and Continue

    The system requires the applicant to confirm their agreement.

    Select the appropriate Agree checkbox and then choose:

    Select and Continue

    This allows the applicant to move forward with the director amendment application.

    Step 5: Select Continue

    The CIPC guide then instructs the applicant to select Continue.

    This takes the filer to the stage where the company must be identified.

    Searching for the Company

    Step 6: Enter the Company Registration Number

    The applicant must provide the company’s registration number.

    CIPC allows the company registration number to be captured in either the short or long format.

    After entering the registration number, click the Search button.

    If the company already appears in the applicant’s list of companies, the applicant can select the relevant file instead.

    This is an important point because selecting the wrong company could result in a transaction being prepared against the wrong corporate record.

    Practical Tip

    Before continuing, check the company information displayed by CIPC and make sure that it corresponds with the company for which the director resignation is being processed.

    Do not rely solely on the company name, particularly where businesses have similar names. The registration number should be treated as the primary identifier.

    Step 7: Select the File Button

    After searching for the company, CIPC displays the relevant company information.

    Select the File button associated with the company.

    This opens the company’s director amendment process.

    Confirming Company and Director Information

    Step 8: Complete the Director Foreigner Quiz and Contact Details

    The CIPC guide instructs the applicant to select No on the Director Foreigner Quiz where applicable.

    The applicant should then review and update the enterprise contact details if necessary.

    Once the information has been checked, select:

    Continue

    It is good administrative practice to review the contact details carefully at this stage.

    Incorrect contact information can create unnecessary difficulties when notifications or other communications need to reach the company.

    Step 9: Select the Director Who Is Resigning

    The system will display the company’s directors.

    The applicant must select the director who is resigning.

    This is one of the most important stages in the process because the amendment must be applied to the correct director.

    Before proceeding, verify:

    • The director’s name.
    • The director’s existing status.
    • The company registration number.
    • That the selected person is actually the director whose resignation is being processed.

    Step 10: Select “Status Change”

    After selecting the appropriate director, select:

    Status Change

    This opens the section where the director’s current status can be amended.

    Step 11: Change the Director’s Status and Capture the Required Information

    The applicant must change the director’s status and capture the required information.

    For a resignation, the relevant status should reflect the director’s resignation.

    The system may require additional information depending on the amendment being processed.

    Applicants should complete all mandatory fields accurately rather than entering approximate information simply to get through the form.

    Completing and Saving the Amendment

    Step 12: Continue Down the Form and Save

    The CIPC guide instructs the applicant to move down through the form and continue capturing the required information.

    After completing the relevant fields, click:

    Save

    Saving the information helps ensure that the captured amendment is retained in the application.

    Before moving forward, review the information for obvious errors.

    Step 13: Review All Directors

    The applicant must ensure that all directors have been reviewed.

    Once the review is complete, select:

    Continue

    This review is particularly useful when a company has multiple directors.

    A director resignation should not be treated as an isolated data-entry exercise. The company’s overall director information should remain accurate after the amendment.

    Supporting Documents and Confirmation

    Step 14: Continue With the Application

    After reviewing the director information, select:

    Continue

    The application proceeds to the document and confirmation stages.

    Step 15: Attach Documents Where Required

    The CIPC guide makes an important distinction regarding supporting documents.

    For updating director details, appointing a director or resigning a director, documents are described as optional.

    However, documents are mandatory for certain other status changes, including:

    • Status Remove
    • Deceased
    • Term Expired

    This distinction is important because applicants should not assume that every director amendment has identical documentary requirements.

    Are Documents Required for a Director Resignation?

    According to the supplied CIPC guide, supporting documents are optional when resigning a director.

    Nevertheless, applicants should carefully consider whether supporting documentation is appropriate for their particular circumstances and should follow any current CIPC requirements shown by the system.

    Where a company has internal corporate records relating to a resignation, those records should also be retained by the company even where CIPC does not require them to be uploaded as part of the online transaction.

    Step 16: Confirm the Application — Click Only Once

    The applicant must select:

    Confirm

    The CIPC guide gives an especially important warning at this stage:

    ONLY CLICK ONCE.

    This instruction should be taken seriously.

    Users should avoid repeatedly clicking the confirmation button if the system appears to take a moment to process the request. Multiple clicks can potentially create confusion or duplicate processing attempts.

    A better approach is to click once and wait for the system to respond.

    Step 17: Finalise the Application

    After confirmation, the applicant must finalise the application by clicking:

    OK

    At this point, the application moves into the submitted/OTP stage.

    CIPC Director Resignation OTP Verification

    The OTP stage is one of the most important parts of the CIPC director resignation procedure.

    Step 18: Application Enters Submitted Status

    According to the CIPC guide, the application will be placed into Submitted Status with Type OTP.

    The relevant people then need to access their email applications to find the Proposed Changes email from CIPC.

    The guide identifies the following parties as relevant to the OTP process:

    • The filer.
    • Directors being appointed, where applicable.
    • Directors being resigned.

    For a straightforward director resignation, the resigning director is therefore an important participant in the confirmation process.

    Step 19: Review the Proposed Changes Email

    The filer and impacted directors must review the proposed changes document attached to the email.

    After reviewing the proposed changes, they must click the link contained in the email.

    The link is used to capture the required:

    • Identification number.
    • SMS OTP.
    • Email OTP.

    This provides an additional confirmation layer before the amendment is finalised.

    Why Is OTP Verification Important?

    OTP verification helps confirm that the relevant individuals have participated in the transaction.

    For a director resignation, this is particularly significant because the system requires confirmation associated with the director whose status is being changed.

    Applicants should therefore make sure that the relevant individuals monitor their email and have access to the mobile number and other information required to complete the OTP process.

    Completing the Red Consent Process

    Step 20: Select the Red Consent Button

    After accessing the relevant link, the user must select the:

    Red Consent button.

    This begins the consent and verification stage.

    Step 21: Capture Identification and OTP Information

    The applicant must move down through the form and capture the required information.

    This includes:

    1. Identification information.
    2. SMS OTP.
    3. Email OTP.
    4. Agreement to the applicable checkbox.

    After entering the required information, select:

    Submit

    This completes that person’s OTP confirmation.

    Completing the Final Submission

    Step 22: The Last Submitter Must Finalise the Application

    The CIPC process requires all impacted parties to complete their OTP submissions.

    The person who submits last will see a:

    Finish

    button after submitting the required information.

    That person must select Finish to finalise the application.

    An important detail in the CIPC guide is that any person who has already submitted their OTPs can complete the finalisation step, even if that person was not the last person to submit their OTPs.

    This means that the finalisation function is not necessarily restricted to the person who physically entered the last OTP.

    Step 23: Active Directors Receive the COR39

    After the process has been completed, all active directors will receive an email containing the:

    COR39

    The COR39 serves as an important record of the company’s director information.

    The company should retain the document with its corporate records and ensure that its internal records correspond with the information reflected in the CIPC documentation.

    What Is a COR39?

    The COR39 is associated with company director information and changes recorded with CIPC.

    For companies maintaining proper corporate records, the updated document can be useful for demonstrating that the director information has been updated.

    After a resignation has been processed, the company should consider retaining:

    • The CIPC confirmation.
    • The COR39.
    • The director’s resignation documentation.
    • Relevant company resolutions or minutes, where applicable.
    • Correspondence relating to the resignation.
    • Other supporting corporate records.

    Maintaining a proper audit trail can make future compliance, banking, legal and administrative processes easier.

    Important Things to Check Before Resigning a Director

    Although the CIPC online procedure is relatively structured, the administrative consequences of a director resignation can be significant.

    Before submitting the amendment, companies should consider the following.

    1. Check the Company’s Remaining Directors

    A resignation may change the company’s leadership structure.

    Before processing the resignation, confirm that the company will continue to have the required directors and that the company’s governance requirements are satisfied.

    If the resignation leaves the company without the required office-bearers or directors, additional corporate action may be necessary.

    2. Check the Company’sInternal Records

    The company’s internal records should be consistent with the CIPC information.

    Depending on the circumstances, relevant records may include:

    • Resignation letters.
    • Board minutes.
    • Shareholder resolutions.
    • Director registers.
    • Company constitutional documents.
    • Contracts involving the departing director.

    The CIPC amendment should form part of a broader corporate record-keeping process.

    3. Make Sure the Correct Director Is Selected

    Companies with several directors should take extra care when selecting the director in the CIPC system.

    Check the person’s full name and other identifying information before submitting the amendment.

    An incorrect director amendment could create unnecessary administrative complications.

    4. Make Sure the Director Can Complete the OTP Process

    Because the CIPC resignation process involves OTP verification, the resigning director needs to be able to access the relevant communication and complete the required verification.

    Before initiating the process, it is sensible to ensure that the relevant parties have access to their email and mobile communications.

    5. Review the Proposed Changes

    Do not treat the OTP email as a formality.

    The parties should review the proposed changes before providing their consent.

    If something is incorrect, it is better to identify the problem before completing the final submission.

    Director Resignation vs Other CIPC Status Changes

    One of the useful aspects of the CIPC guide is that it shows that the director amendment system can handle different types of status changes.

    However, companies should distinguish between them.

    Resignation

    A director voluntarily leaves their position, and the company’s CIPC information needs to be updated accordingly.

    Deceased

    A deceased director’s status must be updated, but CIPC requires supporting documents for this type of status change according to the supplied guide.

    Term Expired

    Where a director’s term has expired, the relevant status needs to be updated. Supporting documents are also mandatory for this status change according to the guide.

    Status Remove

    The guide identifies status removal as another category for which supporting documentation is mandatory.

    Therefore, companies should not simply choose whichever status appears closest to the desired result. The status should accurately reflect the underlying corporate event.

    Common Mistakes When Processing a CIPC Director Resignation

    The process may appear straightforward, but several mistakes can cause delays or confusion.

    Mistake 1: Selecting the Wrong Company

    A filer may manage multiple companies through their CIPC account.

    Always confirm the company registration number before opening the file.

    Mistake 2: Selecting the Wrong Director

    Where a company has several directors, carefully verify the person whose status is being changed.

    Mistake 3: Ignoring Contact Details

    The CIPC guide specifically instructs the applicant to update enterprise contact details if necessary.

    Keeping contact information current is important because CIPC communications may depend on those details.

    Mistake 4: Assuming Every Amendment Needs Documents

    The supplied guide states that documents are optional for director detail updates, appointments and resignations, while they are mandatory for status removal, deceased and term-expired cases.

    The requirements should therefore be checked based on the specific amendment.

    Mistake 5: Clicking Confirm More Than Once

    CIPC specifically warns applicants to click the confirmation button only once.

    If the system takes time to respond, avoid repeatedly clicking the button.

    Mistake 6: Forgetting the OTP Stage

    Submitting the initial application does not necessarily mean that the director resignation process is complete.

    The affected parties must complete the OTP process.

    Mistake 7: Failing to Click Finish

    After all required OTP submissions have been completed, the final Finish action is required to finalise the application.

    This is an easy step to overlook.

    A Practical Checklist for a CIPC Director Resignation

    Before starting the process:

    • Confirm the correct company registration number.
    • Confirm the director who is resigning.
    • Check the company’s current director information.
    • Check company contact details.
    • Ensure the relevant parties can access their email.
    • Ensure the relevant parties can receive SMS OTPs.
    • Keep relevant corporate records available.
    • Confirm whether supporting documents are required.

    During the application:

    • Log into CIPC.
    • Select Transact.
    • Select More Services.
    • Select Director Amendments.
    • Accept the terms and conditions.
    • Search for the company.
    • Select the correct company file.
    • Complete the relevant company information.
    • Select the resigning director.
    • Select Status Change.
    • Enter the required information.
    • Save the application.
    • Review all directors.
    • Attach documents where applicable.
    • Click Confirm only once.
    • Finalise the application.

    After submission:

    • Watch for the Proposed Changes email.
    • Review the proposed changes.
    • Complete identification verification.
    • Enter the SMS OTP.
    • Enter the email OTP.
    • Accept the consent checkbox.
    • Submit the OTP confirmation.
    • Complete the Finish step.
    • Keep the COR39 received after completion.

    What Happens After a Director Resigns?

    A director resignation can have consequences beyond the CIPC register.

    The company should consider whether the resignation affects:

    • Banking mandates.
    • Internet banking access.
    • Signing authority.
    • Contracts.
    • Supplier accounts.
    • Customer accounts.
    • Tax administration.
    • Employment-related responsibilities.
    • Company correspondence.
    • Regulatory registrations.
    • Internal governance.
    • Beneficial ownership or other statutory information, where applicable.

    For example, if the departing director was an authorised signatory on the company’s bank account, the company may need to contact its bank separately.

    Updating CIPC does not automatically mean that every other institution holding the director’s information will update its records.

    CIPC Is Only One Part of Corporate Administration

    A company should therefore treat the CIPC amendment as one component of a broader administrative update.

    A useful approach is to create a director departure checklist covering all organisations and systems where the director’s authority or personal information may appear.

    This can include:

    1. CIPC.
    2. The company’s bank.
    3. Accountants.
    4. Auditors.
    5. Tax representatives.
    6. Legal advisers.
    7. Key suppliers.
    8. Major customers.
    9. Insurance providers.
    10. Government or regulatory bodies, where applicable.

    The exact list will depend on the company’s activities and the role previously performed by the director.

    Why Accurate Director Information Matters

    Keeping company information up to date is more than an administrative exercise.

    Accurate corporate information can help reduce uncertainty for banks, investors, suppliers, regulators, professional advisers and other parties dealing with the company.

    A company with outdated director records may encounter questions when conducting activities such as:

    • Opening or modifying bank accounts.
    • Applying for finance.
    • Entering significant contracts.
    • Conducting due diligence.
    • Changing authorised signatories.
    • Responding to regulatory enquiries.
    • Preparing corporate documents.
    • Selling or restructuring the business.

    For this reason, director amendments should be processed promptly and accurately.

    Final Thoughts

    The CIPC director resignation process is a structured online procedure involving company identification, director status changes, review, confirmation and OTP verification.

    The most important stages are not necessarily the initial form entries. The final verification process deserves particular attention because the affected parties must review the proposed changes and submit their identification and OTP information.

    For a standard director resignation, the CIPC guide indicates that supporting documents are optional. However, the rules differ for other director status changes, such as Status Remove, Deceased and Term Expired, where supporting documents are mandatory according to the guide.

    Companies should also remember that updating CIPC records is only one part of properly managing a director’s departure. Internal corporate records, banking mandates, signing authorities, contracts and other institutional records may also need to be reviewed.

    The safest approach is therefore to treat a director resignation as a complete corporate administration exercise: verify the correct company and director, accurately capture the status change, carefully complete the OTP process, retain the resulting COR39 and update other relevant records.

    For businesses that regularly make corporate changes, keeping a standard director-change checklist can significantly reduce errors and help ensure that resignations, appointments and other director amendments are handled consistently.

  • How to Change a Director’s Contact Details on the CIPC System: Step-by-Step Guide

    How to Change a Director’s Contact Details on the CIPC System: Step-by-Step Guide

    Learn how to change a director’s contact details on CIPC step by step, including customer code requirements, ID verification, email approval, 24-hour deadlines, objections, and practical tips.

    Changing a director’s email address or cellphone number on the Companies and Intellectual Property Commission (CIPC) system is an important administrative process that should be handled carefully. Accurate director contact information helps ensure that important company-related notifications, verification requests, and other communications reach the correct person.

    CIPC has introduced a verification process for changing a director’s contact details. The process is designed to protect directors and companies against unauthorized changes to personal information.

    The process is not simply a matter of logging into the CIPC system and replacing an old email address with a new one. The director’s identity must first be verified, the relevant customer information must correspond with the company records, and the proposed change must be confirmed through email.

    This guide explains the CIPC Director Change of Contact Details process in detail, including the requirements, online procedure, email verification, approval period, objections, and practical considerations for directors and companies.

    Important: This article is based on the CIPC Director Change of Contact Details Step by Step Guide. CIPC online services and procedures can change, so users should verify the current process and requirements on the official CIPC platform before submitting an application.


    What Is a Director Change of Contact Details?

    A director change of contact details is a CIPC transaction used to update the contact information associated with a director in a company’s records.

    The procedure can be used where a director needs to update details such as:

    • Email address
    • Cellphone number
    • Other applicable contact information captured in the CIPC system

    The process includes an identity and customer-profile verification requirement. CIPC uses the verification process to reduce the risk of unauthorized individuals changing a director’s personal information.

    The procedure described by CIPC involves submitting the proposed change and then sending confirmation emails to both the director’s existing email address and new email address.

    The director must then approve the change within the specified period.


    Why Accurate Director Contact Details Matter

    Keeping director information up to date is more important than it may initially appear.

    A company’s directors are responsible for receiving and responding to various corporate communications. If a director’s email address or cellphone number is outdated, important notices may not reach them.

    Accurate information can help with:

    1. Identity verification
    2. Security of company records
    3. Receiving CIPC notifications
    4. Confirming changes to director information
    5. Reducing the risk of unauthorized amendments
    6. Maintaining accurate corporate records

    For companies with several directors, keeping contact information current should form part of the company’s regular compliance and record-keeping practices.


    CIPC Requirements Before Changing a Director’s Contact Details

    Before starting the transaction, there are important requirements that must be satisfied.

    1. The director must have a valid customer code

    The CIPC guide states that the director must have a valid customer code before the change can be processed.

    A customer code is important because it links the user’s CIPC customer profile to the relevant transactions and records.

    If the director does not have the required customer profile information, the change may not be possible through the prescribed process.


    2. The ID or passport number must match

    One of the most important requirements is the matching of identification information.

    The ID or passport number associated with the customer’s CIPC profile must correspond with the ID or passport number recorded for the director on the company.

    This verification requirement is designed to ensure that the person attempting to change the contact details is properly associated with the director record.

    For example, if the director’s company record contains one identification number while the customer’s CIPC profile contains a different number, the system will not allow the contact details to be amended through this process.

    This makes it important to resolve discrepancies in identification information before attempting to change the director’s contact details.


    What Happens After a Director Contact Change Is Submitted?

    The CIPC process contains a verification stage.

    After the application is submitted, notification emails are sent to:

    • The current email address of the director; and
    • The new email address being proposed.

    This is an important security feature.

    It means that changing the email address is not an instant administrative amendment. The proposed change must go through the prescribed confirmation process.


    The 24-Hour Approval Period

    One of the most important aspects of the CIPC process is the 24-hour approval period.

    After the request is submitted, the director must approve the change within 24 hours.

    If the director approves the request within the required period, CIPC will proceed with the change.

    According to the guide, the new contact details are expected to be updated within the following 24 hours after approval, provided that no objection is received.

    This means directors should monitor their email carefully after a change request has been submitted.

    What if the director does nothing?

    If the director does not take action within the prescribed 24-hour period, the application automatically expires.

    In that situation:

    • The requested change will not be implemented.
    • The existing contact details remain unchanged.
    • A new request would need to be initiated if the change is still required.

    Therefore, submitting the application without ensuring that the director can access the relevant email accounts can result in unnecessary delays.


    Step-by-Step Guide to Changing a Director’s Contact Details on CIPC

    The following steps are based on the CIPC Director Change of Contact Details guide.

    Step 1: Log in to the CIPC System

    The first step is to log into the CIPC online platform using the appropriate customer credentials.

    Once logged in, navigate to the Transact section.

    The transaction menu provides access to the services available to the customer.


    Step 2: Select “More Service”

    After selecting Transact, locate and select More Service.

    This takes you to additional CIPC services available through the online platform.

    It is important to make sure you are working within the correct customer profile before proceeding.


    Step 3: Accept the Terms and Conditions

    The system will require you to agree to the applicable Terms and Conditions.

    After reviewing the terms, select the option for:

    Change Contact Details

    This begins the process for changing the director’s contact information.


    Step 4: Select the Company

    The next step is to identify the company for which the director’s contact information needs to be changed.

    CIPC provides an Associated Company Information list from which the relevant company can be selected.

    Alternatively, the company can be located using the search facility.

    Once the correct company has been identified, select File.

    Take care when selecting the company

    If you are associated with multiple companies, carefully verify that you have selected the correct company before proceeding.

    Choosing the wrong company could result in an incorrect transaction being initiated.


    Step 5: Select the Director

    After selecting the company, locate the relevant director.

    The CIPC guide instructs the user to select the Edit/View button associated with the logged-in director.

    This step is important because the system checks the identification information associated with the customer profile.

    ID or passport verification

    The ID or passport number in the customer’s profile must match the identification number recorded for the director on the company.

    If the numbers do not match, CIPC will not allow the contact details to be amended through this process.

    This requirement provides an additional layer of protection against unauthorized changes.


    Step 6: Enter the New Email Address and Cellphone Number

    Once the director’s record has been selected and the identity information has been successfully verified, the relevant contact details can be captured.

    Enter the:

    • New email address
    • New cellphone number

    It is important to check the information carefully before continuing.

    Double-check the email address

    An incorrectly entered email address can create serious problems because the approval process relies on email communication.

    Before submitting the application, verify:

    • Spelling of the email address
    • Correct domain name
    • Correct cellphone number
    • That the director has access to the new email account

    A simple typing mistake can prevent the director from receiving the necessary confirmation.


    Step 7: Save the New Contact Details

    After entering the new email address and cellphone number, select Save.

    At this stage, carefully review the information before moving forward.

    Saving the information is part of the application process, but the change is not yet fully implemented. The request still needs to go through the prescribed submission and verification process.


    Step 8: Select “Continue”

    After saving the information, select the Continue button.

    This takes the transaction to the next stage.

    Before continuing, it is advisable to confirm that you are dealing with the correct company and director.


    Step 9: Submit the Application

    The application must then be finalized by selecting Submit.

    Submitting the application initiates the formal contact-details change request.

    However, submission does not mean that the new information immediately becomes effective.

    The request must still go through the director verification process.


    Step 10: Check the Email Notifications

    Once the application has been submitted, CIPC sends an email to both:

    1. The director’s current email address; and
    2. The director’s new email address.

    The email contains information about the pending contact-details change.

    The director should check both email accounts where possible.

    This is particularly important when the purpose of the transaction is to replace an old email address that the director may no longer use regularly.


    Step 11: Open the Approval Link

    The director must open the relevant email and select the Approval link.

    This allows the director to confirm that the proposed change is authorized.

    The approval stage is a critical part of the security process.

    Simply submitting the application is therefore not sufficient.


    Step 12: Select “Approve”

    After opening the approval link, the director must select the Approve button.

    The approval confirms that the director has authorized the proposed change to their contact information.

    Once the approval has been completed, CIPC sends confirmation emails indicating that the pending change has been verified.


    Step 13: Wait for the Change to Be Implemented

    After the request has been approved, the new contact details are expected to be implemented within the next 24 hours, provided there is no objection.

    This means applicants should not necessarily expect the new information to appear immediately after clicking the approval button.

    The process contains a further period during which the change can be challenged.


    What Happens If a Director Objects to the Change?

    The CIPC procedure also provides an objection mechanism.

    This is particularly important from a security perspective.

    If a director receives a notification about a contact-details change that they did not authorize, they should not approve it.

    Instead, the director should use the objection process.

    According to the CIPC guide, the director must process the objection within 24 hours.


    How to Reject an Unauthorized Contact Change

    If the director did not request the change, the prescribed procedure is to:

    1. Open the relevant email.
    2. Select the Objection link.
    3. Follow the objection process.
    4. Select Reject.
    5. Submit the rejection.

    Once the request is rejected, the application is terminated.

    The director’s existing contact details remain unchanged.


    Why the Objection Process Is Important

    The objection mechanism provides an important security safeguard.

    Imagine that someone attempts to change a director’s email address without authorization.

    The system sends notification to the existing email address as well as the proposed new email address.

    The legitimate director therefore has an opportunity to identify the unauthorized request and reject it.

    This is why directors should pay attention to CIPC notifications, particularly when they receive an unexpected request to change their contact information.


    What If the Director Does Not Approve or Reject the Request?

    The 24-hour deadline is important.

    If the director does nothing, the application will expire according to the procedure described in the CIPC guide.

    No contact-details change will be implemented through that expired application.

    This differs from an explicit rejection.

    No action

    If the director simply does not respond within the required period:

    • The application expires.
    • No change is made.
    • The existing details remain unchanged.

    Rejection

    If the director actively rejects the request:

    • The application is terminated.
    • The proposed change is not implemented.
    • The existing contact details remain unchanged.

    Therefore, an expired application and a rejected application both prevent the requested change from taking effect, although they occur through different processes.


    Common Problems When Changing Director Contact Details

    Although the CIPC process is relatively straightforward, several issues can cause delays.

    1. ID or passport number mismatch

    This is one of the most significant issues.

    If the identification number on the customer’s profile does not match the identification number recorded for the director, the system will not allow the contact details to be changed through the procedure.

    What should you do?

    If the information does not match, the discrepancy needs to be addressed before attempting to proceed with the contact-details change.

    Do not assume that repeatedly submitting the same application will resolve the problem.


    2. The director cannot access the old email address

    This can create a practical problem because the existing email address is part of the notification process.

    Before initiating a change, consider whether the director can access the email account currently associated with their CIPC record.

    If access to the old account has been permanently lost, the appropriate solution may require assistance through the relevant CIPC support or correction process rather than simply submitting the same request repeatedly.


    3. Incorrect new email address

    A typo in the new email address can prevent the director from receiving the necessary communication.

    Always check the new address carefully before submitting the application.


    4. The director misses the 24-hour deadline

    A director may receive the email but fail to approve the request within the prescribed timeframe.

    The application can then expire.

    In that situation, the contact details will not be changed through that application and a new transaction may be necessary.


    5. The approval email goes to spam

    Automated emails can sometimes be filtered into spam or junk folders.

    Directors should check:

    • Inbox
    • Spam folder
    • Junk folder
    • Promotions or other filtered folders where applicable

    This is especially important during the 24-hour approval period.


    Practical Tips for a Successful CIPC Contact Details Change

    Following a few simple precautions can make the process considerably easier.

    Tip 1: Verify the director’s information first

    Before starting the application, confirm that:

    • The director is correctly recorded on the company.
    • The identification information is correct.
    • The customer profile has the required customer code.

    Tip 2: Use an email account the director actively monitors

    The approval process is time-sensitive.

    Use an email address that the director can access immediately.

    Tip 3: Check the email address character by character

    An incorrectly typed email address can cause the verification process to fail.

    Tip 4: Start the transaction when the director is available

    Because the approval period is limited, it is better to initiate the request when the director can respond promptly.

    Tip 5: Do not approve an unexpected request

    If the director did not authorize the change, they should investigate the request and use the objection process rather than approving it.

    Tip 6: Keep evidence of the transaction

    Companies should consider retaining relevant confirmation emails and transaction information for their corporate records.

    This can be useful if questions later arise about when a director’s contact details were changed.


    CIPC Director Contact Details and Company Compliance

    Keeping director information accurate is part of maintaining reliable corporate records.

    Company information can change over time. Directors may:

    • Change cellphone numbers
    • Change email addresses
    • Change employers or professional roles
    • Lose access to old email accounts
    • Adopt new communication arrangements

    Companies should therefore periodically review their corporate records rather than waiting until a CIPC transaction becomes necessary.

    A company with outdated director information may encounter unnecessary administrative problems when it needs to complete future transactions.


    Difference Between Changing Contact Details and Changing a Director

    It is important to distinguish between a change in a director’s contact details and a change of directors.

    Changing contact details does not mean that a director has resigned or that a new director has been appointed.

    The procedure discussed in this guide is specifically concerned with updating the director’s contact information.

    For example:

    A director remains a director of the company but changes from an old email address to a new email address.

    That situation is fundamentally different from:

    A director resigns and another individual is appointed as a replacement.

    Companies should therefore select the correct CIPC transaction for the change they are trying to make.


    Security Considerations for Directors

    The email-based verification mechanism makes it especially important for directors to protect their email accounts.

    A director should be cautious if they receive an unexpected CIPC notification stating that someone has requested a change to their contact details.

    If you did not request the change

    Do not approve it.

    Instead:

    1. Review the notification.
    2. Confirm whether someone authorized to act for the company initiated the request.
    3. If unauthorized, use the objection/rejection process.
    4. Consider reviewing the security of your email and other relevant accounts.
    5. Keep records of the notification and your response.

    The ability to object within the prescribed period is an important part of protecting the director’s information.


    Why CIPC Uses a Verification Process

    Changing an email address may appear to be a simple administrative task, but contact details can have significant security implications.

    An email address may be used to receive:

    • Corporate notifications
    • Verification requests
    • Transaction communications
    • Security alerts
    • Other regulatory correspondence

    If unauthorized individuals could freely replace a director’s email address, they could potentially redirect important communications away from the legitimate director.

    The verification process therefore introduces an additional authorization layer.

    The requirement for the customer code and matching identification information also helps establish a connection between the person accessing the system and the director recorded for the company.


    A Simple Checklist Before Submitting the Change

    Use the following checklist before starting the transaction:

    • The director has a valid CIPC customer code.
    • The director’s ID or passport number matches the company record.
    • The correct company has been selected.
    • The correct director has been selected.
    • The new email address has been checked carefully.
    • The new cellphone number has been checked.
    • The director can access the required email account.
    • The director understands that approval is time-sensitive.
    • The director knows how to reject an unauthorized request.
    • Confirmation emails will be monitored after submission.

    Frequently Asked Questions

    How long does a CIPC director contact-details change take?

    The process involves multiple stages. The director must approve the request within 24 hours. Once approved, the CIPC guide states that the new contact details will be updated within the following 24 hours if there is no objection.

    Therefore, the change should not necessarily be expected to take effect immediately after submission.


    Does the director need to approve the change?

    Yes. The CIPC procedure requires the director to approve the proposed change through the verification email within the prescribed 24-hour period.


    What happens if the director does not respond?

    If the director takes no action within the prescribed period, the application automatically expires and the contact details are not changed.


    Can a director reject an unauthorized change?

    Yes. The CIPC guide provides an objection mechanism. The director should use the objection link and reject the application within the prescribed 24-hour period.


    What happens after a director rejects the request?

    The application is terminated and the director’s existing contact details remain unchanged.


    Why can’t I change the director’s contact details?

    One possible reason is that the ID or passport number associated with the customer profile does not match the identification number recorded for the director on the company.

    The CIPC guide specifically states that the contact details cannot be amended through this process where the identification information does not match.


    Can I change the director’s email and cellphone number at the same time?

    The CIPC guide describes capturing the director’s email and cellphone number as part of the contact-details update process. Both should therefore be checked carefully before the application is submitted.


    What if the new email address is entered incorrectly?

    An incorrect email address can interfere with the verification process. Always carefully review the new email address before saving and submitting the application.

    If an error has already been submitted, the appropriate next step will depend on the status of the application and the available CIPC procedures.


    Final Thoughts

    The CIPC process for changing a director’s contact details is designed to balance convenience with security. Although the actual online transaction involves only a few steps, the verification stage is particularly important.

    The most important points to remember are that the director needs a valid customer code, the ID or passport information must match the company record, and the proposed change must go through the email approval process.

    Directors should also pay close attention to the 24-hour deadline. Failure to approve the request within the prescribed period can cause the application to expire, while an unauthorized request should be rejected through the objection process.

    For companies, the best approach is to treat director contact information as an important component of corporate records rather than as an insignificant administrative detail. Keeping this information accurate can make future CIPC transactions easier and helps ensure that directors receive important communications.

    Most importantly, directors should never approve a contact-details change that they did not authorize. The verification and objection mechanisms exist precisely to provide protection against unauthorized amendments.

    By checking identification information before starting the transaction, entering the new contact details carefully, monitoring both email addresses, and responding within the required timeframe, companies and directors can reduce delays and complete the CIPC contact-details update more efficiently.

  • Step-by-Step Guide to Reinstating a Company or Close Corporation with CIPC in South Africa

    Step-by-Step Guide to Reinstating a Company or Close Corporation with CIPC in South Africa

    Learn how to reinstate a deregistered South African company or close corporation through CIPC eServices, including requirements, costs, OTP verification, annual returns, court orders and post-reinstatement compliance.

    If a South African company or close corporation has been deregistered, reinstatement may provide a way to restore the entity to an active status rather than registering a completely new business. The Companies and Intellectual Property Commission (CIPC) has introduced an electronic reinstatement process that allows eligible companies and close corporations to submit reinstatement applications through its eServices platform.

    However, reinstatement is not simply a matter of paying a fee and clicking a few buttons. The applicant must satisfy specific requirements, provide accurate information, deal with outstanding annual returns and other statutory obligations, and, in certain circumstances, obtain a court order.

    This guide explains the CIPC reinstatement process step by step, based on the CIPC’s official Step by Step Guide: Reinstatement Application, Version 1.0.

    Important: CIPC reinstatement requirements can have legal and financial consequences. Applicants should verify the latest requirements, fees and procedures with CIPC before submitting an application.

    What Is Company or Close Corporation Reinstatement?

    Reinstatement is the process of restoring a deregistered company or close corporation to the CIPC register.

    A deregistered entity may no longer be able to operate normally as a registered legal entity. Reinstatement can therefore be important where the business still has assets, liabilities, contracts, economic value or other legitimate reasons for continuing as the same entity.

    CIPC’s electronic process covers the reinstatement of:

    • Companies; and
    • Close corporations.

    The application is handled through the CIPC eServices platform.

    The reinstatement process can involve several stages, including:

    1. Logging into CIPC eServices.
    2. Selecting the reinstatement service.
    3. Accepting the terms and electronic mandate.
    4. Starting a new application.
    5. Selecting the appropriate reinstatement type.
    6. Calculating outstanding annual return fees.
    7. Providing business and address information.
    8. Obtaining the required director or member resolutions.
    9. Completing OTP verification.
    10. Paying the required amount.
    11. Filing outstanding annual returns and other statutory information.
    12. Bringing the company’s CIPC records up to date.

    Where reinstatement is based on a court order, additional documentation and validation are required.


    When Can a Company or Close Corporation Be Reinstated?

    One of the most important issues to understand is that not every deregistered company or close corporation automatically qualifies for reinstatement.

    According to the CIPC guide, a company or close corporation can be reinstated using Form CoR40.5 if it was in business or had other economic value at the time of deregistration.

    This requirement is significant.

    For example, a deregistered company may potentially have economic value because it owns:

    • Property;
    • Equipment;
    • Intellectual property;
    • Shares or investments;
    • Contractual rights;
    • Outstanding receivables;
    • Business assets; or
    • Other valuable interests.

    The applicant should therefore consider the company’s actual circumstances at the time of final deregistration before proceeding.

    What If the Entity Had No Economic Value?

    If the company or close corporation was not in business and had no economic value at the time of final deregistration, CIPC’s guide indicates that a new company may instead be registered at a cost of R175.

    This creates an important strategic distinction.

    If there is no meaningful reason to preserve the old entity, starting a new company may be more appropriate than pursuing reinstatement.

    However, this should not be treated as a universal recommendation because the consequences can depend on the company’s assets, liabilities, contracts, tax position and other circumstances.


    Important Conditions Before Applying for Reinstatement

    Before beginning the electronic application, applicants should understand the conditions imposed by CIPC.

    1. Do Not Submit False Information

    CIPC expressly warns that submitting false information is a criminal offence under section 214 of the Companies Act.

    False information can result in:

    • Withdrawal of the filing;
    • Possible criminal prosecution; and
    • Additional complications for the company and its representatives.

    Applicants should therefore ensure that information supplied during the reinstatement process is accurate and supported by appropriate records.


    2. Keep Evidence Supporting the Reinstatement

    CIPC states that evidence supporting the reinstatement must be retained by the company or close corporation.

    CIPC reserves the right to request this evidence in accordance with Companies Regulation 168.

    This means that completing the electronic application should not be viewed as the end of the compliance obligation.

    The applicant should retain documentation that supports the company’s eligibility for reinstatement.

    Depending on the circumstances, relevant evidence could include documentation demonstrating:

    • Business operations;
    • Assets;
    • Contracts;
    • Revenue-generating activities;
    • Ownership interests;
    • Outstanding obligations;
    • Other economic value.

    If the required evidence cannot be provided, CIPC may withdraw the reinstatement application and subsequent annual return filings.


    What Happens If a Creditor Wants to Enforce a Liability?

    Another important scenario involves creditors or other parties who want to enforce a liability against a deregistered company or close corporation.

    According to the CIPC guide, a court order is required in such circumstances.

    The court order must not simply state that the company or close corporation is reinstated.

    It must also direct the entity to comply with its outstanding obligations under the Companies Act, 2008.

    These obligations may include:

    • Filing outstanding annual returns;
    • Filing the Beneficial Ownership Declaration;
    • Filing AFS/FAS;
    • Providing other required information; and
    • Bringing the company’s CIPC records up to date.

    This distinction is extremely important for creditors.

    A court order that only provides for reinstatement but does not require the entity to fulfil its outstanding statutory obligations may result in the entity being placed back into Annual Return Deregistration after implementation of the court order.


    The Electronic Mandate

    The reinstatement process involves an electronic mandate.

    The mandate is accepted electronically by clicking “I Agree” on the Terms and Conditions page.

    Applicants should read the terms and conditions carefully before agreeing.

    The electronic mandate is not merely a procedural checkbox. It forms part of the electronic application process and confirms the applicant’s agreement to the relevant terms.


    Step-by-Step CIPC Reinstatement Application

    Step 1: Log Into CIPC eServices

    The first step is to access the CIPC website.

    Go to the CIPC website and select:

    Login / Register → eServices

    On the eServices landing page, select Customer Login.

    You will need to enter:

    • Customer code;
    • Password; and
    • Security code.

    You must also read and accept the Terms and Conditions before clicking LOGIN.

    Forgot Your Password?

    If you have forgotten your password, CIPC provides a Forgot Password option.

    Applicants whose customer information is outdated are instructed by CIPC to contact the relevant password reset support channel.

    It is advisable to resolve login or customer-profile problems before beginning the reinstatement application because delays at this stage can interrupt the process.


    Step 2: Select the Reinstatement Service

    After logging into the CIPC eServices dashboard:

    1. Click HOME.
    2. Select More Services.
    3. Locate Business Registration.
    4. Select Company and Close Corporation Reinstatements.

    This takes you to the electronic reinstatement service.


    Step 3: Read and Accept the Terms and Conditions

    The system will display the applicable Terms and Conditions and the electronic mandate.

    Read the information carefully.

    If you agree:

    1. Click I Agree.
    2. Click Continue.

    Applicants should pay particular attention to the declarations concerning the accuracy of information and the requirements for reinstatement.


    Step 4: Start a New Application

    Select New Application.

    CIPC provides options to identify the company or close corporation.

    You can either:

    • Select an associated company or close corporation; or
    • Search for an unlisted company or close corporation.

    What If There Is Already a Pending Application?

    CIPC notes that if an existing application for the company or close corporation has not been finalised, the system may display a validation error indicating that an application is pending.

    In that situation:

    1. Go to the pending applications.
    2. Select the relevant application.
    3. Continue completing the existing application.

    Starting multiple applications unnecessarily could create confusion and delays.


    Step 5: Select the Reinstatement Type

    The system requires you to select the type of reinstatement.

    The available options include:

    • Reinstatement Application; or
    • Court Order.

    The correct selection depends on the circumstances surrounding the reinstatement.

    A standard reinstatement application should not be confused with a court-order-based reinstatement.

    Where a court order is required, the applicant must follow the separate court-order procedure discussed later in this guide.


    Step 6: Calculate the Reinstatement Cost and Outstanding Annual Returns

    One of the most important financial steps involves calculating the cost of reinstatement together with outstanding annual returns.

    The system provides an Annual Return Calculator.

    You will need to review the outstanding annual return years and indicate the relevant turnover for those years.

    The system then calculates the total amount payable.

    Why Turnover Matters

    Outstanding annual return fees can depend on the information supplied for the relevant financial years.

    Therefore, applicants should not simply guess turnover figures to obtain a lower fee.

    The information supplied should accurately reflect the company’s circumstances and be supported by appropriate records.

    After entering the turnover information:

    1. Review each outstanding year.
    2. Enter the applicable turnover.
    3. Select Calculate.
    4. Review the resulting total cost.

    Consider the Cost Before Proceeding

    The total financial obligation may include more than the basic reinstatement cost because outstanding statutory filings can accumulate over several years.

    Before submitting the application, it is therefore useful to establish:

    • How many annual returns are outstanding;
    • What turnover was recorded for each relevant year;
    • Whether Beneficial Ownership declarations are outstanding;
    • Whether AFS/FAS filings are required; and
    • Whether additional compliance work will be necessary after reinstatement.

    Step 7: Submit the Reinstatement or Court Order Information

    The next stage requires information about the business.

    You will need to select the industry in which the company or close corporation was operating at the time of final deregistration.

    You must also provide the entity’s physical address in South Africa.

    The system can prepopulate some address information after the first part of the address is entered.

    Review the information carefully.

    If information is missing, complete it and select Save and Continue.


    CIPC Address and Google Maps Verification

    The CIPC guide contains an important warning concerning geographic location verification.

    The system uses Google Maps for location verification.

    This can create difficulties for entities located in rural areas or locations where mapping information is less precise.

    The CIPC guide specifically warns that entities in areas such as:

    • Polokwane;
    • Upington; and
    • Venda

    may encounter location-related errors.

    Applicants should therefore verify the location carefully.

    How to Enter the Coordinates

    CIPC’s guide provides the following general procedure:

    1. Select the correct province.
    2. Select the relevant city.
    3. Search for the company’s address using Google.
    4. Obtain the correct geographic coordinates.
    5. Copy and paste the coordinates into the relevant fields.
    6. Enter the street address.
    7. Enter the suburb.
    8. Enter the postal code.

    Why Location Accuracy Matters

    A seemingly minor address error can prevent the electronic application from progressing.

    This is especially important when the company’s registered or physical location is in a rural area.

    Rather than repeatedly submitting different coordinates, applicants should verify the address and geographic information before continuing.


    Director and Member Resolution

    The system will display the directors or members who resolved that the company or close corporation should be reinstated.

    The details can be viewed but cannot be amended during this stage.

    The relevant person should:

    1. Review the displayed information.
    2. Confirm that the information is correct.
    3. Click Resolve.

    Important: Amendments Come Later

    CIPC specifically states that amendments must be submitted after the company or close corporation has been fully reinstated.

    This is an important procedural point.

    If information needs to be amended, applicants should not assume that they can change everything during the reinstatement process.

    Complete the reinstatement first, and then submit the appropriate amendment, such as CoR39, where applicable.


    Confirm the Application

    After clicking Resolve, the system will display the application details.

    Review the information carefully before continuing.

    If everything is correct:

    Click Confirm.

    This is an important checkpoint because errors discovered later can cause additional delays or require further filings.


    Step 8: Complete OTP Verification

    CIPC requires OTP verification as part of the process.

    Once the OTP notification email has been received:

    1. Click Go To OTP Page.
    2. Capture the identity document details of the customer who owns the customer code.
    3. Enter the OTP received through email or SMS.
    4. Click Submit.

    The system provides OTP tabs that can be accessed through the relevant interface.

    After successful verification, the system will indicate that the OTP has been approved.

    How Long Is the OTP Valid?

    According to the CIPC guide, the OTP remains valid for 96 hours.

    This gives the applicant a limited window in which to complete the verification.

    It is therefore advisable to complete the OTP process promptly after receiving the notification.


    Step 9: Pay for the Reinstatement Application

    After submitting the application, payment must be completed.

    The CIPC guide instructs applicants to access the relevant application through the application history.

    The process involves:

    1. Going to the New Application page.
    2. Viewing Historical Application.
    3. Selecting the relevant application.
    4. Clicking the hand/View icon.
    5. Clicking the Cart icon.
    6. Reviewing applications awaiting payment.
    7. Selecting Checkout.
    8. Following the payment instructions.

    The system may take you directly to checkout after submission.

    If you want to make payment immediately but have left the checkout screen, you may need to return to the historical applications page or log in again.


    #Enter Your Card Details

    The payment process requires the applicant to capture the relevant card details.

    Once payment has been successfully completed, the application is processed.

    CIPC indicates that a notification will be received containing information such as:

    • Transaction information;
    • Application status; and
    • Confirmation documentation.

    However, payment alone does not mean that all reinstatement requirements have been completed.


    The Five-Day Payment Deadline

    One particularly important requirement in the CIPC guide is the payment deadline.

    Payment must be made within five working days.

    If payment is not made within this period:

    • The application will be cancelled; and
    • A new application must be started.

    Applicants should therefore avoid submitting an application if they are not ready to make the required payment.


    What Happens After Payment?

    This is where many applicants may misunderstand the reinstatement process.

    After payment, the applicant must still complete the outstanding statutory filings.

    CIPC instructs applicants to proceed with filing:

    • Outstanding Annual Returns;
    • The latest Beneficial Ownership Declaration; and
    • AFS/FAS.

    The goal is to bring the entity’s records up to date and ensure that the company’s or close corporation’s status changes to In Business.


    Why Annual Returns Matter After Reinstatement

    Reinstatement should not be viewed as a permanent solution if outstanding annual returns remain unresolved.

    The purpose of completing the outstanding filings is to bring the entity’s statutory records up to date.

    This is particularly important because failure to maintain annual return compliance can result in the entity being placed into deregistration processes again.

    A business that has gone through the effort and expense of reinstatement should therefore establish a compliance calendar immediately after restoration.


    Beneficial Ownership Declarations

    Another important post-reinstatement obligation is the filing of the latest Beneficial Ownership Declaration.

    Beneficial ownership information is an important component of South Africa’s corporate transparency and regulatory framework.

    Applicants should make sure that the required beneficial ownership information is correctly prepared and submitted.

    If there are changes to ownership or other company information, the appropriate amendment procedures should be followed after reinstatement where necessary.


    AFS/FAS Filing Requirements

    CIPC’s reinstatement procedure also refers to AFS/FAS filings.

    These filings may be necessary depending on the company’s or close corporation’s circumstances.

    Applicants should determine which financial statement requirements apply to their entity and ensure that outstanding submissions are dealt with as part of the post-reinstatement compliance process.


    When the Company Status Changes to “In Business”

    The ultimate objective is for the company’s or close corporation’s status to change to:

    In Business

    The reinstatement process should therefore be considered complete only after the required outstanding filings and declarations have been dealt with and the entity’s CIPC records reflect the appropriate status.


    What If You Paid Twice?

    CIPC’s guide also addresses double deductions.

    If an applicant experiences a double deduction, the guide instructs them to contact the Revenue Department regarding a refund.

    Supporting documentation should be provided.

    Applicants should retain evidence such as:

    • Payment confirmations;
    • Transaction information;
    • Application details; and
    • Any relevant CIPC correspondence.

    Keeping a complete payment trail can make it easier to resolve payment disputes.


    Step 10: Court Order Reinstatement

    CIPC provides a separate process for reinstatements involving court orders.

    When starting the application, select:

    Court Order

    You will then need to capture:

    • Court details; and
    • General information.

    The court order must be uploaded through the system.

    Upload the Court Order — Not All Court Documents

    CIPC specifically states that applicants should upload the court order, rather than simply uploading court documents generally.

    The CIPC back office will then confirm the validity of the court order.

    This distinction is important because uploading unrelated supporting documents instead of the actual order may delay the process.


    What Should a Court Order Say?

    Where a creditor or another party needs to enforce a liability against the deregistered entity, the court order must address more than the reinstatement itself.

    According to CIPC’s guidance, the order should also mandate the company or close corporation to comply with its outstanding statutory obligations.

    These can include:

    • Outstanding Annual Returns;
    • Beneficial Ownership Declaration;
    • AFS/FAS; and
    • Other information needed to bring CIPC records up to date.

    This is particularly important because an incomplete court order may not provide a durable solution.

    If the court order fails to require the necessary compliance, the entity may ultimately be placed back into Annual Return Deregistration after the order has been implemented.


    Step 11: Download the Application Documents

    After the reinstatement application or court order has been successfully processed, the relevant application documents can be downloaded.

    Use the Download Documents function provided by the system.

    It is advisable to retain copies of the documents for the company’s records.

    A proper reinstatement file should ideally contain:

    • The reinstatement application;
    • Payment confirmation;
    • CIPC confirmation;
    • Relevant resolutions;
    • Supporting evidence;
    • Annual return records;
    • Beneficial ownership documentation;
    • AFS/FAS documentation;
    • Court order, where applicable; and
    • Subsequent amendment documents.

    Step 12: Monitor the Application Status

    CIPC also allows customers to view the status of applications submitted under their customer code.

    Applicants should monitor the application rather than assuming that submission automatically means approval.

    Checking the status can help identify:

    • Pending actions;
    • Payment issues;
    • Validation problems;
    • Additional requirements; or
    • Successful completion.

    Common Mistakes to Avoid During Reinstatement

    The CIPC process contains several areas where applicants can easily make mistakes.

    1. Providing Incorrect Information

    Never provide information simply because it appears likely to satisfy the system.

    CIPC warns that false information can have criminal consequences.

    Always use accurate information supported by appropriate records.


    2. Guessing Historical Turnover

    Outstanding annual return calculations require turnover information.

    Do not guess historical figures.

    Instead, use reliable business records, accounting information and other documentation to establish the appropriate figures.


    3. Ignoring Outstanding Annual Returns

    Reinstatement does not eliminate the need to deal with outstanding annual returns.

    The applicant must complete the outstanding statutory obligations after the reinstatement application is processed.


    4. Forgetting Beneficial Ownership

    Applicants should not focus exclusively on annual returns.

    The latest Beneficial Ownership Declaration is also part of the post-reinstatement requirements identified by CIPC.


    5. Uploading the Wrong Court Documentation

    For court-order reinstatements, CIPC specifically instructs applicants to upload the court order.

    Uploading a collection of court documents without the actual order may not satisfy the requirement.


    6. Waiting Too Long to Pay

    The payment deadline is five working days.

    If the payment is not completed within that period, the application will be cancelled and the applicant will have to start a new application.


    7. Trying to Amend Company Details During Reinstatement

    CIPC’s guide states that amendments should be submitted after the entity has been fully reinstated.

    Therefore, applicants should first complete the reinstatement and then make the necessary amendments through the relevant CIPC process.


    Reinstatement vs Registering a New Company

    A key decision is whether to reinstate an existing entity or establish a new one.

    According to CIPC’s guide, where an entity was not in business and had no economic value at the time of final deregistration, a new company may be registered for R175.

    However, cost should not be the only consideration.

    Reinstatement May Make Sense When:

    • The existing company still has economic value.
    • The entity owns assets.
    • The company has contractual relationships that matter.
    • There are existing business interests associated with the entity.
    • Preserving the existing legal entity is commercially important.
    • A creditor or another party needs the entity restored to enforce an obligation.

    A New Company May Be More Appropriate When:

    • The old entity had no business activity.
    • The entity had no economic value at final deregistration.
    • There is no commercial reason to preserve the old entity.
    • Starting a new entity is simpler than resolving historic compliance issues.

    The right decision depends on the circumstances of the business and should be considered carefully.


    Practical Checklist for CIPC Reinstatement

    Before submitting a reinstatement application, use the following checklist.

    Before Starting

    • Confirm the company or close corporation’s CIPC status.
    • Determine whether the entity was in business or had economic value at final deregistration.
    • Gather evidence supporting that economic value.
    • Determine which annual returns are outstanding.
    • Establish accurate turnover figures for outstanding years.
    • Check Beneficial Ownership requirements.
    • Determine whether AFS/FAS filings are outstanding.
    • Confirm the directors or members involved in the reinstatement resolution.
    • Verify the company’s physical address.
    • Verify geographic coordinates where required.
    • Determine whether a court order is necessary.

    During the Application

    • Log into CIPC eServices.
    • Select Company and Close Corporation Reinstatements.
    • Accept the terms and electronic mandate.
    • Start or continue the application.
    • Select the correct reinstatement type.
    • Calculate the outstanding annual return costs.
    • Enter accurate business information.
    • Verify the address.
    • Complete the director/member resolution.
    • Confirm the application.
    • Complete OTP verification.
    • Make payment within five working days.

    After Payment

    • Confirm that the application was successfully processed.
    • File outstanding annual returns.
    • File the latest Beneficial Ownership Declaration.
    • File required AFS/FAS.
    • Monitor the company status.
    • Confirm that the status changes to In Business.
    • Download and retain the relevant documents.
    • Submit any required amendments after reinstatement.
    • Maintain ongoing annual return and statutory compliance.

    How Businesses Can Avoid Future Deregistration

    Reinstatement can be time-consuming and may involve significant compliance costs. The better approach is to prevent deregistration in the first place.

    Companies and close corporations should establish a regular compliance process.

    Maintain Annual Return Compliance

    Do not wait until the company is threatened with deregistration.

    Track annual return deadlines and ensure that required information is submitted on time.

    Keep Beneficial Ownership Information Updated

    Beneficial ownership requirements should form part of the company’s regular compliance activities.

    Whenever ownership or control information changes, determine whether a new declaration or amendment is required.

    Maintain Accurate Company Information

    Companies should also keep their registered information current.

    Changes involving directors, addresses or other company information should be dealt with through the appropriate CIPC amendment procedures.

    Keep Supporting Documents

    Businesses should maintain records supporting their statutory filings.

    Good recordkeeping becomes particularly valuable if CIPC requests evidence relating to a filing or reinstatement.


    Final Thoughts on CIPC Reinstatement

    The CIPC electronic reinstatement system provides a structured way for eligible deregistered companies and close corporations to apply for restoration.

    However, reinstatement should not be viewed as a simple administrative formality.

    The process involves a combination of:

    • Eligibility requirements;
    • Legal declarations;
    • Historical business information;
    • Annual return calculations;
    • Director or member resolutions;
    • Identity verification;
    • Payment;
    • Beneficial Ownership compliance;
    • Financial statement filings; and
    • Ongoing statutory compliance.

    The most important principle is accuracy. CIPC expressly warns against submitting false information, and applicants should retain evidence supporting the information supplied.

    Businesses should also distinguish between a standard reinstatement application and a court-order-based reinstatement. Where a creditor or another party is seeking to enforce a liability against a deregistered company or close corporation, the court order must properly address both reinstatement and the entity’s outstanding statutory obligations.

    Finally, once the entity has been reinstated, the work is not necessarily finished. Outstanding annual returns, Beneficial Ownership declarations and AFS/FAS requirements must still be addressed so that the entity’s records are brought up to date and its status can return to In Business.

    For businesses with valuable assets, contracts, liabilities or other economic interests, reinstatement may be an important route to restoring the existing entity. For entities that had no business activity or economic value at the time of final deregistration, however, CIPC’s guidance indicates that registering a new company may be an alternative.

    The safest approach is to assess the company’s history, gather supporting records, calculate all outstanding obligations and carefully follow the CIPC procedure rather than treating reinstatement as merely another online application.

  • Step-by-Step Guide to Voluntary Deregistration of a Company or Close Corporation in South Africa

    Step-by-Step Guide to Voluntary Deregistration of a Company or Close Corporation in South Africa

    Learn how to voluntarily deregister a South African company or close corporation through CIPC e-Services, including eligibility, OTP consent, objections, the two-month notification period, and document downloads.

    Voluntary deregistration is an important process for companies and close corporations (CCs) in South Africa that have stopped operating and no longer need to remain registered with the Companies and Intellectual Property Commission (CIPC). Rather than leaving an inactive entity on the register indefinitely, qualifying businesses can apply for voluntary deregistration through the CIPC e-Services platform.

    The CIPC Step by Step Guide: Automation of Company and Close Corporation Voluntary Deregistration eServices explains the requirements, application process, consent and OTP verification, notification period, objections, and downloading of application documents.

    However, voluntary deregistration should not be treated simply as a way to make an inactive company disappear. Directors and members need to make sure that the company’s affairs have been properly finalised before submitting the application. Outstanding assets, liabilities, disputes, or other unresolved matters can create problems even after the deregistration process has been completed.

    This guide explains the process in practical terms and highlights the issues directors, members, creditors, and other stakeholders should understand before starting a voluntary deregistration application.

    What Is Voluntary Deregistration?

    Voluntary deregistration is the process through which a company or close corporation requests that CIPC remove the entity from the active register.

    The process is intended for entities that meet specific conditions. According to the CIPC guide, a company or close corporation may apply for voluntary deregistration where:

    • The company or close corporation has ceased all business operations and has no assets; or
    • Due to inadequate assets, there is no reasonable probability of liquidation.
    • The entity may also qualify where it never traded and has no outstanding liabilities.

    The purpose of the process is therefore not merely to close an entity that is inconvenient to maintain. The entity must satisfy the conditions for voluntary deregistration and its affairs should be properly finalised.

    Voluntary Deregistration Is Not the Same as Simply Stopping Trading

    A common misconception is that a company is effectively closed when its owners stop doing business.

    That is not necessarily the case.

    A registered company or close corporation can remain on the CIPC register even when it has stopped trading. If the entity remains registered, it may continue to have regulatory, administrative, tax, or compliance obligations.

    Voluntary deregistration is a formal process. The owners must apply through the appropriate CIPC system and satisfy the applicable requirements.

    Who Can Apply for Voluntary Deregistration?

    The CIPC guide specifically deals with company and close corporation voluntary deregistration.

    Importantly, the process requires a mandate from the company or close corporation.

    A creditor, service provider, or other third party cannot simply apply for voluntary deregistration on behalf of a company or close corporation without the required mandate from the entity itself.

    This distinction matters because deregistration can affect the legal and practical position of the entity and its stakeholders.

    The Mandate Requirement

    When an applicant accepts the mandate and terms during the online application, the applicant confirms that they have the necessary authority to submit the voluntary deregistration application on behalf of the company or close corporation.

    The applicant also confirms that the information provided to CIPC is true and correct.

    This is not merely an administrative checkbox.

    Submitting false information to CIPC is a criminal offence under section 214 of the Companies Act. The CIPC guide states that false information may result in the withdrawal of filings and possible criminal prosecution.

    Applicants should therefore verify the information carefully before submitting the application.

    Conditions That Should Be Checked Before Applying

    Before starting the online application, directors and members should conduct a basic review of the entity’s affairs.

    1. Has the Business Actually Ceased Operations?

    The company or close corporation should no longer be conducting business if it is relying on cessation of operations as the basis for voluntary deregistration.

    If the business is still actively trading, voluntary deregistration may not be appropriate.

    2. Does the Entity Have Any Assets?

    The CIPC guide identifies the absence of assets as one of the circumstances in which voluntary deregistration may be available.

    Assets should therefore be reviewed before the application is submitted.

    This could include:

    • Cash in bank accounts
    • Vehicles
    • Equipment
    • Property
    • Stock
    • Investments
    • Money owed to the business
    • Intellectual property or other valuable business assets

    The exact treatment of particular assets can depend on the circumstances, so directors should not simply assume that an asset can be ignored because the business is inactive.

    3. Are There Outstanding Liabilities?

    Outstanding debts are another critical consideration.

    Potential liabilities can include:

    • Supplier debts
    • Loans
    • Employee-related amounts
    • Tax obligations
    • Rental obligations
    • Professional fees
    • Customer claims
    • Contractual obligations
    • Government-related liabilities
    • Legal claims

    The CIPC guide places significant emphasis on finalising the affairs of the entity before applying.

    4. Was the Entity Ever Active?

    An entity that never traded may potentially qualify where it has no outstanding liabilities.

    This can be particularly relevant for companies that were registered for a planned business venture but never actually commenced operations.

    However, “never traded” should not be confused with “has not traded recently.” The applicant should ensure that the facts accurately reflect the entity’s history.

    Directors and Members Can Remain Exposed to Unresolved Matters

    One of the most important warnings in the CIPC guide concerns the responsibility of directors and members.

    Directors and members should understand that they may be personally liable for unresolved matters after deregistration.

    This means that deregistration should not be viewed as a mechanism for simply escaping outstanding obligations.

    Why Finalising Affairs Matters

    Imagine that a company has stopped trading but still owes money to a supplier.

    If the company is deregistered while that matter remains unresolved, the supplier may have grounds to object to the deregistration or pursue other remedies available under the law.

    Similarly, unresolved tax, employee, contractual, or legal matters can create complications.

    For this reason, directors and members should use the pre-application stage to identify and resolve outstanding matters wherever possible.

    The CIPC Voluntary Deregistration Process

    The CIPC online process can be divided into several major stages:

    1. Log in to CIPC e-Services.
    2. Select the voluntary deregistration service.
    3. Accept the terms and mandate.
    4. Start a new application.
    5. Search for the company or close corporation.
    6. Confirm the entity’s details.
    7. Complete the application information.
    8. Complete the assets and liabilities checklist.
    9. Obtain the required consent from directors or members.
    10. Complete OTP verification.
    11. Submit the application.
    12. Allow the notification and objection period to run.
    13. Download the processed documents.
    14. Deal with any valid objections where applicable.

    Let’s look at each stage in detail.

    Step 1: Log in to CIPC e-Services

    The first step is to access the CIPC website and enter the e-Services platform.

    The process described in the CIPC guide is:

    1. Visit the CIPC website.
    2. Select Login / Register.
    3. Select the e-Services portal.
    4. Select Customer Login.
    5. Enter the customer code.
    6. Enter the password.
    7. Enter the security code.
    8. Read and accept the terms and conditions.
    9. Click Login.

    The applicant needs access to the appropriate CIPC customer account before beginning the transaction.

    What If You Forgot Your CIPC Password?

    The CIPC guide provides a Forgot Password option.

    If the registered cellphone number or email address is outdated, the applicant may need to use the relevant CIPC process for updating customer contact details.

    The guide indicates that the customer contact detail update form can be submitted together with a certified ID copy of the owner of the customer code to the CIPC password-reset email address.

    It is therefore worth resolving account-access problems before starting the deregistration application.

    Step 2: Select the Voluntary Deregistration Service

    Once logged in:

    1. Click Home.
    2. Select Transact from the main menu.
    3. On the main service dashboard, select More Services.
    4. Under Business Registration, select Company / CC Voluntary Deregistration.

    This takes the applicant into the voluntary deregistration workflow.

    Step 3: Read the Terms and Conditions and Mandate

    Before proceeding, CIPC requires the applicant to review the terms and conditions and mandate.

    Read these carefully.

    If the applicant agrees and has the appropriate authority, select I Agree and then Continue.

    Why the Mandate Matters

    By clicking the agreement, the applicant confirms that they have the necessary mandate under the applicable Companies Regulations to submit the application on behalf of the company or close corporation.

    They are also confirming that the information submitted is true and correct.

    Therefore, the person completing the application should not submit it casually or simply because they have access to the company’s information.

    Step 4: Start a New Application

    Select:

    New Voluntary Deregistration → New Application

    The system provides a search function.

    Enter the company’s or close corporation’s registration number in the required format, such as:

    2025/000123/07

    The system will then identify the relevant registered entity.

    What If There Is Already a Pending Application?

    The CIPC guide explains that a validation error can appear if there is already an existing voluntary deregistration application that has not been finalised.

    In such circumstances, the applicant should select the relevant pending application and complete the existing process instead of creating another application unnecessarily.

    This is an important point because submitting multiple applications may create confusion rather than speeding up the process.

    Step 5: Confirm the Company or Close Corporation Details

    The next stage requires the applicant to confirm the details of the company or close corporation.

    Pay particular attention to the contact details of the active directors or members.

    Why Contact Details Are So Important

    The CIPC process uses OTP verification to confirm consent.

    If the relevant director or member’s cellphone number or email address is outdated, that person may not receive the OTP required to confirm their consent.

    CIPC therefore instructs applicants to make sure the contact details are correct before continuing.

    If the details are incorrect, the application should not simply proceed with outdated information.

    The CIPC guide indicates that the details may need to be updated through:

    • A director amendment using CoR39, or
    • A member change using CK2.

    Once the records are correct, the applicant can continue with the deregistration application.

    Step 6: Complete the Voluntary Deregistration Application

    The applicant must provide additional information about the company or close corporation.

    Select the Relevant Industry

    The application asks the applicant to select the industry in which the company or close corporation conducted business at the time of final deregistration.

    Choose the option that best reflects the entity’s activities.

    This information contributes to CIPC’s administrative and statistical records.

    Enter the Physical Address

    The applicant must provide the South African physical address associated with the company or close corporation at the time of deregistration.

    The CIPC guide explains that the relevant address is the physical location where the majority of the administrative activities were undertaken.

    Importantly, the address supplied for this purpose is for statistical purposes and does not necessarily require a separate CoR21 or CK2A amendment.

    The system may prepopulate parts of the address after the first line is entered. Any missing information should be completed before continuing.

    Geographic Location and Google Maps Verification

    One unusual but important aspect of the process is the system’s use of Google Maps for location verification.

    The CIPC guide warns that entities in rural areas may experience errors during the location-verification process.

    This can be relevant to companies located in places where addresses are less standardised or where mapping data is incomplete.

    How to Enter the Location

    The guide recommends the following process:

    1. Select the relevant province.
    2. Select the city associated with the company.
    3. Search the company’s address using Google Maps.
    4. Obtain the correct geographic coordinates.
    5. Copy the latitude and longitude into the relevant CIPC fields.
    6. Enter the street address.
    7. Enter the suburb.
    8. Enter the postal code.

    Applicants should verify that the coordinates actually correspond to the business location rather than copying coordinates from an unrelated location.

    This is particularly important where the system produces a location-validation error.

    Complete the Assets and Liabilities Checklist

    The assets and liabilities checklist is one of the most important parts of the application.

    It is intended to help directors and members confirm that the affairs of the company or close corporation have been properly finalised before voluntary deregistration is requested.

    The checklist should therefore be treated as a genuine review of the entity’s financial position rather than just another form field.

    Questions to Consider Before Completing the Checklist

    Before confirming the information, directors or members should consider whether the entity has:

    • Any bank balances
    • Outstanding invoices
    • Unpaid suppliers
    • Loans
    • Assets
    • Stock
    • Vehicles or equipment
    • Employees or employee claims
    • Tax matters
    • Legal disputes
    • Contractual obligations
    • Other outstanding debts or claims

    If something remains unresolved, it is sensible to investigate the matter before proceeding.

    Personal Liability Warning

    The CIPC guide specifically warns that directors and members may be personally liable for outstanding matters at the time of deregistration.

    This is arguably one of the most important practical lessons from the entire process:

    Deregistration should be the final administrative step after the company’s affairs have been dealt with, not a substitute for dealing with those affairs.

    Select the Directors or Members Who Have Consented

    After completing the application information and disclaimer, the applicant must identify the directors or members who have consented to voluntary deregistration.

    The selected individuals will then be required to confirm their consent through OTP verification.

    Minimum Consent Requirement

    The CIPC guide states that a minimum of 50% of the active directors or members must consent to the voluntary deregistration application.

    This means that applicants should ensure that the relevant directors or members are available and that their CIPC contact information iscurrent.

    Click Continue after selecting the appropriate consenting directors or members and proceed through the confirmation prompts.

    Step 7: Complete OTP Verification

    OTP verification is an important part of the application because it provides an electronic confirmation of the relevant consent.

    Once the OTP notification email is received, the applicant can select Go To OTP Page.

    The CIPC guide requires the applicant to capture:

    • The identity document details of the customer-code owner; and
    • The relevant email or SMS OTP.

    The applicant then selects Submit.

    Completing the OTP Holder Details

    The OTP page contains tabs that can be accessed through the relevant interface.

    The applicant must complete the OTP holder information.

    Once the OTP has been successfully verified, the red indicator changes to green, showing that the OTP has been approved.

    The application can then be submitted.

    How Long Is the OTP Valid?

    According to the CIPC guide, the OTP is valid for 96 hours.

    Applicants should therefore make sure that the required directors or members are available to complete the verification process within the validity period.

    Step 8: CIPC Notification and Objection Period

    Successfully submitting the application does not mean that the company or close corporation is immediately finally deregistered.

    The entity first enters the deregistration process.

    CIPC issues notifications to active directors, members, and other relevant stakeholders, allowing objections to be raised.

    The CIPC guide states that final deregistration will occur automatically after a two-month notification period, provided that no successful objection is received.

    Why the Two-Month Period Matters

    The notification period provides an opportunity for parties who may have an interest in the entity to raise legitimate concerns.

    This could be particularly important where:

    • A creditor believes money is still owed;
    • A service provider has an unresolved claim;
    • A contractual dispute remains outstanding;
    • An asset has not been properly dealt with;
    • A stakeholder believes the company should not be deregistered.

    For directors and members, the practical lesson is straightforward: resolve known issues before submitting the application.

    Doing so can reduce the likelihood of a successful objection.

    What Happens If Someone Objects?

    CIPC provides a separate process for objecting to a voluntary deregistration application.

    An objector should follow the initial steps of the CIPC e-Services process and select:

    Voluntary Deregistration Objection → New Application

    The objector must search for the entity using its full registration number.

    Information Required for an Objection

    The objection requires:

    1. The reason for the objection;
    2. A certified copy of the objector’s ID or passport; and
    3. Evidence supporting the reason for the objection.

    The objection is then submitted to CIPC.

    According to the guide, the objection is referred to the back office for confirmation.

    Why Evidence Matters

    An objection should not simply state that someone disagrees with the deregistration.

    The objector should provide a clear reason and supporting evidence.

    For example, if the objection concerns an outstanding debt, supporting documentation could potentially help demonstrate the existence of the underlying claim.

    The exact legal circumstances and remedies available will depend on the nature of the dispute.

    Step 9: Download the Deregistration Documents

    After the application has been successfully processed, the relevant documents can be downloaded from CIPC.

    The guide instructs users to:

    1. Go to Historical Applications.
    2. Select the relevant transaction.
    3. Click Download Documents.
    4. Select Process.

    The resulting documentation should be retained as part of the entity’s records.

    Why You Should Keep the Documents

    Even after deregistration, it is sensible to maintain copies of:

    • The deregistration application;
    • Confirmation of submission;
    • Relevant CIPC correspondence;
    • Consent and verification records;
    • The final deregistration documentation;
    • Evidence showing that outstanding affairs were finalised.

    Maintaining an organised record can be valuable if a question arises later about the entity’s status or historical affairs.

    Voluntary Deregistration vs. Liquidation

    Voluntary deregistration should not be confused with liquidation.

    The CIPC conditions refer to circumstances where the entity has no assets or, because of inadequate assets, there is no reasonable probability of liquidation.

    This distinction is important.

    Liquidation

    Liquidation is generally associated with the formal winding-up of an entity’s affairs, particularly where assets and liabilities need to be dealt with through a formal process.

    Voluntary Deregistration

    Voluntary deregistration is aimed at qualifying entities whose affairs are sufficiently finalised for deregistration to be appropriate.

    Therefore, a company with substantial assets, significant debts, or complicated unresolved affairs should not assume that voluntary deregistration is the correct solution.

    Where there are substantial unresolved liabilities or disputes, professional legal or accounting advice may be appropriate.

    Common Mistakes to Avoid

    The CIPC procedure appears straightforward, but several practical problems can delay the process.

    1. Applying Without Checking for Assets

    Do not automatically assume that an inactive business has no assets.

    Check bank accounts, equipment, vehicles, receivables, stock, investments, and other property.

    2. Ignoring Outstanding Liabilities

    An entity may have stopped trading but still owe money.

    Outstanding obligations should be investigated and dealt with before applying.

    3. Using Outdated Director or Member Contact Details

    This can prevent OTPs from reaching the relevant people.

    Check the CIPC record before starting the application.

    4. Assuming Submission Means Immediate Deregistration

    Submission starts the process. It does not mean final deregistration occurs immediately.

    The CIPC guide provides for a two-month notification period during which objections can be raised.

    5. Providing Incorrect Information

    Applicants should never guess information merely to get through the online system.

    False information submitted to CIPC can have serious consequences, including potential criminal prosecution.

    6. Ignoring the Geographic Location Requirement

    Incorrect coordinates can cause problems with CIPC’s Google Maps location verification.

    This can be particularly relevant for businesses in rural areas.

    7. Failing to Keep Proof of the Process

    After completion, download and retain the relevant documents.

    Business records should not simply be discarded because the entity has been deregistered.

    A Practical Pre-Deregistration Checklist

    Before starting the CIPC application, directors or members can use the following checklist.

    Corporate Affairs

    • The company or close corporation has ceased operations.
    • The entity qualifies for voluntary deregistration.
    • The appropriate person has the necessary mandate.
    • The CIPC registration information has been reviewed.
    • There is no conflicting pending application.

    Financial Affairs

    • Assets have been identified.
    • Bank balances have been checked.
    • Outstanding receivables have been reviewed.
    • Supplier debts have been reviewed.
    • Loans and other liabilities have been checked.
    • Employee-related matters have been considered.
    • Tax and other regulatory matters have been reviewed.

    CIPC Information

    • Active directors or members are correctly reflected.
    • Their cellphone numbers are current.
    • Their email addresses are current.
    • Required consent can be obtained.
    • At least 50% of active directors or members can provide consent.
    • The physical address is available.
    • Correct geographic coordinates can be obtained.

    Application

    • Terms and conditions have been read.
    • Mandate has been confirmed.
    • Industry information has been completed.
    • Assets and liabilities checklist has been completed accurately.
    • OTP verification has been completed.
    • Application submission has been confirmed.
    • The two-month notification period has been noted.

    After Processing

    • Historical Applications have been checked.
    • Deregistration documents have been downloaded.
    • Copies have been securely stored.

    How Long Does Voluntary Deregistration Take?

    The CIPC guide provides a specific two-month notification period before automatic final deregistration, provided that no successful objection is received.

    This means applicants should not plan around an assumption that the entity will disappear from the register immediately after submitting the application.

    The overall practical timeframe can also depend on factors such as:

    • Whether the application information is correct;
    • Whether director or member details are up to date;
    • Whether OTP verification is completed successfully;
    • Whether an existing application is pending;
    • Whether CIPC requires additional processing;
    • Whether an objection is submitted.

    For this reason, businesses planning a corporate closure should allow sufficient time.

    Why Businesses Should Not Wait Until the Last Minute

    A company that is no longer trading may be tempted to postpone deregistration indefinitely.

    That can create unnecessary administrative complications.

    A better approach is to make corporate housekeeping part of the business’s closure process:

    1. Decide to stop operations.
    2. Review the company’s assets and liabilities.
    3. Finalise outstanding affairs.
    4. Review CIPC information.
    5. Update director or member details if necessary.
    6. Prepare the voluntary deregistration application.
    7. Obtain the required consent.
    8. Submit the application.
    9. Monitor the notification period.
    10. Download and retain the final documents.

    This creates a much cleaner exit from the business.

    What Directors and Members Should Understand

    The voluntary deregistration process places significant responsibility on the people managing or owning the entity.

    Directors and members should not interpret deregistration as a declaration that every historical issue has disappeared.

    The CIPC guide explicitly warns that directors and members may remain personally liable for unresolved matters.

    Therefore, before applying, they should ask a simple question:

    “If someone asked me today whether this company has any outstanding assets, liabilities, claims, or obligations, could I demonstrate that everything has been properly dealt with?”

    If the answer is no, the entity’s affairs may need further attention before deregistration.

    Final Thoughts

    Voluntary deregistration can be a practical way of closing a company or close corporation that has genuinely ceased operations and meets the applicable CIPC requirements. The online process is structured around a series of steps, beginning with CIPC e-Services login and ending with final deregistration after the prescribed notification period.

    The most important part of the process, however, happens before the online application is submitted.

    Directors and members should make sure that the entity has no unresolved assets, liabilities, claims, or other outstanding matters. They should also ensure that CIPC’s director or member contact information is accurate so that OTP verification can be completed successfully.

    The process can be summarised as follows:

    Check eligibility → finalise the company’s affairs → verify CIPC details → submit the application → obtain the required OTP consent → allow the two-month notification period → address any valid objections → download the final documents.

    For straightforward dormant entities with no assets or liabilities, voluntary deregistration can provide a clear route toward formally closing the business. For entities with significant assets, debts, disputes, or complicated affairs, however, directors and members should consider obtaining professional legal or accounting advice before proceeding.

    Ultimately, the goal should not simply be to get a company deregistered. The goal should be to close the company’s affairs responsibly and then complete the deregistration process correctly.

  • CIPC External Company Registration in South Africa: A Step-by-Step Guide to the Automated Process

    CIPC External Company Registration in South Africa: A Step-by-Step Guide to the Automated Process

    CIPC External Company Registration in South Africa: A Step-by-Step Guide to the Automated Process

    Registering an external company in South Africa is an important step for a foreign business that wants to establish a formal presence in the country. The Companies and Intellectual Property Commission (CIPC) has introduced an automated online process that allows applicants and authorised filers to capture and submit external company registration information electronically.

    CIPC’s Step by Step Guide External Company Automation provides a practical view of how the process works, from accepting the POPIA consent and Companies Act declarations through to capturing company information, appointing representatives and directors, adding auditors, uploading supporting documents, completing OTP verification and submitting the application for CIPC back-office approval.

    For foreign businesses, understanding this process is particularly important because an external company registration is not simply a matter of entering the foreign company’s name into an online form. The application requires information about the original jurisdiction, South African address, foreign address, representative, directors, company secretary where applicable, auditor where applicable, and supporting corporate documents.

    This guide explains the process in detail and highlights some of the practical issues applicants should consider before starting an application.


    What Is an External Company?

    An external company is essentially a foreign company that conducts or intends to conduct business activities in South Africa and therefore needs to be registered with the South African corporate regulator.

    This is different from incorporating a completely new South African company.

    For example, suppose a company was originally incorporated in Namibia, the United Kingdom, the United States, Mauritius or another jurisdiction. Instead of creating an entirely separate South African company, the foreign business may establish its South African presence through the external-company framework where appropriate.

    The CIPC automated application specifically provides fields for information such as:

    • Enterprise name
    • Enterprise type
    • Enterprise email
    • Enterprise telephone number
    • Date of incorporation in the original jurisdiction
    • Financial year-end
    • Industry
    • Jurisdiction of original incorporation
    • Jurisdiction of current incorporation
    • South African physical and postal addresses
    • Foreign physical address

    The guide therefore demonstrates that CIPC’s process is designed around the existing foreign legal entity, rather than treating the application as a normal South African incorporation.


    Why the Automated CIPC Process Matters

    The automation of the external-company registration process is significant because international businesses often have more complicated registration requirements than locally incorporated companies.

    A foreign business may have:

    1. A foreign incorporation certificate.
    2. A foreign constitution or governance document.
    3. Directors residing in different countries.
    4. A foreign parent company or corporate director.
    5. A South African representative.
    6. A South African business address.
    7. Foreign-language corporate documents.
    8. A company secretary or auditor where applicable.

    The CIPC workflow brings many of these components into one electronic application.

    Rather than treating the application as a simple registration form, applicants should think of it as a corporate information and verification process.

    That distinction can save considerable time.


    Step-by-Step CIPC External Company Registration Process

    Step 1: Accept POPIA Consent

    The process begins with a POPIA consent screen.

    The CIPC service explains that by using its website, e-services, BizPortal and other processes, users agree to the processing of personal information where required by law. The applicant must accept the relevant consent before proceeding.

    Accept POPIA Consent
    Accept POPIA Consent

    This is an important first step because the registration process requires personal information relating to company officials and other individuals.

    Information that may be processed includes:

    • Identification information
    • Names
    • Dates of birth
    • Contact information
    • Addresses
    • Citizenship
    • Director information
    • Representative information
    • Company secretary information
    • Other information required for verification

    Applicants should therefore ensure that the people whose information is being submitted understand that their information is being used as part of the corporate registration process.


    Step 2: Agree to the Companies Act Terms

    Step 2: Agree to the Companies Act Terms
    Step 2: Agree to the Companies Act Terms

    After the initial consent screen, the applicant is required to acknowledge the relevant Companies Act terms before continuing.

    The system presents an agreement which must be accepted before the applicant can proceed with the registration service.

    This may appear to be a minor administrative step, but it establishes an important principle:

    The person submitting the application is expected to understand and comply with the legal requirements associated with the registration.

    For this reason, the filer should not simply enter information supplied by a client without checking whether the information is consistent with the foreign company’s official records.


    Step 3: Select “New External Company”

    The CIPC workflow then provides an option to create a New External Company.

    Selecting this option starts the external-company registration application.

    At this point, it is useful to have the foreign company’s corporate documents available because many of the subsequent fields should correspond directly with those documents.

    Select "New External Company"
    Select “New External Company”

    Step 4: Enter the External Company Details

    The first major section is External Company Details.

    The CIPC example shows fields for:

    • Enterprise name
    • Enterprise type
    • Enterprise email
    • Enterprise telephone
    • Date of incorporation in the original jurisdiction
    • Financial year-end
    • Industry
    • Jurisdiction of original incorporation
    • Jurisdiction of current incorporation

    The enterprise type is identified as External Company in the example.

    Enter the External Company Details
    Enter the External Company Details

    Why the original incorporation date matters

    The date of incorporation should correspond to the company’s official foreign registration records.

    For example, if a Namibian company was incorporated on 15 March 2020, the applicant should not enter the date on which the company decided to enter South Africa. The relevant information concerns the company’s incorporation in its original jurisdiction.

    Choosing the correct jurisdiction

    The application distinguishes between:

    • Jurisdiction of Original Incorporation
    • Jurisdiction of Current Incorporation

    These fields are particularly relevant where a company has undergone a migration, continuation, redomiciliation or similar corporate restructuring.

    The applicant should therefore avoid assuming that these two fields are always identical.


    Step 5: Provide the South African Physical and Postal Address

    Provide the South African Physical and Postal Address
    Provide the South African Physical and Postal Address

    The application requires a physical address in South Africa and a postal address in South Africa.

    The CIPC guide illustrates fields including:

    • Street address
    • Country
    • Province
    • City
    • Suburb
    • Postal code

    The system also includes a copy function that can make it easier to duplicate address information when the physical and postal addresses are the same.

    Why the South African address deserves attention

    A foreign company entering South Africa should not treat the local address as a purely cosmetic field.

    Businesses should ensure that the address is legitimate and appropriate for the company’s South African activities.

    An applicant should carefully consider:

    • Whether the address is physically valid.
    • Whether correspondence can be received there.
    • Whether the address belongs to the company, its representative or an authorised service provider.
    • Whether supporting proof of the address can be supplied if required.
    • Whether the address is consistent with other regulatory registrations.

    A virtual office can sometimes be useful for international businesses, but applicants should understand the distinction between having a legitimate registered address and merely purchasing an address for correspondence.


    Step 6: Enter the Business Coordinates

    Enter the Business Coordinates
    Enter the Business Coordinates

    The automated form also includes a Business Coordinates section.

    The example provides fields for:

    • Latitude
    • Longitude

    The CIPC guide shows these coordinates being entered as part of the company information.

    This demonstrates that the automated system is designed to collect increasingly structured information about the business rather than relying solely on free-text addresses.

    Practical advice

    Before submitting an application, make sure the coordinates correspond with the South African business address being provided.

    Incorrect coordinates can create inconsistencies between the address and the geographic information recorded in the application.


    Step 7: Provide the Foreign Company’s Address

    Provide the Foreign Company's Address
    Provide the Foreign Company’s Address

    The application also asks for the company’s physical address outside South Africa.

    The guide illustrates fields for:

    • Street address
    • Suburb
    • Country
    • Province or equivalent
    • City
    • Postal code

    The example uses a foreign address in the United States.

    This is another important difference between an external company and an ordinary South African company.

    The regulator needs information about the foreign legal entity behind the South African registration.

    Therefore, applicants should have the foreign company’s official address readily available.


    Step 8: Appoint and Verify the Representative

    Appoint and Verify the Representative
    Appoint and Verify the Representative

    The CIPC workflow includes a Representative Appointment section.

    The representative’s personal information must be captured, including information such as:

    • Citizenship
    • Surname
    • Name
    • Date of birth
    • Occupation
    • Title
    • Email
    • Cellphone number
    • Gender
    • Disability status
    • Demographic information
    • Appointment date

    The application also provides for the representative’s physical and postal address.

    Identification verification

    The guide shows an identification verification step requiring an identification number and identification issue date before verification can be completed.

    This is an important part of the automated system.

    It means that a filer should not wait until the final submission stage to discover that the representative’s identification details cannot be verified.

    Best practice

    Before beginning the application, obtain:

    1. The representative’s correct identification information.
    2. The relevant identification issue date.
    3. Current contact details.
    4. The correct appointment date.
    5. A reliable email address and cellphone number.

    Small discrepancies can create unnecessary delays.


    Step 9: Decide Whether to Appoint a Company Secretary

    Decide Whether to Appoint a Company Secretary
    Decide Whether to Appoint a Company Secretary

    The workflow asks whether the external company will be appointing a company secretary.

    If the answer is yes, the system proceeds to company-secretary information.

    The CIPC example shows personal information fields similar to those used for other company officials, including:

    • Citizenship
    • Surname
    • Names
    • Date of birth
    • Occupation
    • Title
    • Email
    • Cellphone
    • Gender
    • Disability information
    • Demographic information
    • Appointment date

    The secretary’s address information must also be captured.

    Do not confuse the company secretary with the representative

    These are separate roles in the application.

    A company secretary is not automatically the same person as the external company’s representative.

    Businesses should therefore determine the appropriate appointments before starting the application.


    Step 10: Add Directors

    The application then moves into the Director Appointment section.

    The guide provides an option to:

    • Add a director
    • Go back
    • Continue

    This allows multiple directors to be captured.

    The system distinguishes different types of director arrangements.

    For example, the guide demonstrates a director information screen containing fields for:

    • Enterprise number
    • Enterprise name
    • Country of residence
    • Director type
    • Appointment date
    • Email
    • Cellphone
    • Address information

    The director type can include options such as a trust, external/overseas entity or director associated with companies and close corporations, depending on the circumstances.


    Step 11: Understand Natural-Person and Juristic Directors

    One of the more interesting features demonstrated in the guide is that the application separates natural person directors and juristic directors.

    A natural person is an individual.

    A juristic person is a legal entity that can hold rights and obligations under law.

    The example shows a company-related entity appearing as a juristic director, alongside a natural person director.

    This is particularly relevant for international corporate structures.

    For example, a foreign group may have:

    Foreign parent company → South African external company → local operations

    If a corporate entity forms part of the director structure, the applicant needs to understand exactly how that entity should be captured.

    Incorrectly treating a juristic director as an ordinary individual can create problems later.


    Step 12: Deal With Foreign Directors

    The guide specifically includes a Director Foreigner Appointment section.

    The system asks whether a passport will be used to appoint a director.

    If a passport is being used, the guide notes that the passport must have been approved through the Foreigner Assurance process.

    The verification process includes:

    • Passport number
    • Passport expiry date
    • Verification

    This is particularly important for international businesses because a foreign director may not have a South African identity document.

    Practical lesson for international applicants

    Do not assume that simply having a valid passport means the director can immediately be added to the CIPC application.

    The foreigner-assurance component needs to be considered beforehand.

    Where multiple foreign directors are involved, it is sensible to prepare their documentation and verification requirements before starting the application.


    Step 13: Capture Director Personal Information

    For natural-person directors, the system captures personal information such as:

    • Citizenship
    • Surname
    • Name
    • Date of birth
    • Occupation
    • Director type
    • Email
    • Cellphone
    • Gender
    • Disability information
    • Demographic information
    • Title
    • Appointment date

    The guide also demonstrates different director classifications, including director, non-executive director and alternate director.

    The director’s physical and postal addresses are then captured separately.

    Once directors have been added, the application displays them in a table showing information such as:

    • Residency
    • Identification
    • Name
    • Type
    • Edit/remove controls

    This gives the filer an opportunity to review the information before moving forward.


    Step 14: Decide Whether an Auditor Will Be Appointed

    The application then includes a Company Auditor Appointment section.

    The filer is asked whether a company auditor will be appointed.

    If the answer is yes, the system requires auditor information. The example shows a profession number and appointment date, followed by a search function.

    The system then displays confirmation of the auditor associated with the enterprise.

    Why the search function is useful

    Rather than relying entirely on manually typed auditor details, the workflow demonstrates a search-and-confirm mechanism.

    This can reduce the risk of entering an incorrect professional registration number or auditor name.

    Applicants should nevertheless verify the information before saving the appointment.


    Step 15: Prepare the Supporting Documentation

    One of the most important parts of the process is the Supporting Documentation section.

    The CIPC guide states that supporting documents are compulsory and provides a list that includes:

    • Mandate for the authorised filer
    • Resolution from the directors
    • Certified Certificate of Incorporation
    • Certified Governance / Constitutional Document
    • Certified proof of business address within South Africa
    • Certified Translation Certificate, where documents are in a foreign language
    • Security Register, where applicable to profit external companies

    This is arguably one of the most important sections of the entire process.

    An applicant can complete the online form perfectly and still encounter problems if the supporting documents are incomplete, incorrectly certified or inconsistent with the information entered into the application.


    What Documents Should a Foreign Business Prepare?

    Before starting an external company application, I recommend creating a document checklist.

    1. Certificate of Incorporation

    A certified copy of the foreign company’s certificate of incorporation should be prepared.

    The company’s name, registration number and incorporation date should correspond with the information entered into the CIPC application.

    2. Constitutional or Governance Document

    The guide refers to a certified governance or constitutional document.

    Depending on the foreign jurisdiction, this could relate to the company’s:

    • Constitution
    • Articles
    • Memorandum
    • Charter
    • Governance instrument
    • Other founding corporate document

    The terminology varies between jurisdictions.

    3. Directors’ Resolution

    A resolution from the directors is listed among the compulsory supporting documents.

    The resolution should properly authorise the relevant corporate action and should be consistent with the application.

    4. Authorised Filer’s Mandate

    The authorised filer needs a mandate.

    This is particularly relevant where a professional service provider, consultant, attorney, accountant or corporate services provider is submitting the application on behalf of the foreign company.

    5. South African Proof of Business Address

    The application requires certified proof of the business address in South Africa.

    This should be arranged before submission rather than treated as an afterthought.

    6. Certified Translation

    If corporate documents are written in a foreign language, the CIPC guide specifically identifies a certified translation certificate as mandatory in that situation.

    This is particularly relevant to companies originating from non-English-speaking jurisdictions.

    7. Security Register

    The guide identifies a security register as mandatory only for Profit External Companies in the circumstances described in the process.

    Applicants should therefore determine whether this requirement applies to their specific registration before submitting the application.


    Step 16: Upload the Documents

    After preparing the required documentation, the applicant uploads the files to the system.

    The guide demonstrates a document table showing:

    DocumentExample Type
    Certificate of incorporationCertified Certificate of Incorporation
    Governance documentCertified Constitution
    Foreign-language documentationCertified Translation Certificate
    Security documentationSecurity Register
    AuthorisationMandate

    The system provides options to add a new document, go back or continue.

    A useful document-management strategy

    Instead of uploading files with vague names such as:

    • document1.pdf
    • scan.pdf
    • newfile.pdf

    use descriptive names such as:

    • Certified_Certificate_of_Incorporation.pdf
    • Directors_Resolution.pdf
    • Certified_Constitution.pdf
    • South_African_Address_Proof.pdf
    • Filer_Mandate.pdf
    • Certified_Translation.pdf

    This makes it easier for everyone involved to identify the documents and reduces administrative confusion.


    Step 17: Review the Application

    Before submission, CIPC displays a summary of the company information, company officials, auditor and supporting documentation.

    The example shows a company information section containing:

    • Application ID
    • Enterprise name
    • Enterprise type

    The company-officials section then lists the relevant officials and their roles.

    The review stage is extremely important.

    Check the following before confirming:

    • Foreign company’s legal name
    • Original jurisdiction
    • Incorporation date
    • Financial year-end
    • South African address
    • Foreign address
    • Representative
    • Directors
    • Juristic directors
    • Company secretary
    • Auditor
    • Appointment dates
    • Identification information
    • Passport information
    • Supporting documents

    A good rule is:

    Never submit an external-company application simply because every mandatory field has been completed. Submit it only after every field has been reconciled against the company’s official records.


    Step 18: Confirm the Application

    The final review screen provides a Confirm option.

    Once the filer confirms the information, the application proceeds to submission.

    This is effectively the point at which the filer is saying that the captured information and documentation are ready for CIPC processing.


    Step 19: Submit the Application

    After submission, the system provides an application status and reference number.

    The CIPC example states that the application has been submitted successfully and provides a reference number.

    The application then moves into the next stage of processing.

    However, submission does not necessarily mean immediate registration.

    This is an important distinction for applicants.


    Step 20: Complete OTP Verification

    One of the most important features of the automated process is OTP verification.

    The guide demonstrates that OTPs are required for the filer and appointed officials. Each official receives an email or SMS containing a verification mechanism.

    The system then records which officials have consented.

    The guide shows OTP approval information for company officials, with successful approvals represented in the system.

    Why OTP verification matters

    This creates an additional authentication and consent mechanism.

    It means that the filer should make sure all relevant officials:

    • Have access to their email or cellphone.
    • Know that an OTP will be sent.
    • Are available to complete the verification.
    • Understand the application being submitted.
    • Complete the verification within the applicable validity period.

    OTPs Can Expire

    The CIPC example indicates that OTPs have a limited validity period and that applications can become void after OTPs expire, requiring resubmission. It also indicates that payment instructions are issued after OTP consent.

    This has a practical implication for professional filers.

    If you are submitting an application on behalf of an overseas client, do not assume that you can collect all the information today and complete the OTP process weeks later.

    Coordinate the process.

    A sensible workflow is:

    1. Prepare the documents.
    2. Complete the application.
    3. Inform all officials.
    4. Submit the application.
    5. Coordinate OTP verification immediately.
    6. Monitor the application.
    7. Respond to CIPC queries promptly.
    8. Make payment when instructed after successful approval.

    Step 21: CIPC Back-Office Approval

    Once the OTPs have been successfully verified, the application is sent to the Back Office for approval.

    The guide’s example states that the Back Office may respond with queries if necessary. After successful approval, the applicant receives an email to make payment.

    This means there is an important distinction between:

    Application submitted → OTP verified → Back Office review → Approval → Payment

    Applicants should not automatically interpret successful online submission as final approval.


    Step 22: Respond to CIPC Queries

    The guide specifically indicates that the Back Office may issue queries.

    This is where document preparation becomes especially important.

    A query may arise because:

    • A document is unclear.
    • Information does not match.
    • A corporate document is incomplete.
    • A director’s information needs clarification.
    • A foreign document requires additional evidence.
    • The South African address needs attention.
    • An official’s information does not verify correctly.
    • A required supporting document is missing.

    How to handle a query

    Do not respond casually.

    Instead:

    1. Read the query carefully.
    2. Identify exactly what CIPC is requesting.
    3. Compare the request against the original corporate documents.
    4. Obtain the necessary correction or supporting evidence.
    5. Ensure the replacement document is properly certified where required.
    6. Submit the response through the prescribed process.
    7. Keep a copy of the response for your corporate records.

    Step 23: Payment After Approval

    The guide demonstrates that payment instructions are issued after successful approval.

    This is an important feature to understand when budgeting for the registration.

    Applicants should distinguish between:

    • Preparing the application
    • Submitting the application
    • OTP verification
    • Back-office approval
    • Payment
    • Finalisation of the registration

    The exact fee applicable to an external-company registration should always be checked against the current CIPC fee schedule rather than relying on an old guide, quotation or third-party website.


    The Complete External Company Registration Workflow

    The process can be summarised as follows:

    1. POPIA consent
    ↓
    2. Accept Companies Act terms
    ↓
    3. Select New External Company
    ↓
    4. Capture foreign company details
    ↓
    5. Capture South African address
    ↓
    6. Capture foreign address
    ↓
    7. Capture business coordinates
    ↓
    8. Appoint representative
    ↓
    9. Verify representative
    ↓
    10. Add company secretary where applicable
    ↓
    11. Add directors
    ↓
    12. Deal with juristic directors where applicable
    ↓
    13. Verify foreign directors where applicable
    ↓
    14. Add auditor where applicable
    ↓
    15. Upload supporting documents
    ↓
    16. Review application
    ↓
    17. Confirm and submit
    ↓
    18. Complete OTP verification
    ↓
    19. Back-office review
    ↓
    20. Respond to queries if required
    ↓
    21. Receive approval
    ↓
    22. Make payment as instructed

    This sequence is based on the workflow illustrated in the CIPC automation guide.


    Common Mistakes to Avoid

    1. Starting Without the Foreign Corporate Documents

    One of the biggest mistakes is starting the online application before obtaining the foreign company’s documents.

    The application requires information that should normally be verified against official records.

    Better approach

    Prepare the corporate document pack first.


    2. Entering Information That Does Not Match the Certificate

    For example, the company name entered into CIPC should not casually differ from the legal name appearing on the foreign certificate.

    The same principle applies to:

    • Incorporation date
    • Registration number
    • Jurisdiction
    • Directors
    • Company address
    • Corporate structure

    Consistency is essential.


    3. Ignoring Foreign Directors’ Verification Requirements

    Foreign directors may require passport and foreigner-assurance verification.

    The CIPC guide specifically warns that a passport used for a foreign director appointment must have been approved through the Foreigner Assurance process.

    Do not leave this until the final submission.


    4. Forgetting the Translation Requirement

    If a foreign company’s documentation is not in an accepted language, the applicant may need a certified translation.

    The CIPC guide specifically identifies a certified translation certificate as mandatory when documents are in a foreign language.


    5. Using an Incorrect South African Address

    A South African external company registration requires a local business address.

    Do not simply insert an address without confirming that it can support the company’s registration and related regulatory obligations.


    6. Using the Wrong Director Classification

    The application provides different director types.

    This is particularly important where the company has:

    • Natural-person directors
    • Corporate directors
    • Non-executive directors
    • Alternate directors
    • Foreign directors
    • Other specialised arrangements

    Review the corporate structure carefully before selecting an option.


    7. Delaying OTP Verification

    OTP verification is not something to postpone unnecessarily.

    The guide shows that OTPs have a validity period and that expired OTPs can result in the application becoming void and requiring resubmission.


    A Practical Pre-Application Checklist

    Before beginning the CIPC external-company application, I recommend preparing the following checklist.

    Foreign company information

    • Legal company name
    • Foreign registration number
    • Original jurisdiction
    • Date of incorporation
    • Current jurisdiction, where different
    • Financial year-end
    • Industry information
    • Foreign physical address
    • Company email
    • Company telephone number

    South African information

    • South African physical address
    • South African postal address
    • Proof of business address
    • Latitude
    • Longitude

    Representative

    • Full name
    • Identification information
    • Identification issue date
    • Citizenship
    • Contact information
    • Appointment date
    • Physical address
    • Postal address

    Directors

    • Full names
    • Citizenship
    • Date of birth
    • Country of residence
    • Director type
    • Email
    • Cellphone
    • Appointment date
    • Identification documents
    • Passport information for foreign directors
    • Foreigner Assurance where applicable

    Company secretary

    • Appointment decision
    • Full details
    • Identification information
    • Contact information
    • Address
    • Appointment date

    Auditor

    • Decision on appointment
    • Professional number where applicable
    • Appointment date

    Supporting documents

    • Authorised filer mandate
    • Directors’ resolution
    • Certified certificate of incorporation
    • Certified constitutional/governance document
    • Certified South African address proof
    • Certified translation where applicable
    • Security register where applicable

    This checklist is closely aligned with the fields and supporting-document requirements demonstrated in the CIPC automation guide.


    Why External Company Registration Requires More Planning Than a Normal Company Registration

    A major misconception is that registering a foreign company in South Africa is simply another online company-registration exercise.

    It is more complicated because two legal and administrative environments are involved.

    The foreign company already exists under the laws of its original jurisdiction, while CIPC needs enough information to recognise and record its presence in South Africa.

    This creates a bridge between:

    Foreign corporate law

    and

    South African corporate regulation.

    That is why the application asks for both foreign and South African information.

    The process also involves multiple people who may be located in different countries.

    A foreign director could be in Europe, the company secretary could be in South Africa, the parent company could be registered in another African country, and the authorised filer could be a professional in Johannesburg.

    The automated process has to bring all these participants into one registration workflow.


    Advice for Foreign Investors Entering South Africa

    For foreign businesses considering South Africa as an expansion market, external-company registration should be treated as part of a broader market-entry strategy.

    Registration is only one component.

    A foreign business should also consider:

    Tax

    Determine the company’s South African tax obligations and whether it needs registrations with the South African Revenue Service.

    Banking

    Consider whether the company needs a South African bank account and what documentation the bank will require.

    Employment

    If employees will be hired locally, employment-related compliance becomes relevant.

    Licensing

    Certain industries require additional licences or approvals.

    Examples can include:

    • Financial services
    • Healthcare
    • Telecommunications
    • Transport
    • Mining
    • Security
    • Construction
    • Education
    • Food-related activities

    Immigration

    Foreign directors, employees and investors should separately consider immigration and work-authorisation requirements where relevant.

    Beneficial ownership

    Corporate ownership and beneficial ownership obligations should also be considered as part of the company’s wider compliance framework.

    In other words, CIPC registration should be viewed as the beginning of the South African compliance journey, not necessarily the end of it.


    The Role of Professional Assistance

    The automated system makes the application more structured, but automation does not eliminate the need for professional judgement.

    A corporate services provider, attorney, accountant or other qualified professional can help with:

    • Reviewing foreign corporate documents
    • Preparing the application
    • Coordinating directors
    • Preparing resolutions
    • Preparing mandates
    • Checking certification requirements
    • Coordinating translations
    • Assisting with foreign director verification
    • Reviewing South African address documentation
      -Monitoring OTPs
    • Responding to CIPC queries
    • Coordinating payment
    • Maintaining corporate records

    This can be especially useful where the foreign company’s ownership structure is complicated.


    Final Thoughts

    The CIPC External Company Automation process represents a more structured way for foreign companies to submit external-company registration applications electronically.

    The process is not merely about filling in an online form. It involves the verification of corporate information, South African and foreign addresses, representatives, directors, company secretaries where applicable, auditors where applicable, supporting documents and OTP-based consent.

    The most important lesson for applicants is therefore preparation.

    If the foreign company’s corporate documents are complete, the South African address is ready, the officials have been identified, foreign directors have been considered, supporting documents have been properly prepared and everyone is available for OTP verification, the online application becomes considerably easier to manage.

    The CIPC guide shows a workflow that moves from initial consent and company information through appointments, documentation, review, submission, OTP verification and back-office approval.

    For a foreign business planning to establish operations in South Africa, the best strategy is to treat the application as a corporate compliance project rather than a simple registration form. That approach reduces errors, improves document consistency and makes it easier to respond if CIPC raises a query.

    Because regulatory procedures, fees, forms and system functionality can change, applicants should also verify the current requirements directly with CIPC before submitting an application.

    Learn how to register an external company with CIPC in South Africa using the automated process, including company details, directors, foreign directors, representatives, documents, OTP verification and approval.

  • Namibia Business Registration Costs and BIPA Fees: Complete Guide to Company Setup and Compliance

    Namibia Business Registration Costs and BIPA Fees: Complete Guide to Company Setup and Compliance

    Namibia Business Registration Costs and BIPA Fees: Complete Guide to Company Setup and Compliance

    Learn the Namibia business registration costs and BIPA fees for private companies and close corporations, including beneficial ownership, annual compliance, VAT and professional registration costs.

    Starting a business in Namibia involves more than paying a registration fee and receiving a certificate. Entrepreneurs need to consider the legal structure of the business, BIPA registration charges, name reservation, beneficial ownership requirements, document preparation, professional fees and ongoing annual compliance costs.

    For anyone planning to establish a business in Namibia, understanding the difference between BIPA statutory fees and the total cost of setting up a compliant business is particularly important.

    The Business and Intellectual Property Authority (BIPA) is Namibia’s company and business registration authority. Its published fee schedules provide the statutory charges for different registration processes, but these amounts do not necessarily cover legal, accounting, notarial, certification or administrative expenses.

    This means that a business owner who sees a registration fee of a few hundred Namibian dollars should not automatically assume that this represents the total cost of establishing the business.

    Namibia Business Registration Costs and BIPA Fees: Complete Guide to Company Setup and Compliance
    Namibia Business Registration Costs and BIPA Fees: Complete Guide to Company Setup and Compliance

    This guide explains the main Namibia business registration costs and BIPA fees, including private companies, close corporations, beneficial ownership, annual compliance and related tax considerations.

    Important: BIPA fee schedules and administrative requirements can change. The figures discussed below should therefore be confirmed with BIPA before submitting an application.

    Understanding the Different Costs of Registering a Business in Namibia

    One of the biggest mistakes entrepreneurs make is treating business registration as a single expense.

    In reality, a realistic startup budget can contain several separate categories:

    1. Business or company name reservation
    2. BIPA registration fees
    3. Share-capital-related charges for certain private companies
    4. Document preparation and certification
    5. Notarial and legal costs
    6. Accounting fees
    7. Beneficial ownership compliance
    8. Annual BIPA duties and submissions
    9. Tax registration and compliance
    10. Sector-specific licences and permits

    The actual amount required therefore depends heavily on the type of entity being registered and the complexity of its ownership and governance structure.

    BIPA fees versus total registration costs

    A useful way to think about the process is to separate government fees from professional and administrative expenses.

    For example, a close corporation can have a basic BIPA statutory cost of N$225, but that does not mean an entrepreneur should expect to establish the business for N$225.

    Certified identification documents, the accountant’s consent letter, preparation of documents and other professional services can add to the final amount.

    Similarly, a private company can have a relatively modest basic registration fee but incur additional costs depending on its share capital, constitutional documents and professional requirements.

    This distinction is essential when preparing a business plan or calculating the amount of capital needed to launch a new business.

    For entrepreneurs who want to understand the paperwork before starting, a detailed guide to BIPA company registration documents in Namibia can help clarify the documentation involved.

    Private Company Registration Costs in Namibia

    A private company is often considered by entrepreneurs who want a more formal corporate structure, multiple shareholders, potential investors or a structure that can accommodate future growth.

    According to the fee information outlined in the source material, the core BIPA charges for a private company include:

    • N$75 for name reservation using CM5.
    • N$100 for registration of the memorandum and articles using CM2.
    • N$5 for every N$1,000, or part thereof, of nominal share capital.
    • N$5 per 1,000 no-par-value shares, where applicable.

    The important point is that the N$50 and N$100 charges are not necessarily the complete BIPA bill.

    Entrepreneurs considering this structure can also review information on private limited company registration in Namibia before deciding how they want to structure the business.

    Why share capital affects the registration cost

    The share-capital component can significantly affect the statutory registration cost of a private company.

    For example, suppose a company has nominal share capital of N$500,000.

    The calculation would be:

    • Name reservation: N$75
    • Memorandum and articles: N$100
    • Nominal share capital: N$500,000 ÷ N$1,000 = 500 units
    • Capital-related fee: 500 × N$5 = N$2,500

    This gives an illustrative core BIPA cost of:

    N$75 + N$100 + N$2,500 = N$2,675

    This is before legal, notarial, certification, accounting and other professional expenses.

    The example demonstrates why simply advertising a private-company registration price based on the N$150 initial charges can be misleading.

    Documents required for a private company

    A private-company application can involve several statutory forms and supporting documents, including:

    • CM1
    • CM2
    • CM22
    • CM29
    • CM31
    • CM44 or CM44A
    • CM44C
    • CM46

    Applicants may also need:

    • Certified identification documents for directors
    • Constitutional documents
    • Notarised documents
    • Beneficial ownership information
    • Other supporting documentation required by BIPA

    Because these documents can involve certification and professional preparation, the final cost of incorporation can be considerably higher than the basic BIPA filing fees.

    The requirements for registering a company in Namibia should therefore be considered when calculating the total startup budget.

    Close Corporation Registration Costs in Namibia

    The close corporation, commonly known as a CC, can be an attractive structure for certain owner-managed businesses.

    The source material identifies the basic BIPA fees for a CC as:

    • N$75 for name reservation using CC8
    • N$150 for registration of the founding statement using CC1

    This produces a basic statutory BIPA cost of:

    N$75 + N$150 = N$225

    The N$225 figure, however, should be regarded as a starting statutory cost, rather than the total cost of establishing a compliant CC.

    Entrepreneurs can learn more about the practical process through this guide to close corporation registration in Namibia.

    Additional CC registration requirements

    A CC registration can require:

    • CC1 founding statement
    • Triplicate filing
    • Certified identification documents
    • Certified accountant’s consent letter
    • Name reservation
    • Other supporting documentation

    The requirement for an accountant’s consent letter is particularly relevant because it introduces a professional cost outside the basic BIPA registration fee.

    Is a CC cheaper than a private company?

    From a purely statutory registration-fee perspective, a CC can have a lower entry cost.

    However, entrepreneurs should not choose a legal structure exclusively because its registration fee is cheaper.

    A business owner should consider:

    • Number of owners
    • Planned investors
    • Ownership arrangements
    • Governance requirements
    • Financing plans
    • Future restructuring
    • Business growth
    • Liability considerations
    • Compliance requirements

    A business that expects external investment or substantial corporate growth may require a different structure even if a CC initially appears cheaper.

    Example: Comparing Two Namibia Business Registration Budgets

    Consider two hypothetical businesses.

    Example 1: Two-founder services business

    Two Namibian entrepreneurs want to establish a simple services business with no external investor.

    If they choose a CC, the basic BIPA calculation would be:

    CostAmount
    Name reservationN$75
    Founding statementN$150
    Basic BIPA costN$225

    However, they would still need to budget for items such as:

    • Accountant’s consent
    • Certified IDs
    • Document preparation
    • Professional assistance
    • Other compliance requirements

    Therefore, N$225 should not be presented as the complete cost of starting the business.

    Example 2: Company with N$500,000 nominal share capital

    A second business intends to establish a private company with N$500,000 nominal share capital.

    The illustrative calculation is:

    CostAmount
    Name reservationN$75
    Memorandum and articlesN$100
    Share-capital-related feeN$2,500
    Core BIPA estimateN$2,650

    Professional and administrative expenses would then be added to this amount.

    This is an important consideration for companies entering Namibia with substantial planned share capital.

    Beneficial Ownership Requirements in Namibia

    Business registration in Namibia does not end when the incorporation documents are submitted.

    Beneficial ownership (BO) has become an increasingly important component of the BIPA compliance process.

    BIPA requires beneficial ownership information at registration.

    Businesses must identify the individuals who ultimately own or control the entity rather than simply recording the immediate legal shareholder where a more complicated ownership structure exists.

    What is beneficial ownership?

    Beneficial ownership generally focuses on the ultimate natural persons who own or exercise control over a legal entity.

    This can become more complicated where:

    • A company has several shareholders
    • Another company owns shares
    • A foreign parent company is involved
    • Ownership is spread across multiple entities
    • Trust or other ownership arrangements are involved
    • Control differs from direct share ownership

    Entrepreneurs should therefore map the ownership structure before completing beneficial ownership documentation.

    BO1 and BO2 declarations

    The source material states that BIPA requires BO1 beneficial ownership information at registration.

    It also notes that beneficial ownership information must be updated after a material change and at each financial year-end.

    Where previously submitted beneficial ownership information has not changed, BO2 can be used under the no-change declaration process introduced in March 2024.

    This means that businesses should not simply complete beneficial ownership documentation once and forget about it.

    Beneficial ownership should become part of the company’s recurring compliance calendar.

    Why beneficial ownership matters

    Incomplete or inaccurate beneficial ownership information can cause practical problems with BIPA applications and amendments.

    For a business with international shareholders, this can be particularly important.

    Before filing, it is advisable to:

    1. Identify all direct shareholders.
    2. Trace ownership through corporate shareholders.
    3. Identify the ultimate beneficial owners.
    4. Verify identification documents.
    5. Compare ownership information against company records.
    6. Keep the information updated after ownership changes.

    Businesses should also pay attention to BIPA enforcement activity and compliance deadlines.

    BIPA Annual Compliance Costs After Registration
    BIPA Annual Compliance Costs After Registration

    BIPA Annual Compliance Costs After Registration

    One of the most overlooked aspects of business registration in Namibia is the cost of maintaining the business after incorporation.

    Registration is only the beginning of the company’s compliance obligations.

    According to the source material:

    • A CC pays N$120 annual duty on CC7.
    • A private company pays at least N$130 annual duty.
    • A private company also has a N$160 CM23 submission fee.

    This means the minimum identified annual BIPA cost for a private company is:

    N$130 + N$160 = N$290

    This excludes professional assistance and any penalties that may arise from late compliance.

    When are BIPA annual fees due?

    Annual duties are linked to the entity’s financial year-end, rather than necessarily being due on the anniversary of the original registration.

    This is important for business owners because the compliance calendar should be established when the entity is formed.

    A company should keep track of:

    • Financial year-end
    • Annual duty deadline
    • Annual returns or submissions
    • Beneficial ownership declarations
    • Changes in directors
    • Changes in shareholders
    • Registered address changes
    • Other statutory amendments

    For businesses that want to outsource recurring obligations, company secretarial services in Namibia can be considered as part of the annual compliance budget.

    Late compliance can increase the cost

    Failing to submit required information on time can result in additional charges.

    The source material identifies a N$300 late-submission fee for a private company, followed by further period-based penalties in applicable circumstances.

    Consequently, a company that ignores its annual compliance obligations can end up paying substantially more than the basic annual statutory amount.

    Name Reservation Is Not Business Registration

    Another common misunderstanding concerns company or business name reservation.

    An entrepreneur may reserve a name because they want to protect a particular brand while preparing the business.

    However, reserving a name does not create a trading company.

    Name reservation and company registration are separate steps.

    A reserved name does not automatically provide:

    • A registered company
    • Tax registration
    • A trading licence
    • A business bank account
    • Industry-specific permits
    • Beneficial ownership compliance
    • Annual corporate compliance

    Therefore, entrepreneurs should not confuse the cost of reserving a name with the cost of establishing an operational business.

    For a broader overview of the process, see this guide on registering a business in Namibia.

    VAT Registration and Namibia Business Setup Costs
    VAT Registration and Namibia Business Setup Costs

    VAT Registration and Namibia Business Setup Costs

    BIPA incorporation and VAT registration are separate matters.

    The Namibia Revenue Agency (NamRA) administers tax registration, including VAT. Entrepreneurs planning their tax setup can review a guide to NamRA registration in Namibia alongside their BIPA registration plans.

    The source material states that VAT registration becomes mandatory when annual taxable turnover exceeds N$500,000, with the standard VAT rate identified as 15%.

    The N$500,000 threshold should therefore not be treated as a BIPA registration threshold.

    Instead, it is a tax-compliance consideration that should be incorporated into the financial planning of a growing business.

    Example of VAT planning

    Suppose a retailer expects taxable sales of:

    N$45,000 per month

    Annualised:

    N$45,000 × 12 = N$540,000

    The projected taxable turnover would therefore exceed N$500,000.

    The entrepreneur should consider VAT compliance during the business-planning stage rather than waiting until the business has already reached the threshold.

    On the other hand, a small business with a credible forecast below the threshold should not automatically add mandatory VAT registration to its initial BIPA incorporation cost.

    The situation should be reviewed as the business grows.

    Other Tax Registrations to Consider After Business Registration

    Business registration and tax compliance can involve several separate obligations depending on how the business operates.

    For example, an entrepreneur may need to distinguish between the company’s own income-tax registration and individual taxpayer obligations. Businesses should also consider whether they will have employees, foreign shareholders, non-resident service providers or other arrangements that trigger specialised tax requirements.

    Depending on the circumstances, useful tax-related resources include:

    These requirements are not automatically part of the BIPA incorporation fee, but they can become important components of the overall compliance budget.

    What Should Be Included in a Namibia Business Registration Budget?

    A realistic business registration budget should contain more than one line item.

    Before starting the registration process, entrepreneurs should ask for a detailed breakdown covering the following.

    1. Name reservation

    Confirm the applicable BIPA name reservation charge for the chosen entity.

    2. Registration fees

    Determine the actual statutory registration cost for the selected legal structure.

    For a private company, this may include a share-capital-related fee.

    3. Professional fees

    Consider the cost of:

    • Legal services
    • Accounting services
    • Notarial services
    • Company-secretarial assistance
    • Document preparation

    4. Certification

    Budget for certified identification documents and any other documents that require certification.

    5. Beneficial ownership

    Make sure the registration budget considers BO documentation and future BO compliance.

    6. Annual compliance

    Do not stop the budget at the incorporation date.

    Include:

    • Annual duty
    • Annual submissions
    • Beneficial ownership updates
    • Accounting
    • Tax compliance
    • Professional support

    7. Sector-specific licences

    Some businesses require additional licences or approvals after incorporation.

    For example, businesses operating in sectors such as:

    • Healthcare
    • Financial services
    • Mining
    • Construction
    • Transport
    • Tourism
    • Food services
    • Security
    • Education

    may have regulatory obligations beyond BIPA registration.

    A company registration certificate does not automatically authorise a business to conduct every regulated activity in Namibia.

    Why the Cheapest Registration Option Is Not Always the Best

    Entrepreneurs naturally want to reduce startup expenses.

    However, choosing a legal structure purely because it has the lowest registration fee can become expensive later.

    For example, suppose an entrepreneur chooses a structure because it costs only a few hundred Namibian dollars to establish, but then discovers that a planned investor requires a different corporate structure.

    The entrepreneur may eventually need to:

    1. Restructure the business.
    2. Amend ownership arrangements.
    3. Prepare new documentation.
    4. Change governance arrangements.
    5. Update beneficial ownership information.
    6. Potentially incur additional professional fees.

    The original saving may therefore become insignificant compared with the cost of restructuring.

    Think about the next three to five years

    Before registering, ask:

    • Who will own the business?
    • Will additional shareholders join?
    • Will investors be introduced?
    • Will the company seek external financing?
    • Will foreign shareholders be involved?
    • Will the business expand into other sectors?
    • Will subsidiaries be created?
    • Does the business require licences?
    • What level of corporate governance will be necessary?

    These questions can be more important than the difference between two registration fees.

    Registration Costs for Foreign Investors

    Foreign investors entering Namibia should be particularly careful when calculating setup costs.

    A foreign-owned business may require additional attention to:

    • Shareholding
    • Directors
    • Beneficial ownership
    • Company constitutional documents
    • Tax registration
    • Immigration requirements
    • Investment permissions where applicable
    • Sector-specific approvals
    • Banking requirements
    • Local operational arrangements

    Entrepreneurs considering whether they can establish a Namibian company as a non-Namibian can review information on whether a foreigner can register a company in Namibia, while those ready to proceed can review how to register a company in Namibia as a foreigner.

    More detailed planning may also require reviewing the requirements for registering a company in Namibia as a foreigner.

    The BIPA incorporation fee is therefore only one component of a broader market-entry budget.

    International groups should also establish who will maintain corporate records and who will be responsible for reporting ownership changes.

    Remote and International Business Setup in Namibia

    Not every entrepreneur establishing a Namibian business will already have a physical office in the country.

    A founder may live outside Namibia, operate an international business or need a local corporate presence before establishing a full operational office.

    In those circumstances, remote business setup in Namibia can form part of a broader market-entry strategy.

    A virtual office in Namibia may also be relevant for businesses that need an appropriate local business address or administrative presence, subject to the specific requirements of the business and relevant authorities.

    A Practical Namibia Business Registration Checklist

    Before submitting your registration application, work through the following checklist.

    Business structure

    • Determine whether a CC or private company is appropriate.
    • Define the ownership structure.
    • Identify shareholders or members.
    • Determine planned share capital where applicable.
    • Consider future investors and expansion.

    BIPA registration

    • Reserve the proposed business or company name.
    • Prepare the relevant BIPA forms.
    • Prepare constitutional or founding documents.
    • Obtain certified identification documents.
    • Arrange required professional consents.
    • Prepare beneficial ownership information.
    • Confirm current BIPA fees before filing.

    Tax and compliance

    • Consider NamRA registration.
    • Determine whether VAT registration applies.
    • Establish the financial year-end.
    • Create an annual compliance calendar.
    • Record beneficial ownership deadlines.
    • Identify sector-specific licences.

    Financial planning

    • Separate government fees from professional fees.
    • Budget for annual compliance.
    • Allow for accounting costs.
    • Allow for legal or notarial services where necessary.
    • Budget for tax compliance.
    • Include licensing costs where applicable.

    Common Mistakes When Estimating Namibia Business Registration Costs

    Mistake 1: Assuming the advertised BIPA fee is the total cost

    A statutory filing fee is not necessarily the same as the total professional cost of completing a registration.

    Mistake 2: Ignoring share capital

    Private companies can have capital-related registration charges. A company with substantial nominal share capital should calculate this component before budgeting.

    Mistake 3: Forgetting beneficial ownership

    BO information is a fundamental part of the registration and ongoing compliance process.

    Mistake 4: Budgeting only for the first year

    A company continues to have compliance obligations after incorporation.

    Mistake 5: Choosing an entity based solely on price

    The cheapest registration structure may not be the most appropriate structure for the company’s ownership and growth plans.

    Mistake 6: Confusing name reservation with incorporation

    A reserved name does not create a legal entity.

    Mistake 7: Ignoring tax obligations

    BIPA registration and NamRA tax compliance are separate components of establishing and operating a business.

    How to Build a More Accurate Business Setup Budget

    A better approach is to prepare a three-part budget.

    Phase 1: Pre-registration

    Include:

    • Name reservation
    • Business structure advice
    • Legal advice where required
    • Document preparation
    • Certification
    • Notarial services

    Phase 2: Registration

    Include:

    • BIPA statutory registration fees
    • Beneficial ownership documentation
    • Professional submission assistance
    • Other government charges

    Phase 3: Post-registration

    Include:

    • NamRA registration
    • VAT compliance where applicable
    • Accounting
    • Annual BIPA duties
    • Annual submissions
    • Beneficial ownership updates
    • Licences and permits
    • Company-secretarial support

    This approach gives entrepreneurs a much more realistic picture of the cash required to move from an idea to a legally established and compliant business.

    For entrepreneurs who want assistance with the broader process rather than individual registration steps, business setup services in Namibia can cover the wider requirements involved in establishing and maintaining a business.

    Additional Business Structures and Registration Options

    Not every organisation entering Namibia will operate as a conventional private company or close corporation.

    Depending on the purpose of the organisation, entrepreneurs and founders may also need to investigate structures such as non-profit organisations or other specialised arrangements.

    For organisations pursuing charitable, community or social objectives, information on NGO registration in Namibia may be relevant.

    The correct structure should always be determined by the organisation’s intended activities, ownership, governance and regulatory requirements rather than registration price alone.

    Final Thoughts on Namibia Business Registration Costs
    Final Thoughts on Namibia Business Registration Costs

    Final Thoughts on Namibia Business Registration Costs

    The cost of registering a business in Namibia should never be reduced to a single BIPA fee.

    A close corporation can have a basic statutory BIPA cost of N$225, while a private company starts with name reservation and memorandum-and-articles fees, with additional charges depending on its share capital or share structure.

    But these government fees are only one part of the overall business setup budget.

    Professional documentation, certification, accounting, notarial services, beneficial ownership requirements, annual duties, tax compliance and industry-specific licences can all affect the final amount.

    The most important lesson for entrepreneurs is therefore simple: budget for compliance, not merely registration.

    Before filing, confirm the current BIPA fee schedule and requirements, choose the legal structure based on your ownership and growth plans, and calculate the ongoing costs of keeping the entity compliant.

    For investors entering Namibia, especially foreign-owned companies and subsidiaries, this approach can prevent unexpected costs and reduce the risk of compliance problems after incorporation.

    Entrepreneurs who want to review the registration process from the beginning can also consult this broader guide on how to register a business in Namibia. For questions about registration, compliance or business setup support, businesses can contact a Namibia business registration specialist.

    HASHTAGS:

    #NamibiaBusiness, #BIPA, #BusinessRegistrationNamibia, #NamibiaCompanyRegistration, #BIPAFees, #NamibiaBusinessSetup, #NamibiaEntrepreneurs, #BusinessInNamibia, #CompanyRegistration, #NamibiaInvestment

  • Business Setup in Namibia: A Complete Guide for Local and Foreign Investors

    Business Setup in Namibia: A Complete Guide for Local and Foreign Investors

    Business Setup in Namibia: A Complete Guide for Local and Foreign Investors

    Learn how to set up a business in Namibia, including company structures, BIPA registration, tax, VAT, licences, investment incentives, foreign investors, and practical tips.

    Namibia has emerged as one of Southern Africa’s more attractive destinations for entrepreneurs, investors, and international companies looking to establish a presence in the region. Known for political stability, relatively strong institutions, abundant natural resources, and access to regional markets, the country presents opportunities across mining, agriculture, tourism, fisheries, logistics, manufacturing, renewable energy, technology, and professional services.

    However, starting a business in Namibia involves more than simply registering a company. Entrepreneurs need to select an appropriate business structure, comply with registration requirements, understand taxation, obtain sector-specific licences where necessary, and maintain ongoing statutory compliance.

    For foreign investors, additional considerations can include local representation, immigration, banking, tax registration, ownership structures, and the practical requirements of operating a business from outside Namibia.

    This guide explains the key aspects of business setup in Namibia, from choosing a company structure and registering a business with the relevant authorities to understanding taxes, investment incentives, challenges, and practical strategies for building a sustainable business.

    Business Setup in Namibia: A Complete Guide for Local and Foreign Investors
    Business Setup in Namibia: A Complete Guide for Local and Foreign Investors

    Why Invest in Namibia?

    Namibia offers a combination of political stability, natural resources, infrastructure, and regional access that can make it attractive to both local entrepreneurs and international investors.

    1. Stable Governance and Legal Framework

    Political and economic stability are important considerations when deciding where to establish a business.

    Namibia has developed a relatively predictable legal and institutional environment, with established government agencies responsible for business registration, taxation, social security, investment, and sector regulation.

    For investors, this can provide greater confidence when making long-term commitments to property, equipment, employees, technology, and other business assets.

    2. Strategic Location in Southern Africa

    Namibia’s geographic position gives businesses access to Southern African markets.

    The country shares borders with Angola, Botswana, South Africa, and Zambia, while its Atlantic coastline provides access to important ports, including the Port of Walvis Bay.

    This combination of road, rail, air, and maritime infrastructure can be particularly relevant to companies involved in:

    • Logistics
    • Import and export
    • Mining
    • Agriculture
    • Manufacturing
    • Retail
    • Wholesale distribution
    • Construction
    • Regional trade

    Businesses established in Namibia can therefore use the country not only as a domestic market but also as a potential base for regional operations.

    3. Abundant Natural Resources

    Namibia has significant natural resources, making extractive industries one of the country’s most important economic sectors.

    The country is known for resources such as:

    • Diamonds
    • Uranium
    • Gold
    • Copper
    • Zinc
    • Lithium and other critical minerals
    • Fisheries resources

    The developing energy and critical-minerals sectors are also creating opportunities for investors involved in exploration, processing, infrastructure, technology, logistics, and supporting services.

    4. Renewable Energy Potential

    Namibia has exceptional solar and wind resources. This has increased interest in renewable energy, green hydrogen, electricity generation, and related infrastructure.

    Entrepreneurs can potentially participate in the renewable-energy value chain through:

    • Solar installations
    • Engineering services
    • Energy consulting
    • Equipment supply
    • Project development
    • Maintenance services
    • Green-hydrogen-related services
    • Environmental and technical consulting

    This sector may become increasingly important as Namibia seeks to expand its energy capacity and develop new export-oriented industries.

    5. Diverse Economic Opportunities

    Business opportunities in Namibia extend well beyond mining.

    Other promising areas include:

    • Agriculture
    • Tourism and hospitality
    • Fisheries
    • Transport and logistics
    • Construction
    • Healthcare
    • Financial services
    • Information technology
    • Renewable energy
    • Manufacturing
    • Professional services
    • Retail and wholesale
    • Real estate

    The best business opportunity depends heavily on the entrepreneur’s capital, skills, target market, regulatory requirements, and ability to compete.

    Business Structures in Namibia

    One of the first decisions an entrepreneur must make is choosing the right legal structure.

    The structure affects liability, ownership, administration, taxation, governance, fundraising, and the way the business interacts with customers, suppliers, banks, and government institutions.

    Common options include the following.

    1. Sole Proprietorship

    A sole proprietorship is operated by one individual.

    It is generally simpler than incorporating a company and can be suitable for small businesses where the owner wants straightforward administration.

    However, the major disadvantage is that the owner and business are not fully separated from a liability perspective. This means the owner can potentially be personally responsible for business obligations.

    A sole proprietorship may therefore be appropriate for certain low-risk activities but less suitable for businesses carrying significant contractual, financial, or operational risks. Entrepreneurs operating as individuals should also understand the process of registering as an individual taxpayer.

    2. Private Limited Company

    A Private Limited Company (Pty) Ltd is one of the most common structures for businesses seeking a formal corporate identity.

    A private company generally provides limited liability, meaning the company’s legal obligations are separated from those of its shareholders, subject to applicable law and circumstances.

    This structure can be particularly suitable for:

    • Growing businesses
    • Businesses seeking investment
    • Companies entering commercial contracts
    • Businesses employing staff
    • Foreign investors
    • Businesses that want a formal corporate structure

    The company can also provide a stronger foundation for future expansion and corporate governance.

    3. Public Limited Company

    A public company is generally more suitable for larger enterprises with broader ownership or capital-raising requirements.

    Public companies may be appropriate for businesses that eventually want access to public capital markets, subject to the applicable legal and listing requirements.

    Because the administrative and governance requirements can be more demanding, this structure is generally unnecessary for a small startup.

    4. Close Corporation

    A Close Corporation, commonly known as a CC, can be attractive to small and medium-sized businesses.

    The structure allows between one and ten members and is designed around direct participation by members in the management of the business.

    A CC can be useful for entrepreneurs who want a formal registered business structure without adopting all the characteristics associated with a larger corporate organization.

    5. Branch of a Foreign Company

    International companies that want to conduct business in Namibia may consider establishing a branch rather than creating an entirely separate local company.

    A branch allows a foreign business to establish an operational presence in Namibia while remaining connected to its parent organization.

    Foreign companies should, however, carefully assess registration, taxation, reporting, licensing, ownership, banking, and regulatory requirements before selecting this approach.

    Steps to Setup a Business in Namibia
    Steps to Setup a Business in Namibia

    Steps to Setup a Business in Namibia

    The exact process depends on the structure and nature of the proposed business, but entrepreneurs should approach registration as a sequence of connected compliance steps rather than treating company incorporation as the end of the process.

    Step 1: Choose and Reserve a Business Name

    The first step is generally selecting a suitable business name and checking its availability with the Business and Intellectual Property Authority (BIPA).

    The proposed name should be sufficiently distinctive and should comply with applicable naming requirements.

    Entrepreneurs should also consider whether the name accurately reflects the business and whether a corresponding domain name and brand identity are available.

    Step 2: Prepare the Founding Documents

    Once the business structure and name have been established, the required founding documents need to be prepared.

    For a company, this can involve documents relating to the company’s constitution, directors, shareholders, registered office, and shareholding.

    For a Close Corporation, the relevant founding statement and supporting documentation are required.

    Accuracy is important at this stage because mistakes in ownership details, identification documents, addresses, or business activities can cause delays.

    Step 3: Submit the Registration Application

    The registration application documents are submitted to BIPA together with the required supporting documentation.

    The information provided may include:

    • Identification documents
    • Residential addresses
    • Registered business address
    • Director or member information
    • Shareholder information
    • Company details
    • Proposed business activities
    • Founding documents

    Entrepreneurs should ensure that the information submitted is consistent across all documents.

    Step 4: Register for Tax

    Company registration does not eliminate the need to deal with tax authorities.

    Businesses should register with the Namibia Revenue Agency (NamRA) and determine which tax obligations apply to their activities.

    Depending on the nature and size of the business, this may include:

    • Corporate income tax
    • Value Added Tax
    • PAYE
    • Withholding taxes
    • Other applicable taxes and reporting obligations

    Tax registration should be treated as an essential part of business setup rather than something to address only after the business starts generating significant revenue.

    Step 5: Determine Whether VAT Registration Is Required

    Businesses that meet the applicable VAT registration requirements must register for VAT.

    The supplied source information identifies NAD 500,000 in annual taxable supplies as the relevant threshold. However, entrepreneurs should confirm the current threshold and applicable rules with NamRA before relying on a particular figure because tax legislation and administrative requirements can change.

    VAT-registered businesses must generally charge the appropriate VAT on taxable supplies and maintain records that support their VAT returns.

    Step 6: Register for Social Security

    Employers have additional obligations when they employ workers.

    Businesses employing staff should register with the Social Security Commission (SSC) and ensure that employees are properly enrolled.

    This is an important part of employment compliance and should be addressed early when setting up a business with employees.

    Step 7: Apply for Sector-Specific Licences

    Company registration does not automatically authorize a business to conduct every type of commercial activity.

    Depending on the industry, additional approvals, licences, permits, registrations, or professional requirements may apply.

    For example, businesses operating in:

    • Mining
    • Fisheries
    • Tourism
    • Healthcare
    • Financial services
    • Transport
    • Construction
    • Food production
    • Hospitality
    • Energy

    may need additional regulatory approvals.

    Before launching operations, entrepreneurs should identify every licence relevant to their particular business model.

    Understanding Namibia’s Tax Environment

    Tax planning is one of the most important components of business setup in Namibia.

    A company that is correctly registered but fails to meet its tax obligations can face penalties, interest, compliance problems, and difficulties when dealing with banks or government institutions.

    Corporate Income Tax

    The source material identifies a standard corporate income tax rate of 32% for most companies, with different treatment potentially applying to specific industries.

    Manufacturing and mining businesses may be subject to different rates and rules depending on their activities and applicable legislation.

    Investors should therefore avoid assuming that every Namibian company has exactly the same tax treatment.

    A company operating in mining, for example, may face a significantly different fiscal regime from an ordinary service company.

    Businesses should also understand the process of registering for business income tax and maintaining the necessary tax compliance records.

    Value Added Tax

    VAT applies to qualifying taxable supplies.

    The source material identifies the standard VAT rate as 15%, with certain supplies receiving different treatment, including zero-rating in appropriate circumstances.

    VAT compliance requires proper bookkeeping and documentation.

    Businesses should maintain accurate:

    • Sales invoices
    • Purchase invoices
    • VAT records
    • Accounting records
    • Import documentation
    • Credit notes
    • Supporting financial documents

    Withholding Taxes

    Withholding tax can become particularly important when a Namibian business makes certain payments to non-residents.

    Potential areas include:

    International businesses should evaluate withholding tax before signing cross-border contracts because the tax implications can affect the actual amount received by an overseas supplier or shareholder.

    Foreign shareholders may also need to consider non-resident shareholders tax when structuring investments into Namibia.

    Personal Income Tax and PAYE

    Businesses employing individuals may need to operate PAYE.

    Employers generally have responsibilities relating to calculating deductions, withholding the relevant amounts from employee remuneration, submitting returns, and paying the amounts to the tax authority.

    Failure to properly administer payroll taxes can create significant compliance problems.

    Social Security Contributions

    Employers and employees may both have social security obligations, subject to the applicable rules and contribution ceilings.

    For businesses with employees, payroll budgeting should therefore account for both salary costs and statutory employment-related contributions.

    Investment Incentives in Namibia

    Investment incentives can influence where and how a business is established.

    However, investors should distinguish between general company registration and qualifying for a specific incentive.

    Export-Oriented Businesses

    Businesses focused on exports may be able to benefit from specific regimes or incentives depending on their structure, activities, location, and eligibility.

    This can be particularly relevant to:

    • Manufacturers
    • Exporters
    • Logistics businesses
    • Processing companies
    • Regional distribution operations

    Manufacturing Incentives

    Manufacturing has historically received attention from policymakers because of its potential contribution to industrial development, employment, value addition, and exports.

    Potential support mechanisms can include tax treatment, deductions, depreciation allowances, or other incentives, depending on the applicable programme and eligibility requirements.

    Agriculture and Renewable Energy

    Agriculture and renewable energy are other sectors with significant development potential.

    Investment opportunities may include:

    • Irrigation
    • Agricultural processing
    • Renewable electricity
    • Solar projects
    • Wind energy
    • Energy storage
    • Green technologies
    • Sustainable tourism

    Investors should verify the current requirements for any incentive before including it in a financial model.

    Double Taxation Agreements

    Double Taxation Agreements, where applicable, can help determine how certain income is taxed when transactions involve more than one country.

    For multinational investors, DTAs can bean important component of international tax planning.

    The availability and application of treaty benefits depend on the countries involved, the type of income, ownership structures, residency, and applicable domestic rules.

    Professional tax advice is therefore particularly valuable for cross-border investments. Businesses with more complex structures, including trusts registered for tax purposes, should also ensure that their tax treatment is properly understood.

    Challenges of Doing Business in Namibia

    Namibia has considerable investment potential, but it is not without challenges.

    Understanding these challenges before incorporating a business can help investors build more realistic business plans.

    1. Relatively Small Domestic Market

    Namibia has a relatively small population compared with many African markets.

    For companies whose business model depends entirely on high domestic sales volumes, this can create limitations.

    One solution is to develop a business model that can serve regional markets rather than relying exclusively on Namibian consumers.

    2. High Operating Costs

    Businesses can face significant costs associated with:

    • Electricity
    • Transport
    • Imported equipment
    • Logistics
    • Commercial property
    • Labour
    • Technology
    • Finance

    These costs should be incorporated into financial projections before an investor commits capital.

    3. Skills Shortages

    Certain specialized industries can experience shortages of appropriately qualified personnel.

    Companies entering technical sectors may therefore need to invest in:

    • Training
    • Staff development
    • Recruitment
    • Technology
    • External consultants
    • Knowledge transfer

    4. Regulatory and Licensing Procedures

    Although Namibia has established institutions for business regulation, entrepreneurs may encounter administrative delays when multiple permits, licences, inspections, or approvals are involved.

    This is particularly relevant in highly regulated sectors.

    A business should therefore identify its regulatory requirements before signing leases, purchasing equipment, hiring large teams, or committing substantial capital.

    Setting Up a Business in Namibia as a Foreign Investor
    Setting Up a Business in Namibia as a Foreign Investor

    Setting Up a Business in Namibia as a Foreign Investor

    Namibia can be attractive to foreign investors seeking a Southern African base, but international entrepreneurs should approach business establishment differently from a simple local company registration.

    A foreign investor should evaluate several issues before starting the process.

    Ownership Structure

    The investor should determine whether the business will be:

    • A Namibian company
    • A subsidiary
    • A branch
    • A joint venture
    • Another legally permitted structure

    The choice can influence taxation, governance, reporting, liability, banking, and future expansion.

    Immigration and Work Authorization

    Company ownership and the right to work in Namibia are separate considerations.

    A foreign entrepreneur who intends to physically live and work in Namibia should investigate the appropriate immigration and work authorization requirements before making relocation plans.

    Banking

    Opening a corporate bank account can require documentation relating to:

    • Company registration
    • Directors
    • Shareholders
    • Identification
    • Tax registration
    • Source of funds
    • Business activities
    • Beneficial ownership

    International investors should allow sufficient time for compliance checks by financial institutions.

    Local Professional Support

    Foreign investors can benefit significantly from working with professionals who understand the Namibian regulatory environment.

    Depending on the project, professional support may involve:

    • Corporate registration specialists
    • Accountants
    • Tax advisers
    • Lawyers
    • Immigration specialists
    • Industry consultants
    • Payroll providers

    The objective should not simply be to get a company registered, but to ensure that the entire operating structure is compliant. Investors who need assistance can explore business setup services designed around the local regulatory environment.

    How to Choose the Right Business Structure

    Choosing a legal structure should be based on the business’s long-term needs rather than simply selecting the cheapest or fastest registration option.

    Consider the following questions:

    1. How many owners will the business have?
    2. Will external investors be involved?
    3. Does the business carry significant liability risk?
    4. Will employees be hired?
    5. Will the company import or export?
    6. Will the business operate in a regulated sector?
    7. Will foreign shareholders be involved?
    8. Will the business need bank financing?
    9. Could the company expand into other countries?
    10. Will the business eventually need sophisticated corporate governance?

    A small consulting business may have very different needs from a mining services company or an international logistics operation.

    Entrepreneurs considering other formal structures, including non-profit activities, should also assess the specific NGO registration requirements before deciding how to establish the organization.

    Practical Tips for Investors Setting Up in Namibia

    1. Build Compliance Into the Business Plan

    Do not treat compliance as an afterthought.

    Your initial business plan should account for:

    • Registration costs
    • Tax obligations
    • Licences
    • Accounting
    • Payroll
    • Insurance
    • Professional fees
    • Annual compliance
    • Regulatory renewals

    2. Verify Requirements Before Spending Money

    Before renting premises, importing equipment, hiring employees, or signing major contracts, determine whether your intended activity requires additional approvals.

    This can prevent an investor from committing money to an operation that cannot legally begin trading.

    3. Keep Corporate and Personal Finances Separate

    Once a company is established, maintain proper separation between personal and business finances.

    A dedicated corporate bank account, accurate accounting records, proper invoices, and documented business expenses can improve financial control and simplify tax compliance.

    Businesses that need a formal business address without maintaining a conventional office may also consider a virtual office as part of their operating arrangements.

    4. Use Professional Advice for Complex Structures

    Professional assistance becomes increasingly valuable when a business involves:

    • Foreign shareholders
    • Multiple companies
    • Cross-border transactions
    • Significant investment
    • Mining
    • Financial services
    • Complex tax arrangements
    • Intellectual property
    • Large employment structures

    Trying to minimize professional costs at the beginning can sometimes result in substantially higher costs later if the structure needs to be corrected.

    For ongoing corporate administration, businesses may also require company secretarial support to help maintain statutory compliance.

    5. Think Beyond Registration

    A certificate of incorporation is only the beginning.

    A successful business also needs:

    • Customers
    • Reliable suppliers
    • Proper accounting
    • Marketing
    • Human resources
    • Operational systems
    • Contracts
    • Compliance controls
    • Working capital
    • Risk management

    The real objective should be to build an operating company rather than simply obtain a registration certificate.

    Is Namibia a Good Place to Start a Business?

    For the right entrepreneur, Namibia can be an attractive place to establish a business.

    Its strengths include political stability, natural resources, regional connectivity, relatively established institutions, and opportunities in sectors such as mining, tourism, agriculture, logistics, manufacturing, renewable energy, and professional services.

    However, entrepreneurs should not assume that every business model will succeed simply because the country offers investment opportunities.

    Success depends on factors such as:

    • Market demand
    • Pricing
    • Access to capital
    • Operational efficiency
    • Regulatory compliance
    • Management capability
    • Competition
    • Location
    • Supplier relationships
    • Ability to scale

    For businesses targeting a relatively small domestic market, regional expansion can be an especially important part of the growth strategy.

    Foreign entrepreneurs considering a remote or partially remote operating model can also explore remote business setup options where appropriate.

    Final Thoughts on Business Setup in Namibia
    Final Thoughts on Business Setup in Namibia

    Final Thoughts on Business Setup in Namibia

    Setting up a business in Namibia can provide local entrepreneurs and international investors with access to an economy offering opportunities across natural resources, services, trade, tourism, agriculture, manufacturing, logistics, and emerging energy industries.

    The process begins with selecting an appropriate legal structure and completing registration with BIPA, but incorporation is only one part of establishing a compliant business.

    Entrepreneurs must also consider tax registration, VAT, PAYE, social security, sector-specific licences, accounting, employment requirements, corporate governance, and ongoing regulatory obligations.

    Foreign investors should take an even broader approach by considering ownership structures, immigration, banking, cross-border taxation, and the practical requirements of operating in Namibia. Those preparing a foreign-owned structure should carefully review the requirements for registering a company in Namibia as a foreigner and the process for registering a company in Namibia as a foreigner.

    The most effective approach is to plan the business structure and compliance requirements before investing significant capital. With appropriate preparation, professional guidance, realistic financial projections, and a clear understanding of the Namibian market, investors can position their businesses for sustainable growth both within Namibia and across the wider Southern African region.

    Businesses should also understand the applicable forms and fees for registering a private company in Namibia before beginning the incorporation process. After registration, obtaining a NamRA certificate of good standing may become relevant for businesses that need to demonstrate their tax compliance status.

  • How to Invest in Namibia: Opportunities, Sectors, and Step-by-Step Guide

    How to Invest in Namibia: Opportunities, Sectors, and Step-by-Step Guide

    How to Invest in Namibia: Opportunities, Sectors, and Step-by-Step Guide

    Discover how to invest in Namibia, including unit trusts, government bonds, fixed deposits, business opportunities, mining, renewable energy, agriculture, tourism, logistics, joint ventures, and investment opportunities for foreign investors.

    Namibia offers a diverse range of investment opportunities for individuals, entrepreneurs, companies, and foreign investors. From unit trusts and government bonds to mining, renewable energy, agriculture, logistics, tourism, and technology, investors can choose between financial investments and direct participation in the Namibian economy.

    The country combines political stability, significant natural resources, an established financial sector, access to regional markets, and a growing focus on renewable energy and green hydrogen. This Namibia Business Opportunities guide provides a useful overview of business opportunities across sectors such as mining, tourism, and renewable energy.

    However, choosing among the best investments in Namibia requires more than identifying an attractive sector. Investors should consider their capital, risk tolerance, investment period, expected returns, regulatory requirements, liquidity needs, and whether they want a passive financial investment or an operating business.

    How to Invest in Namibia: Opportunities, Sectors, and Step-by-Step Guide
    How to Invest in Namibia: Opportunities, Sectors, and Step-by-Step Guide

    Why Invest in Namibia?

    Namibia is increasingly positioned as an investment destination for both domestic and international capital. Its economy has important links to South Africa and the wider Southern African Development Community (SADC), while the country’s Atlantic coastline and transport infrastructure provide access to regional and international markets.

    The Namibia Investment Promotion and Development Board (NIPDB) facilitates investment by local and foreign investors and supports investment promotion and business development.

    Several characteristics make Namibia attractive to investors:

    • Political and economic institutions with established legal frameworks
    • Significant mineral and natural resources
    • Strong potential for renewable energy
    • Access to regional trade corridors
    • Opportunities in agriculture and agribusiness
    • A developed banking and financial services sector
    • Growing tourism demand
    • Emerging technology and digital businesses
    • Opportunities for public-private partnerships
    • Potential in green hydrogen and related industries

    Investors should nevertheless conduct independent due diligence because every investment carries different commercial, financial, regulatory, and operational risks.

    Financial Investment Options in Namibia

    Not every investor needs to establish a company or purchase a physical business. Namibia has several savings and investments products that allow individuals to invest according to their financial objectives and risk tolerance.

    Unit Trusts Namibia

    Unit trusts are pooled investment vehicles where money from multiple investors is invested in assets such as shares, bonds, money-market instruments, or other securities.

    For investors looking for professionally managed portfolios, unit trusts Namibia options can provide diversification without requiring the investor to select every underlying asset personally.

    Investment plans may also allow investors to contribute regularly rather than investing a large amount at once. Old Mutual Namibia’s investment plans include unit trust options designed around different goals and investment time horizons.

    Before investing, compare:

    • Minimum investment requirements
    • Management and administration fees
    • Investment objectives
    • Historical performance
    • Liquidity
    • Underlying assets
    • Risk level
    • Recommended investment period

    Past performance should not be treated as a guarantee of future returns.

    Money Market Funds

    Money market funds generally invest in short-term interest-bearing instruments and can be appropriate for investors prioritising liquidity and relatively lower volatility compared with equity-focused investments.

    They may be considered for:

    • Emergency savings
    • Short-term financial goals
    • Temporary cash holdings
    • Conservative investment strategies
    • Diversification within a broader portfolio

    The appropriate product depends on the fund’s investment mandate, fees, liquidity provisions, and underlying instruments.

    Fixed Deposits Namibia

    Fixed deposits Namibia can appeal to investors who want predictable interest over an agreed investment period. The investor deposits money for a specified term, with the applicable interest rate and withdrawal conditions determined by the financial institution.

    Fixed deposits can be useful when:

    • You know when you will need your money
    • You prefer predictable returns
    • You do not require immediate access to the funds
    • You want to reduce exposure to market fluctuations

    However, locking money away can create an opportunity cost if interest rates subsequently increase or you need the funds before maturity.

    Notice Deposits Namibia

    Notice deposits Namibia provide another savings and investment option. Rather than locking money away for a fixed maturity date, the account may require advance notice before funds can be withdrawn.

    This can provide a balance between accessibility and earning interest.

    When comparing notice deposits, check the notice period, applicable interest rate, minimum balance, withdrawal rules, and whether the rate can change.

    Government Bonds Namibia

    Government bonds Namibia allow investors to lend money to the government in return for interest according to the terms of the relevant bond.

    Government securities can play a role in diversified portfolios, particularly for investors seeking exposure to fixed-income assets. Investors should examine maturity dates, coupon rates, market prices, liquidity, taxation, and interest-rate risk before purchasing securities.

    The Bank of Namibia research publication on savings and investment provides additional background on savings and investment in Namibia.

    Investment Accounts Namibia

    Investment accounts Namibia can range from simple interest-bearing savings products to structured investment solutions. The right account depends on whether the primary objective is capital preservation, liquidity, income generation, or long-term growth.

    Financial institutions may offer products for short-, medium-, and long-term objectives. FNB Namibia’s savings and investment resources provide examples of categories investors can consider, including unit trusts and other savings products.

    Direct Investment in Namibian Businesses

    Investors who want potentially higher growth and greater control can consider direct business investment rather than only financial products.

    Direct private investment can involve establishing a new company, purchasing an existing business, investing in an expansion project, or providing capital to an entrepreneur.

    Potential advantages include:

    • Greater control over business decisions
    • Direct exposure to business growth
    • Potential dividend or profit income
    • Opportunity to build an asset
    • Ability to participate in strategic sectors

    The disadvantages can include illiquidity, operational risk, regulatory obligations, management challenges, and the possibility of losing some or all invested capital.

    Business Opportunities in Namibia
    Business Opportunities in Namibia

    Business Opportunities in Namibia

    There are numerous business opportunities Namibia investors can explore, ranging from small enterprises to large infrastructure projects. Investors planning a new venture can also review business setup services in Namibia when assessing the practical requirements of establishing an operation.

    Potential areas include:

    • Mining services
    • Renewable energy
    • Agriculture
    • Food processing
    • Logistics
    • Tourism
    • Hospitality
    • Technology
    • Healthcare
    • Construction
    • Manufacturing
    • Professional services
    • Import and distribution
    • Equipment supply

    The best opportunity depends on available capital, technical expertise, market demand, competition, regulatory requirements, and the ability to execute the business model.

    Key Sectors for Investment in Namibia

    Mining and Natural Resources

    Mining remains one of Namibia’s most important investment sectors. The country is known for uranium and diamonds and has opportunities associated with emerging critical minerals.

    Potential investment areas include:

    • Mineral exploration
    • Mining operations
    • Mining equipment
    • Engineering services
    • Geological services
    • Mineral processing
    • Logistics
    • Mining technology
    • Support services

    Investors entering mining should undertake extensive geological, environmental, licensing, financial, and community-impact due diligence.

    Renewable Energy and Green Hydrogen

    Namibia has exceptional solar and wind resources, making renewable energy one of the country’s most closely watched investment areas.

    Potential projects include:

    • Solar power generation
    • Wind farms
    • Battery storage
    • Green hydrogen
    • Green ammonia
    • Transmission infrastructure
    • Port infrastructure
    • Renewable-energy equipment
    • Industrial projects using renewable electricity

    Large projects can require substantial capital, long development periods, government approvals, infrastructure investment, and partnerships between public and private entities.

    Agriculture and Agribusiness

    Agriculture presents opportunities across primary production and value-added processing.

    Potential areas include:

    • Cattle farming
    • Sheep farming
    • Poultry
    • Dairy
    • Horticulture
    • Irrigated agriculture
    • Food processing
    • Cold-chain logistics
    • Agricultural equipment
    • Animal feed

    Investors should consider water availability, land access, climate conditions, market access, input costs, logistics, and applicable agricultural regulations.

    Logistics and Infrastructure

    Namibia’s geographical position creates opportunities in transport, warehousing, freight forwarding, distribution, and infrastructure.

    The Walvis Bay corridor connects Namibia with landlocked markets in the region, creating potential for:

    • Warehousing
    • Freight services
    • Trucking
    • Inland logistics hubs
    • Distribution centres
    • Cold-chain logistics
    • Port-related services
    • Rail-related projects

    Large infrastructure projects can also create public private partnership opportunities where government and private-sector participants collaborate to finance, build, operate, or maintain infrastructure.

    Tourism and Hospitality

    Namibia’s landscapes and wildlife support a substantial tourism sector. Attractions such as Etosha National Park, the Skeleton Coast, and the Sossusvlei area contribute to demand for accommodation and tourism services.

    Investment opportunities include:

    • Lodges
    • Guesthouses
    • Safari operations
    • Luxury camps
    • Tour companies
    • Cultural tourism
    • Adventure tourism
    • Transport services
    • Hospitality infrastructure

    Tourism investors should evaluate seasonality, location, access roads, utilities, environmental requirements, staffing, and international tourism trends.

    Technology and Digital Businesses

    Technology is another area where investors can participate without the large capital requirements associated with mining or major infrastructure.

    Potential opportunities include:

    • Fintech
    • E-commerce
    • Software development
    • Digital payments
    • Agritech
    • Business software
    • Online marketplaces
    • Artificial intelligence services
    • Digital marketing
    • Technology-enabled logistics

    Small technology companies can also be suitable for small business investments, although early-stage businesses generally carry significant execution and market risk.

    Investment Opportunities for Foreign Investors in Namibia
    Investment Opportunities for Foreign Investors in Namibia

    Investment Opportunities for Foreign Investors in Namibia

    Foreign investors Namibia opportunities span both financial investments and direct commercial projects. International investors may establish businesses, enter partnerships, acquire interests in existing enterprises, or participate in major infrastructure and resource projects, subject to applicable laws and approvals.

    The Namibia Trade Information Portal’s Invest in Namibia section provides information on Namibia as an investment destination and the country’s investment facilitation framework.

    Foreign investors should obtain professional advice on:

    • Company structure
    • Ownership arrangements
    • Immigration and work requirements
    • Tax registration
    • Sector-specific licensing
    • Foreign exchange considerations
    • Land and property arrangements
    • Employment obligations
    • Environmental approvals
    • Import and export requirements
    • Repatriation of investment returns

    For investors establishing a local company, understanding the requirements for registering a company in Namibia can help with early planning.

    Foreign entrepreneurs can also review guidance on how to register a company in Namibia as a foreigner and whether a foreigner can register a company in Namibia.

    Joint Venture Opportunities

    Joint venture opportunities can be particularly useful where an international investor has capital or technology but needs local knowledge, networks, operational expertise, or market access.

    A joint venture can involve:

    • A local company and international investor
    • Two or more private companies
    • A private company and government entity
    • Strategic investors in a major project
    • Technology and capital partners

    A well-structured agreement should clearly define ownership, funding obligations, management responsibilities, intellectual property, profit distribution, decision-making, dispute resolution, exit rights, and responsibilities when a partner fails to perform.

    Public-Private Partnership Opportunities

    A public private partnership can provide a framework for delivering infrastructure or public services through cooperation between government and private-sector participants.

    Potential areas can include:

    • Roads
    • Rail
    • Ports
    • Energy
    • Water infrastructure
    • Healthcare
    • Public facilities
    • Transport infrastructure

    Investors considering PPP projects should assess project feasibility, government obligations, revenue mechanisms, contractual risks, financing requirements, procurement procedures, and long-term operating responsibilities.

    Investment Companies Namibia

    Investors seeking professional portfolio management can consider regulated financial institutions and investment companies Namibia.

    Before selecting an investment provider, compare:

    1. Regulatory status
    2. Investment products
    3. Fees
    4. Minimum contributions
    5. Historical performance
    6. Risk profile
    7. Liquidity
    8. Customer service
    9. Reporting
    10. Withdrawal conditions

    The objective should not simply be to identify the product with the highest advertised return. Risk-adjusted performance, costs, diversification, and suitability for your financial objectives are equally important.

    How to Invest in Namibia Step by Step
    How to Invest in Namibia Step by Step

    How to Invest in Namibia Step by Step

    Step 1: Define Your Investment Objective

    Start by determining what you want the investment to accomplish.

    Your objective might be:

    • Building long-term wealth
    • Generating income
    • Saving for a property
    • Preserving capital
    • Funding retirement
    • Establishing a business
    • Expanding an existing company
    • Participating in a large infrastructure project

    Step 2: Determine Your Risk Tolerance

    Higher potential returns generally come with greater investment risk.

    Consider how comfortable you are with:

    • Market fluctuations
    • Business losses
    • Illiquidity
    • Currency movements
    • Interest-rate changes
    • Regulatory uncertainty
    • Commodity-price changes

    Step 3: Research the Market

    Conduct detailed research before committing capital.

    For a business investment, examine:

    • Customer demand
    • Competitors
    • Pricing
    • Operating costs
    • Regulations
    • Supply chains
    • Infrastructure
    • Labour availability
    • Financing
    • Expected cash flow

    For financial products, review the investment mandate, fees, historical performance, liquidity, and underlying assets.

    Step 4: Choose an Investment Structure

    Dependingon your objectives, you could choose:

    • Unit trusts
    • Money market funds
    • Fixed deposits
    • Notice deposits
    • Government bonds
    • Shares
    • A private company
    • A partnership
    • A joint venture
    • A direct investment project

    The appropriate structure depends on your circumstances and the nature of the investment.

    Investors establishing a close corporation can review close corporation registration in Namibia, while those establishing a private company can review private limited company registration in Namibia.

    For organisations operating for charitable or public-benefit purposes, NGO registration in Namibia may be relevant.

    Step 5: Complete the Required Registrations

    If you establish a business, registration and licensing requirements will depend on the business structure and industry.

    A company may need to address:

    • Business registration
    • Tax registration
    • Social security requirements
    • Sector-specific licences
    • Environmental approvals
    • Import and export permits
    • Local authority requirements

    Investors should verify current requirements with the relevant authorities before commencing operations. The BIPA company registration documents guide can help investors understand the documentation involved in company registration.

    For investors starting from the beginning, registering a business in Namibia provides additional practical guidance.

    Business investors should also understand how to register a business in Namibia before commencing commercial activities.

    Step 6: Conduct Due Diligence

    Do not invest solely because an opportunity promises high returns.

    Review:

    • Ownership
    • Financial statements
    • Contracts
    • Licences
    • Debts
    • Litigation
    • Assets
    • Liabilities
    • Market assumptions
    • Management
    • Cash-flow projections
    • Exit options

    For substantial investments, independent legal, tax, accounting, financial, and technical advice can help identify risks before funds are committed.

    Step 7: Monitor the Investment

    Investing does not end when money is transferred.

    Review your investment periodically and assess:

    • Performance
    • Cash flow
    • Costs
    • Market conditions
    • Regulatory changes
    • Business performance
    • Portfolio diversification
    • Whether your original investment objective remains valid

    Investment Risks in Namibia

    Namibia offers attractive opportunities, but investors should understand the risks involved.

    Market Risk

    Shares, funds, commodities, and other market-linked investments can rise and fall in value.

    Business Risk

    A direct investment in a company depends on its management, customers, competitors, costs, and ability to generate sustainable profits.

    Regulatory Risk

    Certain industries require licences, permits, environmental approvals, or compliance with sector-specific legislation.

    Currency Risk

    International investors may face currency movements between the Namibian dollar and their home currency.

    Liquidity Risk

    Some investments cannot easily be converted into cash without a delay or financial loss.

    Sector Risk

    Concentrating capital in one industry, such as mining or tourism, can expose an investor to sector-specific shocks.

    Diversification, appropriate due diligence, realistic financial projections, and professional advice can help manage these risks.

    Namibia’s Investment Framework

    Namibia’s investment environment involves several public institutions responsible for different aspects of business, trade, taxation, investment promotion, regulation, and infrastructure.

    The Namibia Investment Centre highlights the country’s objective of attracting and retaining both foreign and local investment.

    Investors should distinguish between investment promotion information and legally binding regulatory requirements. Where a project involves substantial capital or a regulated industry, current requirements should be confirmed directly with the relevant authority and qualified professional advisers.

    How to Choose the Best Investments in Namibia

    There is no single investment that is universally the best investment in Namibia.

    A suitable choice depends on your:

    • Available capital
    • Investment horizon
    • Risk tolerance
    • Liquidity requirements
    • Expected returns
    • Tax position
    • Financial objectives
    • Experience
    • Need for control

    For example, an investor prioritising liquidity may consider money market products, while someone seeking predictable interest may investigate fixed-income products. An entrepreneur seeking greater control might establish a business, while a large institutional investor could evaluate renewable energy, mining, logistics, or infrastructure projects.

    The strongest approach is often to diversify rather than rely entirely on one asset, company, sector, or investment strategy.

    Frequently Asked Questions

    What are the best investments in Namibia?

    The best investments depend on the investor’s goals and risk tolerance. Options can include unit trusts, money market funds, fixed deposits, government bonds, shares, property, businesses, mining, agriculture, renewable energy, tourism, and logistics.

    Can foreigners invest in Namibia?

    Yes, foreign investors can participate in investment and business opportunities in Namibia, subject to applicable ownership, registration, licensing, tax, immigration, exchange-control, and sector-specific requirements. Foreign entrepreneurs should also review the requirements to register a company in Namibia as a foreigner before setting up their business.

    What sectors have the most investment opportunities in Namibia?

    Important areas include mining, renewable energy, green hydrogen, agriculture, logistics, infrastructure, tourism, hospitality, manufacturing, healthcare, and technology. The appropriate sector depends on available capital, expertise, market demand, regulations, and expected returns.

    Final Word on How to Invest in Namibia
    Final Word on How to Invest in Namibia

    Final Word on How to Invest in Namibia

    Namibia provides investment opportunities ranging from relatively accessible financial products to capital-intensive commercial projects. Unit trusts Namibia, money market funds, fixed deposits, notice deposits, government bonds, and other investment accounts can serve different financial objectives, while direct private investment can provide exposure to operating businesses and major economic sectors.

    For entrepreneurs and institutional investors, mining, renewable energy, green hydrogen, agriculture, logistics, tourism, infrastructure, and technology offer diverse investment opportunities Namibia. Foreign investors can also explore joint ventures and public-private partnerships where appropriate.

    Successful investing requires more than identifying an attractive opportunity. Investors should define their objectives, assess risk, conduct due diligence, understand regulatory requirements, compare costs and potential returns, and monitor their investments over time.

    Business investors should also consider ongoing compliance after incorporation. Depending on the structure and activities of the business, this may include company secretarial services, tax registration, and other administrative requirements.

    For tax compliance, investors can review NamRA registration in Namibia, business income tax registration, and individual taxpayer registration. Businesses employing staff may also need to understand PAYE employer registration in Namibia.

    Additional tax considerations can apply to trusts, non-resident service providers, and foreign shareholders. Relevant guidance includes registering a trust for tax purposes with NamRA, obtaining a NamRA certificate of good standing, non-resident withholding tax on services, and non-resident shareholders tax registration.

    International entrepreneurs who want to manage a Namibian business without maintaining a traditional office can also explore remote business setup in Namibia and virtual office services. Before committing to a structure or investment, investors can review forms and fees for registering a private company in Namibia and seek professional assistance through the business setup contact page.

  • Where to Incorporate in Southern Africa: Botswana, Namibia, Zambia, DRC and Mauritius Compared

    Where to Incorporate in Southern Africa: Botswana, Namibia, Zambia, DRC and Mauritius Compared

    Where to Incorporate in Southern Africa: Botswana, Namibia, Zambia, DRC and Mauritius Compared

    Compare company incorporation and company registration in Botswana, Namibia, Zambia, DRC, Mauritius and South Africa, including company structures, directors, beneficial ownership, subsidiaries, branches and compliance requirements.

    Choosing where to incorporate a company in Southern Africa involves far more than comparing registration fees. The right jurisdiction depends on your operating model, ownership structure, governance requirements, tax position, beneficial ownership obligations and plans for regional expansion.

    Botswana, Namibia, the Democratic Republic of Congo (DRC) and Mauritius each offer different approaches to company incorporation, business registration and ongoing corporate compliance.

    For businesses considering regional expansion, a useful starting point is this comparison of Botswana, Namibia, Zambia, DRC and Mauritius, which highlights how incorporation requirements differ across these jurisdictions.

    Where to Incorporate in Southern Africa: Botswana, Namibia, Zambia, DRC and Mauritius Compared
    Where to Incorporate in Southern Africa: Botswana, Namibia, Zambia, DRC and Mauritius Compared

    Botswana Company Incorporation

    Botswana company registration is handled by the Companies and Intellectual Property Authority (CIPA) through its Online Business Registration System.

    The process is relatively straightforward, but company registration does not necessarily give a business every licence required to trade. Depending on the activity and premises, a separate local trade licence may be necessary.

    Botswana Annual Compliance

    Annual compliance is particularly important because a Botswana company must file its annual return during its incorporation month.

    The stated annual-return fee is P500. Late filing during days 1 to 10 of the following month attracts an additional P500, while removal from the register can follow from day 11. Restoration can cost P2,500.

    This demonstrates why company setup should include an ongoing compliance calendar rather than stopping once the certificate of incorporation has been obtained.

    For businesses considering the practical requirements of incorporation and ongoing support, company incorporation in South Africa and related corporate support also illustrates the broader principle that incorporation is only the beginning of the corporate lifecycle.

    Namibia Company Registration

    Namibia uses the Business and Intellectual Property Authority (BIPA) for company registration and related entity registrations.

    Before preparing incorporation documents, investors should decide which legal structure best suits the proposed business. A private company generally uses CM5 for name reservation and CM1 for incorporation, while a close corporation uses CC8 and CC1. BIPA company registration documents in Namibia provide further guidance on the documentation involved.

    The choice should not be based solely on the initial registration fee. Ownership, management authority, future investment, governance and capital-raising requirements can all influence whether a particular entity is appropriate.

    Choosing a Namibian Company Structure

    A small owner-managed business may consider a close corporation where the structure fits its ownership and operational requirements. A business expecting multiple investors, formal board oversight or future capital raising may need to consider a private company instead. Businesses can review the close corporation registration process in Namibia when assessing this option.

    The company name should be selected only after the founders have considered the proposed ownership and business activities.

    A good business registration process therefore starts with entity selection rather than simply completing the cheapest available form. More information on registering a business in Namibia can help investors understand the broader registration process.

    Zambia Company Incorporation

    Zambia’s Patents and Companies Registration Agency (PACRA) handles business incorporation and company registration.

    After name clearance or reservation, companies generally proceed with Companies Form 3. The incorporation process is only one component of ongoing compliance.

    One particularly important requirement is beneficial ownership.

    Beneficial Ownership and Annual Returns

    Zambian companies must file annual returns within three months of the financial year-end, including updated beneficial ownership information.

    This means beneficial ownership should be treated as a continuing governance responsibility. If shareholders or controlling interests change, company records should be updated when the change occurs rather than reconstructed immediately before an annual return is due.

    Businesses considering Zambia should therefore assign responsibility for corporate records to specific company directors or another appropriate compliance function.

    DRC Company Formation

    The Democratic Republic of Congo uses the Guichet Unique de Création d’Entreprise (GUCE) for company formation.

    The one-stop process can provide important registration outputs, including the RCCM commercial registration, National Identification and a Direction Générale des Impôts tax number (NIF).

    The stated process can take approximately three working days, with published formation charges depending on whether articles are privately signed or notarised. A 1% duty can also apply to share capital.

    NIF DRC and Business Registration

    Obtaining a NIF is important for tax compliance, but NIF DRC registration should not be confused with completing every corporate and employment-related requirement.

    Businesses entering the DRC should identify each registration separately and establish who is responsible for completing it.

    This is particularly important for foreign investors because a foreign company entering a new market may need additional registrations, licences or local arrangements beyond its basic incorporation.

    Mauritius Company Incorporation

    Mauritius provides several corporate structures, and investors should avoid treating all Mauritius entities as interchangeable.

    A domestic company, Global Business Company and Authorised Company can have different requirements and purposes.

    Domestic incorporation is handled by the Corporate and Business Registration Department (CBRD), generally through an online process. A domestic private company requires, among other things, a resident director, shareholder information and beneficial-owner disclosure.

    Domestic Company vs Global Business Company

    The appropriate structure depends on where the business operates, where management takes place and what the company is intended to accomplish.

    A Global Business Company is designed for businesses conducting their principal operations from Mauritius, while an Authorised Company is intended for circumstances where business activities and management are outside Mauritius.

    The distinction is important for investors looking at Mauritius as a regional holding or investment location.

    South Africa Incorporation Compared With Other Jurisdictions

    Although South Africa is not part of the five-jurisdiction comparison, it is frequently considered by businesses evaluating Southern African expansion.

    South Africa incorporation is administered through the Companies and Intellectual Property Commission (CIPC). The appropriate structure depends on the nature and objectives of the business.

    South Africa recognises several company types, including private companies, public companies and personal liability companies. A detailed corporate guide explains the different types of companies that can be incorporated in South Africa.

    Businesses beginning the incorporation steps typically need to consider their company name, registration documentation, directors and other corporate requirements.

    A practical overview of how to start a corporation in South Africa highlights core stages such as choosing a company name, registering the business and appointing directors and incorporators.

    Subsidiary Company or Branch Company?

    Foreign businesses expanding into Southern Africa often have to decide between establishing a subsidiary company and registering a branch company.

    The two structures can produce significantly different legal and governance consequences.

    A subsidiary is generally a separate locally incorporated company. A branch, by contrast, represents the foreign company in the local jurisdiction rather than creating an entirely separate corporate entity.

    The distinction can affect liability, governance, taxation, reporting and operational control. Businesses should therefore consider the structure alongside their long-term expansion strategy.

    A useful discussion of the subsidiary versus branch structure for foreign companies provides further context for businesses considering a South African market entry.

    Company Incorporators and Directors

    The people responsible for establishing and managing a company are another important consideration during company setup.

    Depending on the jurisdiction and entity type, incorporation may require information about company directors, shareholders, beneficial owners and company incorporators.

    These requirements are not merely administrative. Directors can have continuing statutory responsibilities involving financial records, annual returns, beneficial ownership information and regulatory compliance.

    A business should therefore identify responsible individuals before filing rather than treating governance as something to resolve after registration.

    Foreign Company or Local Company?

    International investors must also determine whether they need a foreign company registration, a new local company, a subsidiary or another legal structure.

    The answer depends on the intended activity.

    A business establishing a permanent operating presence may benefit from a locally incorporated entity, while another business may have legitimate reasons to operate through a registered foreign entity or branch.

    The South African government’s guidance on starting your own business provides an example of how official business-registration information can form part of the initial market-entry research process.

    The same principle applies throughout Southern Africa: incorporation should be assessed together with licensing, tax, employment and sector-specific requirements.

    Key Factors When Choosing a Jurisdiction to Incorporate in Southern Africa
    Key Factors When Choosing a Jurisdiction to Incorporate in Southern Africa

    Key Factors When Choosing a Jurisdiction to Incorporate in Southern Africa

    Registration cost is only one factor when comparing jurisdictions.

    Businesses should evaluate:

    • Company registration requirements
    • Company incorporation costs
    • Annual filing obligations
    • Beneficial ownership requirements
    • Tax registration
    • Local licensing
    • Employment registrations
    • Resident-director requirements
    • Foreign ownership considerations
    • Corporate governance
    • Banking requirements
    • Ability to raise future capital
    • Regional expansion plans
    • Sector-specific permits
    • Ongoing compliance costs

    For example, a company with a physical retail operation may face very different requirements from an investment holding company.

    Likewise, a regional business may prioritise cross-border governance and ownership flexibility, while a locally managed SME may prioritise simplicity and operating costs.

    Comparing Botswana, Namibia, Zambia, DRC and Mauritius

    JurisdictionMain registration authorityKey consideration
    BotswanaCIPAOnline registration and strict annual-return timing
    NamibiaBIPAChoosing the appropriate entity before filing
    ZambiaPACRAAnnual returns and beneficial ownership
    DRCGUCECoordinating incorporation with tax and employment registrations
    MauritiusCBRD/FSC depending on structureSelecting the correct domestic or international business structure

    No single jurisdiction is automatically the best place to incorporate.

    The right choice depends on what the company will actually do, where its customers are located, where management will occur, whether employees will be hired and whether the company will hold assets or investments.

    Company Registration Should Match the Business Model to Incorporate in Southern Africa
    Company Registration Should Match the Business Model to Incorporate in Southern Africa

    Company Registration Should Match the Business Model to Incorporate in Southern Africa

    A successful company registration strategy starts with the operating model.

    A Botswana company may require careful coordination between incorporation and trade licensing. A Namibian company requires an appropriate choice between available entity structures. A Zambian business needs ongoing beneficial ownership management. A DRC operation requires attention to the full GUCE process and related registrations. Mauritius requires investors to distinguish between different corporate structures rather than simply choosing an entity because it is described as an offshore company.

    Businesses expanding into South Africa should likewise consider whether a new local company, branch or subsidiary company best fits their expansion strategy.

    Where uncertainty exists, the incorporation route should be reviewed before documents are submitted. Changing the structure later can be considerably more complicated than selecting the correct structure at the beginning.

    Namibia Tax and Compliance Considerations

    For businesses choosing Namibia as their incorporation jurisdiction, company formation should be followed by appropriate tax registration and compliance. The NamRA registration process in Namibia is an important part of establishing the company’s tax profile.

    Individual owners and business founders may also have separate tax obligations. Investors can review the process for registering as an individual taxpayer in Namibia where applicable.

    Companies carrying on taxable activities should also consider how to register a business for income tax in Namibia.

    Other structures can have different tax-registration requirements. For example, investors establishing trusts can review the process for registering a trust for tax purposes with NamRA.

    A company that needs evidence of its tax compliance status may also need to understand how to apply for a NamRA Certificate of Good Standing.

    Cross-border businesses should pay particular attention to withholding-tax obligations. Relevant considerations include registering for non-resident withholding tax on services and registering for non-resident shareholders tax (NRST) with NamRA.

    Where a Namibian company employs staff, registering as an employer for PAYE in Namibia can form part of the company’s post-incorporation compliance work.

    Business Setup in Namibia for Local and Foreign Investors

    Investors who select Namibia should consider the entire business setup rather than treating BIPA incorporation as an isolated step. Professional business setup services in Namibia can assist with coordinating different stages of establishing an operating presence.

    A private company may be appropriate for businesses requiring a more formal corporate structure. Investors can review private limited company registration in Namibia when evaluating this route.

    The practical requirements should be reviewed before filing, including the requirements for registering a company in Namibia, as well as the applicable forms and fees for registering a private company in Namibia.

    Foreign Investors Establishing a Namibian Company

    International investors may have additional questions about ownership, documentation and the practical process of establishing a Namibian company.

    A foreign investor can review how to register a company in Namibia as a foreigner and the related requirements to register a company in Namibia as a foreigner.

    The question of whether a non-Namibian can establish a company is also addressed by guidance on whether a foreigner can register a company in Namibia.

    Businesses whose owners or management teams are located outside Namibia may also consider remote business setup in Namibia, depending on their operational model.

    Supporting a Namibian Business After Incorporation

    Incorporation is only the beginning of a company’s corporate lifecycle. Depending on the business model, founders may require a local business address, administrative support and continuing corporate compliance.

    A virtual office in Namibia can be relevant for businesses that require a professional local presence without immediately establishing a conventional office.

    Ongoing corporate administration can also include company secretarial services, particularly where directors need assistance maintaining statutory records and meeting recurring compliance obligations.

    Businesses that require additional assistance can also contact a Namibia business setup service for guidance on the appropriate incorporation and compliance route.

    Frequently Asked Questions About Where to Incorporate in Southern Africa
    Frequently Asked Questions About Where to Incorporate in Southern Africa

    Frequently Asked Questions About Where to Incorporate in Southern Africa

    What is the best country for company incorporation in Southern Africa?

    There is no universal best jurisdiction. Botswana, Namibia, Zambia, DRC and Mauritius have different incorporation, governance, tax and compliance requirements. The best option depends on the company’s activities, ownership, employees, customers and expansion plans.

    What is the difference between a subsidiary and a branch company?

    A subsidiary is generally a separate locally incorporated legal entity, while a branch is an extension of the foreign company. The choice can affect liability, governance, taxation and reporting requirements.

    Does company registration allow a business to start trading immediately?

    Not necessarily. Company registration creates or registers the legal business presence, but additional trade licences, sector approvals, tax registrations, employment registrations or other permits may be required before operations can begin.

    For a practical incorporation project, businesses should treat company incorporation, tax registration, licensing and ongoing corporate compliance as connected stages rather than isolated administrative tasks.

    A useful reference for the procedural side of South African incorporation is this guide to incorporation steps and CIPC company registration.

  • Different Types of Companies That Can Be Incorporated in South Africa

    Different Types of Companies That Can Be Incorporated in South Africa

    Different Types of Companies That Can Be Incorporated in South Africa

    Learn about the different types of companies that can be incorporated in South Africa, including private companies, public companies, personal liability companies, state-owned companies and non-profit companies, plus sole proprietorships, partnerships, external companies and small business structures.

    South Africa has several company types and business entity types available to entrepreneurs, investors, professionals, non-profit organisations and government-related enterprises. Choosing the right legal structure is important because it can affect ownership, liability, taxation, governance, reporting obligations and the way a business raises capital.

    Under the Companies Act 71 of 2008, companies are broadly divided into profit companies and non-profit companies. Profit companies include private companies, public companies, personal liability companies and state-owned companies, while non-profit companies are established for public-benefit or related objectives.

    For a useful overview of the available structures, the South Africa Africa Corporate Guide provides a breakdown of the principal company categories.

    Different Types of Companies That Can Be Incorporated in South Africa
    Different Types of Companies That Can Be Incorporated in South Africa

    Main Company Types in South Africa

    The main company types that can be incorporated under South African company law are:

    1. Private companies (Pty) Ltd
    2. Public companies (Ltd)
    3. Personal liability companies (Inc.)
    4. State-owned companies (SOC Ltd)
    5. Non-profit companies (NPC)

    Each structure serves a different purpose. The most appropriate choice depends on whether the organisation is intended to operate for profit, raise capital from the public, serve a professional practice, perform a public function or pursue a non-profit objective.

    1. Private Companies (Pty) Ltd

    A private company Pty Ltd is generally the most suitable structure for many entrepreneurs and privately owned businesses. It is a separate legal entity from its shareholders and can conduct business, own assets, enter contracts and incur liabilities in its own name.

    Private companies are commonly used by small and medium-sized businesses because they provide a formal corporate structure while allowing ownership and management to remain relatively private.

    A private company can have one or more shareholders and directors, subject to the requirements of the Companies Act. Its shares are not offered to the general public.

    The Types of Companies in South Africa guide explains the distinction between private companies, public companies, personal liability companies, state-owned companies and non-profit companies.

    Why choose a private company?

    A private company may be appropriate when the owners want:

    • A separate legal personality
    • Limited liability for shareholders, subject to applicable legal exceptions
    • A formal structure for conducting commercial activities
    • The ability to have multiple shareholders
    • A structure suitable for growing businesses
    • Greater separation between personal and business affairs

    For many entrepreneurs, the private company is the practical starting point when comparing different business entity types.

    2. Public Companies (Ltd)

    A public company Ltd is designed for businesses that may need to raise capital from the public. Unlike a private company, a public company can offer shares to the public in accordance with applicable legal and regulatory requirements.

    Public companies are generally associated with larger enterprises and more extensive governance and reporting requirements.

    Importantly, being a public company does not automatically mean that the company is listed on a stock exchange. A listed company must be a public company, but not every public company is necessarily listed.

    The guide to companies that can be incorporated in South Africa explains this distinction and provides further information about private and public companies.

    When is a public company appropriate?

    A public company may be considered where a business:

    • Requires significant capital
    • Plans to raise funds from public investors
    • Has a large shareholder base
    • May eventually seek a stock exchange listing
    • Requires a corporate structure suitable for substantial operations

    For a typical owner-managed small business, however, a private company is usually more relevant than a public company.

    3. Personal Liability Companies (Inc.)

    A personal liability company is identified by the abbreviation Inc. and is particularly associated with certain professional practices.

    The structure can be suitable for professionals whose businesses require a corporate vehicle while retaining particular legal responsibilities for directors. Depending on the circumstances and applicable legislation, directors may have personal liability for certain company obligations.

    Professional practices such as firms of attorneys, accountants and other regulated professionals may use this structure where permitted.

    This makes personal liability companies different from ordinary private companies and highlights why business owners should consider the legal consequences of each structure before completing company registration.

    4. State-Owned Companies (SOC Ltd)

    A state-owned company SOC is a company in which the state has the relevant ownership or control and which operates commercially or performs activities in the public interest.

    State-owned companies can play important roles in strategic sectors of the South African economy, including infrastructure, transport, energy and other public services.

    The South Africa corporate guide provides additional context on state-owned companies alongside the other categories of companies recognised under South African company law.

    This structure is generally not an option for an ordinary private entrepreneur simply looking to establish a new commercial business. Its purpose is fundamentally different from that of privately owned companies.

    5. Non-Profit Companies (NPC)

    A non-profit company NPC is established for a public benefit objective or another purpose recognised under South African law rather than primarily to distribute profits to shareholders.

    Non-profit companies can be used for activities involving community development, education, social welfare, cultural initiatives, environmental programmes and other public-benefit purposes.

    An NPC can generate income, but its income and assets must be applied in accordance with its non-profit objectives and governing requirements rather than distributed to members or directors simply as profits.

    The Different types of business entities guide from Old Mutual provides useful background on the differences between business structures used for commercial and non-profit purposes.

    Companies Versus Other Business Entities in South Africa
    Companies Versus Other Business Entities in South Africa

    Companies Versus Other Business Entities in South Africa

    Not every business operating in South Africa is incorporated as a company. Entrepreneurs can also encounter structures such as sole proprietorships, partnerships and close corporations when considering different forms of business ownership.

    A business entity overview from Ithala discusses sole proprietorships, partnerships, close corporations and companies as different forms of business entities.

    Sole Proprietorships

    A sole proprietorship is operated by an individual rather than through a separate incorporated company. It can be relatively straightforward to establish, but the owner and business are generally not separate legal persons.

    This means the owner may have personal exposure to the business’s debts and obligations.

    Partnerships

    A partnership involves two or more people conducting business together under an agreed arrangement. Partnerships can be useful where individuals want to combine skills, capital or resources, but the legal and financial consequences depend on the partnership arrangement and applicable law.

    Close Corporations

    Close corporations were historically an important structure for small businesses in South Africa. However, new close corporations cannot generally be registered under the current Companies Act framework. Existing close corporations continue to operate subject to applicable legislation.

    Consequently, entrepreneurs establishing a new small business will generally consider a private company or another available structure instead.

    A comparison of small business structures, including sole proprietorships, close corporations and partnerships, can also be found in Nedbank’s guide to choosing a business structure.

    External Companies

    An external company is another important concept for businesses operating in South Africa. It generally refers to a foreign company conducting or intending to conduct business or non-profit activities in South Africa, subject to the applicable registration and compliance requirements.

    This structure is particularly relevant to international businesses that want to establish a presence in South Africa without necessarily creating an entirely new South African company.

    The requirements for an external company can differ from those applicable to a locally incorporated private company, making professional advice valuable where a foreign parent company is involved.

    Profit Companies vs Non-Profit Companies

    One of the most important distinctions when choosing between company structures is whether the organisation is intended to operate for profit or for a non-profit purpose.

    CategoryMain company typesGeneral purpose
    Profit companiesPrivate company, public company, personal liability company, state-owned companyCommercial or profit-generating activities
    Non-profit companiesNon-profit companyPublic benefit or other recognised non-profit objectives

    The distinction affects the company’s objectives, governance arrangements, treatment of income and compliance obligations.

    Which Company Structure Is Best for a Small Business in South Africa?
    Which Company Structure Is Best for a Small Business in South Africa?

    Which Company Structure Is Best for a Small Business in South Africa?

    For many entrepreneurs starting a conventional commercial business, a private company (Pty) Ltd is often the most practical option.

    It can provide a separate legal personality and a recognised corporate structure without the public fundraising characteristics associated with a public company.

    However, the best structure depends on the business’s circumstances. A professional practice may need to consider a personal liability company, while an organisation established for public benefit may be better suited to an NPC.

    When comparing business entities, consider:

    • The purpose of the organisation
    • Ownership requirements
    • Liability exposure
    • Number of owners or shareholders
    • Funding requirements
    • Whether public investment will be required
    • Governance obligations
    • Tax considerations
    • Ongoing compliance requirements
    • Whether the business is locally or internationally owned

    Company Registration in South Africa

    Companies incorporated in South Africa are registered through the Companies and Intellectual Property Commission (CIPC). The incorporation process involves selecting an appropriate structure, determining the proposed company name where applicable, preparing the required information and completing the relevant registration procedures.

    Choosing the correct structure before registration is important because changing a company’s structure later can involve additional administrative, legal and financial considerations.

    Business owners should also distinguish between incorporation and general business registration. An incorporated company becomes a separate legal entity, while other forms of business ownership may not create the same legal separation.

    Key Differences Between Company Types

    The following comparison provides a simplified way to understand the principal incorporated companies available in South Africa:

    Company typeMain purposeTypical usersPublic share offering
    Private company (Pty) LtdCommercial businessEntrepreneurs and SMEsNo
    Public company (Ltd)Commercial enterprise and capital raisingLarger businessesYes, subject to legal requirements
    Personal liability company (Inc.)Professional or specialised practicesCertain professionalsNo
    State-owned company (SOC Ltd)Commercial/public-interest activitiesState-controlled enterprisesDepends on structure and ownership
    Non-profit company (NPC)Public benefit or non-profit objectivesNGOs and other organisationsNot established for shareholder profit

    The terminology should not be confused with general types of business entities. Sole proprietorships and partnerships, for example, are business structures but are not incorporated companies in the same sense as a company registered under the Companies Act.

    Frequently Asked Questions

    What are the main types of companies in South Africa?

    The principal types are private companies (Pty) Ltd, public companies (Ltd), personal liability companies (Inc.), state-owned companies (SOC Ltd) and non-profit companies (NPC).

    Which company type is best for a small business?

    A private company (Pty) Ltd is commonly suitable for a conventional small or medium-sized commercial business because it provides a separate corporate structure and is designed for privately held businesses.

    Can I still register a close corporation in South Africa?

    New close corporations are generally no longer registered under the current Companies Act. Existing close corporations can continue subject to applicable legal requirements, while new entrepreneurs commonly consider a private company as an alternative.

  • Company Incorporation in South Africa: A Complete Guide to Registration and Corporate Support

    Company Incorporation in South Africa: A Complete Guide to Registration and Corporate Support

    Company Incorporation in South Africa: A Complete Guide to Registration and Corporate Support

    Learn how company incorporation in South Africa works, including CIPC company registration, company name reservation, founding documents, SARS tax registration, BizPortal registration, business structures and ongoing corporate support.

    Company incorporation in South Africa is a structured process that gives a business a recognised legal identity and creates the foundation for operating, contracting, employing staff and meeting tax obligations. For entrepreneurs, investors and international businesses, understanding the company registration process before submitting documents can reduce delays and prevent costly compliance mistakes.

    The Companies and Intellectual Property Commission (CIPC) is responsible for registering companies and maintaining South Africa’s companies registry. Businesses can also use the government’s BizPortal platform for a range of registration-related services.

    This guide explains the key stages of company incorporation in South Africa, including choosing a company legal structure, reserving a name, preparing company founding documents, completing CIPC registration, handling SARS tax registration and managing post-incorporation compliance.

    Company Incorporation in South Africa: A Complete Guide to Registration and Corporate Support
    Company Incorporation in South Africa: A Complete Guide to Registration and Corporate Support

    What Is Company Incorporation in South Africa?

    Company incorporation is the legal process of creating a company as a separate business entity under South African company law. Once incorporated, the company has its own legal identity, separate from its shareholders.

    The CIPC official website provides access to company registration, company searches and other corporate services.

    For most entrepreneurs establishing a conventional trading business, a private company, commonly identified as a (Pty) Ltd, is an important option to consider. Other structures may be appropriate depending on the purpose, ownership arrangement and activities of the organisation.

    The choice of structure is important because it can affect governance, ownership, taxation, reporting and future expansion.

    Choose the Right Company Legal Structure

    One of the first decisions in company formation South Africa is determining which legal structure best fits the proposed business.

    A private company is commonly used by entrepreneurs who want to establish a separate legal entity. Other structures can be relevant to non-profit activities, external companies and specialised business arrangements.

    When selecting a structure, consider:

    • Number and type of owners
    • Intended business activities
    • Ownership and shareholding arrangements
    • Management requirements
    • Funding and investment plans
    • Tax obligations
    • Reporting and compliance requirements
    • Whether the business may expand internationally

    Choosing a suitable structure at the beginning can prevent unnecessary restructuring later.

    Professional incorporation providers can also assist with selecting a suitable structure and handling related corporate requirements. Our South African incorporation guidance explains how incorporation can form part of a broader programme of corporate and administrative support.

    Company Name Reservation

    A company name reservation is an important step when the founders want to register a company under a particular name.

    Before submitting a name application, entrepreneurs should consider whether the proposed name is distinctive and appropriate for the intended business. A name that is unavailable or unsuitable can result in additional delays.

    The incorporation process commonly starts with determining the proposed company name and dealing with its reservation through CIPC. Our guide to setting up a company in South Africa provides an overview of this stage and the broader incorporation process.

    It is sensible to prepare alternative names rather than relying on a single choice.

    Prepare the Company Founding Documents

    After deciding on the structure and name, the founders need to prepare the information and documentation required for registration.

    One of the most important documents is the Memorandum of Incorporation (MOI). It establishes important rules concerning the company’s governance and operation.

    Depending on the company and registration circumstances, information may be required concerning:

    • Directors
    • Shareholders
    • Company address
    • Registered office
    • Shareholding
    • Company activities
    • Incorporation details
    • Identification or supporting documents

    The exact requirements can vary depending on the company structure and circumstances, so applicants should verify the current requirements before submitting an application.

    Complete CIPC Company Registration in South Africa
    Complete CIPC Company Registration in South Africa

    Complete CIPC Company Registration in South Africa

    The next stage is submitting the application for CIPC company registration.

    CIPC is the central authority responsible for registering companies and maintaining the official corporate registry. Applicants can use CIPC’s electronic services or appropriate government-supported registration channels.

    The BizPortal platform was developed by CIPC to provide company registration and related services through a simplified, largely paperless process.

    A typical CIPC registration process involves:

    1. Selecting the appropriate business entity.
    2. Preparing the required information and documentation.
    3. Completing the relevant registration application.
    4. Submitting the application and paying applicable fees.
    5. Responding to any requests for additional information.
    6. Receiving confirmation and company registration documents once the application is approved.

    The registration timeline can vary depending on the application, documentation and processing requirements.

    What You Receive After Incorporation

    Successful business registration South Africa results in an officially registered business entity. The registration documentation should be retained carefully because it may be required when dealing with banks, customers, suppliers, government authorities and other professional service providers.

    Depending on the registration, the company’s records can include information relating to:

    • Company registration number
    • Registered company name
    • Directors
    • Shareholders
    • Incorporation documentation
    • Memorandum of Incorporation
    • Registered address

    It is important to check the registration documents after incorporation and ensure that the information is accurate.

    SARS Tax Registration

    CIPC registration and tax administration are closely connected, but entrepreneurs should not assume that every possible tax obligation is automatically dealt with simply because the company has been incorporated.

    A newly registered South African company may have obligations involving the South African Revenue Service (SARS), depending on its activities, turnover, employees and other circumstances.

    Potential tax-related registrations and obligations can include:

    • Income tax
    • Value-added tax (VAT), where applicable
    • Pay-As-You-Earn (PAYE), where applicable
    • Unemployment Insurance Fund (UIF), where applicable
    • Other tax or reporting obligations relevant to the business

    The appropriate registrations depend on the company’s circumstances. Businesses should therefore establish their tax requirements early rather than waiting until they begin trading.

    Open a Business Bank Account

    After incorporation, many businesses will need a dedicated corporate bank account.

    Banks may request company registration documentation, identification documents, information about directors and shareholders, proof of address and other supporting information.

    A separate business account helps maintain a clear distinction between company transactions and personal finances. This can make bookkeeping, accounting, tax administration and financial reporting easier.

    Banking requirements can differ between financial institutions, so entrepreneurs should confirm the latest requirements directly with their chosen bank.

    Post-Incorporation Corporate Support

    Incorporation is not the end of the process. A registered company must continue meeting applicable legal, tax and administrative obligations.

    Ongoing corporate support may include:

    • Accounting and bookkeeping
    • Tax administration
    • Payroll administration
    • Annual returns
    • Corporate record maintenance
    • Beneficial ownership compliance
    • Changes to directors or shareholders
    • Registered office administration
    • Financial reporting
    • Regulatory registrations and licences

    The importance of ongoing support is highlighted by our guidance on incorporating an entity in South Africa, which covers several considerations that businesses should address beyond the initial registration.

    Professional company registration services can be particularly useful for businesses that do not have an internal legal, accounting or compliance team.

    CIPC Company Search and Verification

    A CIPC company search can be useful when checking information about an existing business.

    Company searches can help businesses perform due diligence before entering commercial relationships, signing contracts or making investments. Entrepreneurs may also want to verify their own company’s information after registration.

    Useful checks can include:

    • Whether a company is registered
    • Company registration information
    • Company status
    • Directors or related corporate information where available
    • Corporate records available through the relevant search service

    Verification is particularly important when dealing with unfamiliar suppliers, partners or investment opportunities.

    Registering a Company Online

    Online registration has made setting up a company more accessible for many entrepreneurs.

    Digital registration platforms can reduce paperwork and allow applicants to submit information electronically. However, convenience does not eliminate the need to provide accurate information.

    Before beginning an online application, prepare:

    • Proposed company names
    • Business activity information
    • Director details
    • Shareholder details
    • Addresses
    • Identification documents
    • Relevant incorporation information
    • Payment method for applicable fees

    Carefully review the application before submission. Incorrect information can create delays or require subsequent amendments.

    How Much Does Company Registration Cost in South Africa?
    How Much Does Company Registration Cost in South Africa?

    How Much Does Company Registration Cost in South Africa?

    The cost of company incorporation in South Africa depends on the type of entity, services selected and whether professional assistance is used.

    Government registration fees and optional professional service fees should be considered separately.

    Some providers offer packages that combine registration with additional services such as document preparation, tax assistance or administrative support. For example, our company registration service illustrates how private registration services may package incorporation with additional support.

    When comparing prices, do not look only at the advertised registration fee. Check exactly what the package includes and whether additional charges apply.

    Why Professional Corporate Support Can Be Valuable

    A company can technically be registered without extensive professional assistance, but incorporation is only one part of establishing a compliant business.

    Professional support can be useful where the founders:

    • Are unfamiliar with South African company law
    • Live outside South Africa
    • Have multiple shareholders
    • Need assistance with corporate documentation
    • Need tax or accounting support
    • Are establishing a subsidiary or external operation
    • Require ongoing compliance administration
    • Want to avoid mistakes during registration

    The South African government business registration guidance also provides official information about registering profit and non-profit companies through CIPC.

    For more complex structures, obtaining appropriate legal, accounting or tax advice before incorporation can be worthwhile.

    Company Incorporation for Foreign Investors

    Foreign entrepreneurs can establish business interests in South Africa, but international investors should consider more than the basic registration procedure.

    A foreign-owned business may need to consider:

    • Ownership structure
    • Directors and management
    • Immigration requirements where relevant
    • Tax obligations
    • Banking requirements
    • Exchange-control considerations where applicable
    • Local business licences
    • Employment requirements
    • Industry-specific regulations
    • Ongoing corporate compliance

    Foreign investors should distinguish between business entity registration and the separate regulatory permissions that may be required to actually conduct a particular activity.

    Common Mistakes During Company Registration in South Africa
    Common Mistakes During Company Registration in South Africa

    Common Mistakes During Company Registration in South Africa

    Several avoidable mistakes can make the incorporation process more difficult.

    Choosing the Wrong Structure

    Selecting a structure without considering future ownership, investment and operational requirements may create unnecessary complications.

    Providing Incorrect Information

    Errors in names, identification details, addresses or shareholder information can result in delays or corrections.

    Ignoring Tax Requirements

    Company incorporation does not mean that every tax obligation has been assessed. Businesses should determine their applicable SARS requirements before commencing significant trading activity.

    Treating Registration as the Final Step

    A company must continue meeting its corporate and regulatory obligations after incorporation. Annual returns, company records and applicable tax filings should be managed consistently.

    Failing to Check Industry Requirements

    Some sectors require additional licences, registrations or approvals. A CIPC registration alone may not authorise every type of business activity.

    A Practical Company Incorporation Checklist

    Before starting the company incorporation process, work through the following checklist:

    • Choose the appropriate company legal structure.
    • Select suitable company names.
    • Check name availability and reserve the preferred name where required.
    • Prepare director and shareholder information.
    • Prepare the required company founding documents.
    • Submit the CIPC registration application.
    • Pay the applicable registration fees.
    • Obtain and securely store incorporation documents.
    • Confirm relevant SARS tax obligations.
    • Register for additional taxes where applicable.
    • Open a business bank account.
    • Check whether industry-specific licences are required.
    • Establish accounting and bookkeeping procedures.
    • Monitor annual returns and other compliance deadlines.
    • Maintain accurate company and beneficial ownership records.

    Frequently Asked Questions

    1. How do I register a company in South Africa?

    You generally begin by selecting the appropriate legal structure, choosing a company name, preparing the required information and documents, and submitting the application through CIPC or an approved registration channel such as BizPortal. After incorporation, the business should address applicable tax, banking and compliance requirements.

    2. Is CIPC registration the same as tax registration?

    No. CIPC handles company incorporation and corporate registration, while SARS administers taxation. Some tax processes may be connected to company registration, but businesses should still establish which tax registrations and obligations apply to their specific circumstances.

    3. Do I need professional company registration services?

    Not necessarily. Some entrepreneurs can complete straightforward registrations themselves. Professional assistance can nevertheless be valuable when the ownership structure is complex, the founders are unfamiliar with the process, the business is foreign-owned or additional tax, regulatory and corporate support is required.

  • How to Start a Logistics Company in Namibia: Cross-Border Corridor Guide

    How to Start a Logistics Company in Namibia: Cross-Border Corridor Guide

    How to Start a Logistics Company in Namibia: Cross-Border Corridor Guide

    Learn how to start a logistics company in Namibia, including BIPA registration, NamRA customs clearance, road freight permits, Walvis Bay corridor routes, cross-border trade and logistics services.

    Starting a logistics company in Namibia can provide access to one of Southern Africa’s strategically positioned transport and trade markets. Namibia connects the Atlantic Ocean to landlocked markets through the Walvis Bay corridor, while established road networks provide access to Botswana, South Africa, Zambia, the Democratic Republic of Congo and southern Angola.

    However, building a successful logistics business involves much more than purchasing trucks or arranging freight. Entrepreneurs must consider company registration, customs compliance, transport permits, clearing requirements, warehousing, route planning and cross-border regulations.

    The cross-border corridor guide for logistics companies in Namibia provides useful context on the relationship between route selection, customs and the legal operating structure.

    Namibia’s Logistics Infrastructure Sector

    Namibia has developed an important position in regional transport and logistics because of its ports, road network and connections to neighbouring economies. The country’s Atlantic coastline gives businesses access to international shipping routes through Walvis Bay and Lüderitz.

    The Namibia logistics and infrastructure sector includes infrastructure and services intended to facilitate domestic and regional movement of goods, while corridor development supports more efficient cross-border transactions and customs operations.

    For entrepreneurs, this creates opportunities in several areas, including:

    • Road freight
    • Freight forwarding
    • Customs clearing
    • Warehousing
    • Distribution
    • Sea freight
    • Air freight
    • Fleet management
    • Transport brokerage
    • Project logistics
    • Supply-chain services
    • Cargo handling

    The opportunity is particularly relevant for businesses that can provide reliable logistics services between Namibia and neighbouring countries.

    How to Start a Logistics Company in Namibia: Cross-Border Corridor Guide
    How to Start a Logistics Company in Namibia: Cross-Border Corridor Guide

    Understanding the Walvis Bay Corridor

    The Walvis Bay corridor is central to Namibia’s regional logistics strategy. It connects the country’s western coastline with inland markets and provides routes for cargo moving between Namibia and countries in the Southern African region.

    The Namibia Logistics Hub information from the Walvis Bay Corridor Group highlights the role of the country’s logistics corridors in facilitating and accelerating cross-border trade.

    Several important corridors form part of Namibia’s regional logistics network.

    Trans-Kalahari Corridor

    The Trans-Kalahari Corridor connects Walvis Bay with Botswana and South Africa. It is particularly important for road freight moving between Namibia and the Gauteng and Botswana markets.

    Walvis Bay-Ndola-Lubumbashi Development Corridor

    This route provides access toward Zambia and the Democratic Republic of Congo, creating opportunities for freight operators serving mining, manufacturing, retail and industrial customers.

    Trans-Cunene Corridor

    The Trans-Cunene Corridor provides a connection between Namibia and southern Angola. Businesses operating along this route must account for the separate customs, transport and border requirements applicable to Angola.

    Trans-Oranje Corridor

    The Trans-Oranje Corridor links Lüderitz with South Africa’s Northern Cape, providing another route for regional cargo movement.

    These corridors should not be treated as a single regulatory environment. Each destination can have different customs procedures, permits, documentation and commodity controls.

    Conduct Market Research Before Launching

    Before establishing a logistics company, determine exactly what type of logistics operation you want to build.

    A company focused on local deliveries has very different requirements from a business transporting commercial cargo across several borders.

    Start by identifying:

    • Target customers
    • Cargo types
    • Origin and destination countries
    • Expected shipment volumes
    • Vehicle requirements
    • Warehouse requirements
    • Customs responsibilities
    • Required permits
    • Insurance requirements
    • Pricing and operating costs
    • Competitors
    • Expected delivery times

    The freight market should also be analysed before investing heavily in vehicles. Operators need to understand whether sufficient recurring cargo exists to keep vehicles productive.

    A truck that spends several days waiting for return loads can significantly reduce profitability, even when the initial transport rate appears attractive.

    Create a Business Plan

    A logistics business plan should translate the market opportunity into realistic financial and operational assumptions.

    A comprehensive plan should cover:

    1. Business structure
    2. Target market
    3. Services offered
    4. Route network
    5. Fleet requirements
    6. Staffing
    7. Fuel expenses
    8. Maintenance
    9. Insurance
    10. Customs and compliance costs
    11. Warehousing
    12. Marketing
    13. Revenue projections
    14. Working capital
    15. Break-even analysis

    The business plan should distinguish between revenue generated from transportation and revenue generated from other services such as customs clearance, warehousing or freight forwarding.

    Register the Logistics Company in Namibia
    Register the Logistics Company in Namibia

    Register the Logistics Company in Namibia

    A logistics company operating commercially in Namibia generally needs an appropriate legal structure and registration with the Business and Intellectual Property Authority (BIPA).

    Entrepreneurs should determine whether they are establishing a Namibian company, partnership or another permitted structure. Foreign companies establishing a sustained place of business in Namibia may also need to consider external-company registration.

    The requirements for registering a company in Namibia should be reviewed when preparing the business structure and supporting documentation.

    The legal structure should correspond with the actual business model.

    For example, a business that owns trucks, employs drivers, signs customer contracts and maintains local premises may require a different structure from a company that simply acts as a freight intermediary.

    Align Registration With Your Operations

    Company registration should not be treated as an isolated administrative step.

    The structure should support:

    • Business banking
    • Tax registration
    • Employment
    • Contracts
    • Licensing
    • Customs operations
    • Insurance
    • Premises
    • Fleet ownership
    • Beneficial ownership compliance

    Foreign investors should establish the intended operating model before preparing registration documents.

    Businesses can also review the BIPA company registration documents required in Namibia before submitting their applications.

    Register for Tax and Customs Operations for a Logistics Company in Namibia
    Register for Tax and Customs Operations for a Logistics Company in Namibia

    Register for Tax and Customs Operations for a Logistics Company in Namibia

    Namibia Revenue Agency (NamRA) plays a central role in the country’s customs environment.

    For businesses involved in importing, exporting or clearing cargo, customs compliance needs to be integrated into everyday operations. Companies should complete the applicable NamRA registration in Namibia as part of establishing their tax and compliance framework.

    Customs documentation may involve information such as:

    • Importer details
    • Exporter details
    • Tariff classification
    • Customs value
    • Country of origin
    • Quantity
    • Description of goods
    • Supporting commercial documents
    • Applicable permits

    Businesses should ensure that the information supplied to customs accurately reflects the underlying commercial transaction.

    Use ASYCUDAWorld Correctly

    Namibia uses ASYCUDAWorld for customs processing. This means inaccurate or incomplete information can disrupt the movement of cargo.

    A logistics company should establish a document-control process before cargo is dispatched.

    The commercial invoice, packing information, transport documents and customs declaration should correspond with each other.

    Where a third-party clearing agent is used, the logistics company should still maintain internal oversight of the information submitted on behalf of its customers.

    Understand Customs Clearing Requirements

    Freight forwarding and customs clearing are closely related but are not necessarily the same service.

    A company that clears goods for another importer or exporter for reward may require a NamRA clearing-agent licence.

    Businesses considering this service should confirm the current licensing requirements directly with NamRA before beginning operations.

    The UN Trade Facilitation E-Learning discussion on Namibia’s trade facilitation reforms also illustrates the importance of coordinated public and private-sector measures in improving regional trade and logistics.

    Decide Whether to Clear Cargo Yourself

    A new logistics company does not necessarily need to build an in-house customs-clearing department.

    There are two broad approaches:

    Use a licensed clearing agent:
    The logistics company focuses on transport, coordination and customer service while an authorised specialist handles customs clearance.

    Develop an in-house clearing operation:
    The company takes responsibility for the relevant licensing, compliance systems, premises, personnel and customs processes.

    The second option can create an additional revenue stream but also introduces additional regulatory responsibilities.

    Build a Reliable Road Freight Operation

    Road freight is an important part of Namibia’s regional logistics network. Trucks connect ports, warehouses, industrial centres and border crossings.

    However, operating commercial vehicles across borders involves more than having a registered truck.

    Depending on the route, operators may need to address:

    • Vehicle registration
    • Operator documentation
    • Driver requirements
    • Cross-border transport permits
    • Insurance
    • Customs documentation
    • Border procedures
    • Vehicle roadworthiness
    • Destination-country requirements

    A customs declaration does not automatically provide permission for a truck to operate across an international border.

    Plan Return Loads

    One of the major challenges for transport companies is empty return capacity.

    For example, a truck travelling from Walvis Bay to Johannesburg may generate revenue on the outbound trip but become unprofitable if it returns empty.

    Successful operators therefore develop relationships with freight brokers, manufacturers, wholesalers, exporters and importers that can provide cargo in both directions.

    The 2026 guide to finding truck loads in Namibia illustrates the importance of cargo availability along routes such as the Johannesburg-Windhoek corridor and the Walvis Bay gateway.

    Consider Freight Forwarding Services

    Freight forwarding can complement transportation services.

    A freight forwarder may coordinate multiple stages of a shipment, including:

    • Carrier bookings
    • Cargo consolidation
    • Documentation
    • Port coordination
    • Warehousing
    • Customs clearance
    • Inland transportation
    • Delivery

    Businesses can combine road freight, sea freight and air freight depending on the customer’s requirements.

    For example, an urgent high-value shipment might be moved by air, while large volumes of industrial equipment may be better suited to sea freight followed by road transportation.

    Companies operating across these services should clearly define their responsibilities to customers.

    An established transport and logistics company in Namibia demonstrates how road, sea and air freight can be combined with warehousing, customs clearance and project logistics.

    Explore Project Logistics

    Project logistics can be particularly attractive in Namibia because of opportunities associated with mining, energy, infrastructure and industrial development.

    Project cargo may include:

    • Heavy machinery
    • Mining equipment
    • Construction machinery
    • Industrial components
    • Oversized cargo
    • Energy equipment
    • Specialized vehicles

    These shipments require considerably more planning than ordinary commercial freight.

    A project logistics operator may need to coordinate route surveys, lifting equipment, escorts, temporary storage, customs documentation and specialised transport equipment.

    Strengthen Cross-Border Trade Compliance

    Cross-border logistics involves multiple jurisdictions. A company should therefore avoid assuming that compliance in Namibia automatically satisfies requirements in another country.

    Before dispatch, identify:

    1. Export requirements in the origin country.
    2. Transit requirements.
    3. Import requirements in the destination country.
    4. Road transport requirements.
    5. Commodity-specific controls.
    6. Customs documentation.
    7. Driver and vehicle requirements.
    8. Border-crossing procedures.

    The trade facilitation environment continues to evolve, so operators should verify current requirements before every major route expansion.

    For businesses with foreign owners, it is also useful to understand how to register a company in Namibia as a foreigner and how local operations affect the company’s compliance obligations.

    Develop a Logistics Documentation System

    Documentation is one of the most important operational controls for a logistics business.

    Create a standard shipment file containing the applicable:

    • Commercial invoice
    • Packing list
    • Transport documents
    • Customs declarations
    • Import or export permits
    • Certificates of origin
    • Vehicle documents
    • Driver documents
    • Insurance documents
    • Customer instructions

    The exact documents will vary depending on the cargo, route and transaction.

    A central digital document system can reduce errors by ensuring that the warehouse, transport team, customer, clearing agent and management team work from the same information.

    Companies should also understand how to register a business in Namibia when formalising their local operating structure.

    Establish a Technology-Enabled Operation

    Modern logistics companies increasingly depend on technology to monitor freight movement and improve customer visibility.

    Useful systems may include:

    • GPS vehicle tracking
    • Electronic proof of delivery
    • Fleet management software
    • Accounting software
    • Customer relationship management
    • Inventory management
    • Shipment tracking
    • Digital document storage

    Customers increasingly expect to know where their cargo is and when it is expected to arrive.

    Technology can also help management monitor fuel consumption, vehicle utilisation, maintenance schedules and driver performance.

    For companies that operate without maintaining a traditional physical office, remote business setup in Namibia can provide another model to consider, subject to the business’s regulatory and operational requirements.

    Build Relationships Across the Logistics Chain

    A logistics company rarely operates independently.

    Its performance depends on relationships with:

    • Transport companies
    • Clearing agents
    • Freight forwarders
    • Warehouses
    • Port operators
    • Customs authorities
    • Border agencies
      -Insurance providers
    • Vehicle suppliers
    • Fuel suppliers
    • Importers
    • Exporters

    Strong partnerships can be especially valuable when expanding into unfamiliar cross-border markets.

    The objective of the Namibia Logistics Hub is closely connected to improving regional connectivity and making cross-border movement more efficient. This broader logistics ecosystem creates opportunities for private operators that can provide dependable services.

    Businesses requiring assistance with establishment, registrations and related compliance can explore business setup services in Namibia.

    Control Logistics Costs

    Fuel is often one of the largest operating expenses for road freight companies, but it is not the only cost that needs to be controlled.

    Important cost categories include:

    • Fuel
    • Vehicle finance
    • Repairs
    • Tyres
    • Driver salaries
    • Insurance
    • Licences
    • Permits
    • Customs-related costs
    • Warehouse rent
    • Administration
    • Tracking systems
    • Security
    • Financing costs

    Pricing should therefore be based on total operating cost rather than fuel cost alone.

    A transport rate that appears profitable before maintenance, depreciation and empty return kilometres may actually produce a loss.

    How to Set Up a Logistics Company in Namibia Step by Step
    How to Set Up a Logistics Company in Namibia Step by Step

    How to Set Up a Logistics Company in Namibia Step by Step

    The step-by-step guide to setting up a logistics company in Namibia provides a useful framework for entrepreneurs planning market entry.

    A practical sequence is:

    Step 1: Define the Business Model

    Choose whether the company will focus on transportation, freight forwarding, customs clearing, warehousing, distribution or a combination of services.

    Step 2: Research the Freight Market

    Identify cargo demand, customers, competitors, routes and pricing.

    Step 3: Prepare a Business Plan

    Calculate startup costs, operating expenses, revenue and working-capital requirements.

    Step 4: Register the Business

    Choose an appropriate structure and complete the required BIPA registration. Depending on the preferred structure, entrepreneurs can compare close corporation registration in Namibia with private limited company registration in Namibia.

    Step 5: Complete Tax and Regulatory Registrations

    Establish the company’s NamRA and other applicable registrations. Businesses should also assess whether they need income tax registration in Namibia and employer registrations where applicable.

    Step 6: Obtain Required Licences and Permits

    Confirm the requirements for customs clearing, cross-border transportation and the specific cargo categories involved.

    Step 7: Acquire or Lease Equipment

    Purchase or lease vehicles and other equipment based on confirmed demand rather than speculative expansion.

    Step 8: Establish Operational Controls

    Create procedures for dispatch, customs documents, vehicle inspections, cargo tracking and delivery confirmation.

    Step 9: Secure Customers and Contracts

    Develop recurring relationships with importers, exporters, manufacturers, retailers and other businesses.

    Step 10: Expand Carefully

    Only add routes, trucks or services once the existing operation demonstrates sustainable demand and cash flow.

    Namibia as an International Logistics Hub

    Namibia’s geographical position gives it an important role in regional logistics.

    The JICA discussion of Namibia’s ambition to become an international logistics hub reflects the broader strategic objective of strengthening connectivity, competitiveness and regional economic integration.

    For private businesses, this can create opportunities beyond conventional trucking.

    A company can build a specialised logistics offering around a particular industry, route or customer type rather than attempting to serve every segment of the market.

    For example, a business could specialise in:

    • Mining logistics
    • Agricultural freight
    • Retail distribution
    • Angola-Namibia transport
    • Zambia-Namibia freight
    • South Africa-Namibia transport
    • Port-to-inland distribution
    • Heavy equipment logistics
    • Cold-chain logistics
    • Customs and freight coordination

    Specialisation can make it easier to build expertise and develop a strong reputation within a defined market.

    Additional Registration and Compliance Considerations

    A logistics company may have tax and administrative obligations beyond its initial company and NamRA registration.

    For example, businesses employing staff should review the requirements for registering as an employer for PAYE in Namibia.

    Companies dealing with foreign shareholders or non-resident service providers may also need to assess applicable withholding-tax obligations, including non-resident withholding tax on services and non-resident shareholders tax (NRST).

    Where a business needs to demonstrate its compliance status to customers, banks or other counterparties, it can also review the process for applying for a NamRA certificate of good standing.

    Other legal structures and arrangements may create additional obligations. For example, organisations using a trust structure should understand the process for registering a trust for tax purposes with NamRA.

    A business that needs a professional address without immediately establishing a conventional office can also consider a virtual office in Namibia, subject to the requirements of the relevant regulators and service providers.

    Ongoing compliance can be managed through appropriate company secretarial services as the business grows.

    Frequently Asked Questions

    How much does it cost to start a logistics company in Namibia?

    The cost depends heavily on the business model. A freight coordination business can start with substantially less capital than a fleet-owning transport company. Major expenses can include company registration, premises, vehicles, insurance, permits, technology, staff and working capital.

    Does a logistics company need a customs-clearing licence?

    Not every logistics business needs to become a clearing agent. A company that clears goods for other importers or exporters for reward may need the applicable NamRA clearing-agent licence. Businesses should confirm their exact activities and licensing obligations before offering customs-clearing services.

    Why is the Walvis Bay corridor important for logistics companies?

    The Walvis Bay corridor provides Namibia with strategic connections to regional markets, including Botswana, South Africa, Zambia, the DRC and Angola. It supports road freight, port-related logistics, distribution and broader cross-border trade opportunities.

    Final Considerations for Starting a Logistics Company in Namibia
    Final Considerations for Starting a Logistics Company in Namibia

    Final Considerations for Starting a Logistics Company in Namibia

    A successful logistics company in Namibia requires more than trucks and customers. The strongest operators combine route knowledge, reliable logistics services, customs compliance, effective documentation, technology and disciplined cost management.

    The country’s logistics infrastructure sector, ports and regional corridors provide a strong foundation for businesses involved in road freight, freight forwarding, customs clearance, warehousing and project logistics.

    For entrepreneurs entering the market, the best approach is to define the commercial route first, establish the correct legal and regulatory structure, understand customs responsibilities and build an operating model capable of handling cross-border transactions reliably.

    Businesses can review the requirements to register a company in Namibia as a foreigner before committing to a foreign-owned logistics operation. They can also compare the forms and fees for registering a private company in Namibia when budgeting for incorporation.

    For foreign entrepreneurs asking whether ownership is possible, the guide on whether a foreigner can register a company in Namibia addresses this specific issue.

    Organisations that intend to operate as nonprofit entities rather than commercial logistics businesses can review the NGO registration process in Namibia to determine whether that structure is appropriate.

    For assistance with establishing a logistics operation, registration, tax compliance or related business requirements, contact the Namibia business setup team.

  • Foreign Business Setup in Namibia: 2026 Investor Guide

    Foreign Business Setup in Namibia: 2026 Investor Guide

    FOREIGN BUSINESS SETUP IN NAMIBIA: 2026 INVESTOR GUIDE

    Foreign business setup in Namibia guide covering company registration Namibia, foreign company registration, external companies, 100% foreign ownership, investment visa Namibia, beneficial ownership, tax, banking and business registration requirements for foreign investors.

    Namibia continues to attract international entrepreneurs and companies looking for opportunities in sectors such as mining, energy, agriculture, tourism, logistics, technology, healthcare and professional services. However, a successful foreign business setup involves more than simply registering a company.

    Foreign investors must consider the appropriate legal structure, company registration Namibia requirements, beneficial ownership, immigration permission, banking, tax registration, sector-specific licences and ongoing compliance.

    The first decision is whether to establish a new Namibian company or register an existing overseas company as an external company. Investors can also explore the 2026 guide to foreign business setup in Namibia for additional context on market entry considerations.

    Step 1: Choose the Right Legal Route Before Reserving a Name

    The Business and Intellectual Property Authority (BIPA) administers company registration in Namibia. A foreign investor can either incorporate a Namibian private company or register an existing overseas company as an external company.

    A private company normally suits an investor creating a separate Namibian operating business, with its own local governance and tax position. Investors should prepare the required incorporation documents, identification records, ownership details and beneficial ownership information before submitting an application. A useful reference for understanding the BIPA company registration documents in Namibia can help investors prepare their documentation.

    An external company route can suit an established overseas enterprise entering Namibia through a branch structure. BIPA’s listed requirements can include company forms, certified constitutional documents and beneficial-ownership records. Investors should review the BIPA requirements for external or foreign companies before choosing this structure.

    Do not choose an external company simply because the parent company already exists. Choose it when the parent intends to operate directly in Namibia and can support the additional document trail. If a local management team, local contracts and a distinct Namibian investment plan will drive the enterprise, a private company often gives clearer operational separation.

    We do not advise investors to assume a universal foreign-ownership cap. Licensing requirements can differ by activity, so confirm the rules for the specific sector before committing capital.

    Worked Example: Choosing a Vehicle

    Take an engineering group incorporated outside the Common Monetary Area that wants to bid for Namibian maintenance work worth about N$8 million a year. It plans to keep contracting authority and most senior management at its head office for the first 18 months. An external company may fit that model, provided the group can produce certified constitutional documents and complete BIPA’s prescribed forms.

    If the group instead plans to recruit locally, hold separate Namibian inventory and accept contracts in a locally governed subsidiary, it should assess a private company before company registration. The costly mistake would be registering a branch by default, then rebuilding the structure once local operations grow. The right answer depends on contracts, sector licensing and where management will make decisions.

    Step 2: Treat Beneficial Ownership as a Continuing Compliance Duty

    Beneficial ownership Namibia compliance is an important part of the modern business registration process.

    Beneficial ownership information is not a formality to address only at incorporation. BIPA requires beneficial ownership filing at registration, within seven working days of a material change, and at every financial year-end.

    Where the information already filed has not changed, an entity may use BO2 rather than submit a new beneficial-ownership declaration. Keep the share register, director records and beneficial ownership records aligned, because inconsistent records create a governance problem before they create an administrative one.

    The consequences can be material. Non-compliant entities can face penalties and other regulatory consequences. BIPA has also demonstrated active enforcement of beneficial ownership compliance.

    What Directors Should Put on the Compliance Calendar

    • File beneficial ownership information when registering the entity.
    • Review the information immediately after a share transfer, change in control or other material change.
    • Review the filing again at financial year-end.
    • Record who owns the deadline internally.
    • Keep shareholder, director and beneficial ownership records consistent.

    The step businesses skip most often is the post-transaction check. A shareholder agreement may close correctly, but if the team does not ask whether control or beneficial ownership changed, the BIPA filing can be missed.

    Step 3: Separate Immigration Permission from Company Ownership

    A foreign shareholder can own an interest in a Namibian company, but a foreign founder who will work in Namibia needs approval from the immigration authority. BIPA registration does not grant the right to take up employment, manage daily operations on the ground or draw a salary for work performed in Namibia.

    A Namibian business investment visa may be relevant to foreign nationals seeking to establish, manage or work within a Namibian business, subject to the applicable immigration requirements.

    A business-exploration visa should not automatically be treated as work authorisation. Investors should establish the correct immigration status before travelling to Namibia for operational activities.

    The judgement call is straightforward: if a foreign founder will only attend meetings, assess premises and meet potential partners, obtain advice on the appropriate visit status before travel. If they will direct staff, deliver services or operate the business from Namibia, plan the employment-permit process before setting a commercial launch date.

    Worked Example: The Founder Who Arrives Too Early

    Consider a retailer with twelve planned staff, a N$40,000 monthly payroll and a foreign founder booked to open the first Windhoek outlet. The company completes BIPA registration and signs a lease, but assumes that the founder’s shareholding permits them to manage the shop. It does not.

    At N$40,000 a month, a six-week delay in opening can leave roughly N$60,000 in payroll commitments before normal trading starts, excluding rent and stock. The company should align its opening date with immigration approval and identify which decisions a locally authorised manager can make.

    Step 4: Plan the Bank Account and Capital Flow Process Early

    A certificate of incorporation does not create an automatic Namibian bank account. The selected bank will apply its own know-your-customer checks, source-of-funds review and account-opening requirements, which the investor should confirm directly with the bank.

    For exchange-control matters, work through an authorised dealer regulated by the Bank of Namibia. Where investment funds originate outside Namibia, confirm the settlement route with the authorised dealer before sending substantial capital.

    This is where documentary discipline pays for itself. Prepare the group structure, constitutional documents, board resolutions, identity records for beneficial owners and a clear explanation of the source and purpose of funds before the first banking meeting.

    If the investor expects funding from outside the Common Monetary Area, confirm the settlement route with the authorised dealer before sending funds. A transfer that arrives without a clear investment rationale or supporting documents can create avoidable questions at the point where the operating company needs working capital.

    Step 5: Register for Tax Through NamRA and ITAS

    The Namibia Revenue Agency, NamRA, administers applicable tax registrations through ITAS. Incorporation and tax registration serve different purposes, so do not assume that completing one completes the other.

    Investors can review the process for NamRA registration in Namibia when preparing for tax compliance after company incorporation.

    Depending on the business, obligations may include:

    • Corporate income tax
    • Value-added tax
    • Employee-related taxes
    • Withholding taxes
    • Import-related taxes
    • Other sector-specific tax obligations

    A company intending to operate in Namibia should also understand how its specific income-tax obligations apply. Guidance on registering a business for income tax in Namibia can be useful when planning the post-incorporation compliance process.

    VAT Registration

    Businesses should monitor taxable turnover against the applicable VAT registration threshold.

    For businesses approaching the threshold, VAT planning should be incorporated into pricing, accounting systems, contracts and financial forecasts rather than treated as an issue only after the business has begun trading.

    Foreign companies with cross-border transactions should also obtain professional tax advice because the treatment of transactions involving foreign entities can depend on the specific circumstances.

    Individual foreign directors, shareholders or other individuals may also have separate tax obligations depending on their activities and circumstances. Investors can review guidance on registering as an individual taxpayer in Namibia where individual tax registration becomes relevant.

    External Company Registration for Overseas Businesses in Namibia
    External Company Registration for Overseas Businesses in Namibia

    Additional Tax Compliance for Foreign-Owned Businesses

    Foreign-owned businesses should not assume that corporate income tax is the only tax consideration.

    Depending on the structure and transactions involved, additional registrations or compliance obligations may arise. Businesses with trusts, non-resident service providers, foreign shareholders or employees should identify these requirements early.

    For example, a trust connected to the business may have separate requirements for registering a trust for tax purposes with NamRA.

    A business that needs evidence of tax compliance may also require a NamRA certificate of good standing. Investors can review the process for applying for a NamRA certificate of good standing when preparing documents for tenders, banking, contracts or other transactions.

    Where a Namibian company pays certain non-resident service providers, withholding-tax considerations may also arise. Businesses can review the process for registering for non-resident withholding tax on services when planning cross-border transactions.

    Foreign shareholders should likewise consider whether non-resident shareholders tax obligations apply to their particular circumstances. The NRST registration process with NamRA provides additional guidance on this area.

    If the business employs workers in Namibia, employer tax compliance must also be addressed. This can include PAYE obligations, making employer registration for PAYE in Namibia an important step for companies establishing a local workforce.

    External Company Registration for Overseas Businesses in Namibia
    External Company Registration for Overseas Businesses in Namibia

    External Company Registration for Overseas Businesses in Namibia

    An established international company may decide that registering its existing business as an external company is more appropriate than incorporating a separate Namibian subsidiary.

    The external-company model can be useful where the foreign parent wants the Namibian operation to remain closely connected to the overseas enterprise.

    The foreign/external company registration guidance provides further information on the concept of registering an overseas company that has established a place of business in Namibia.

    However, investors should consider the wider consequences of this structure, including governance, accounting, taxation, liability, contracts and the relationship between the Namibian operation and its foreign parent.

    Setting Up a Business in Namibia: A Practical Sequence For A Foreign Business Setup in Namibia
    Setting Up a Business in Namibia: A Practical Sequence For A Foreign Business Setup in Namibia

    Setting Up a Business in Namibia: A Practical Sequence For A Foreign Business Setup in Namibia

    A well-planned setting up business Namibia process can reduce unnecessary delays.

    Investors looking for assistance with the broader process can review available business setup services in Namibia before deciding which aspects of the setup they want to handle internally.

    Step 1: Define the Business Activity

    Clearly identify what the business will do in Namibia.

    Avoid vague descriptions that fail to capture the actual commercial activities. The intended activities can affect licensing, tax, ownership and regulatory requirements.

    Step 2: Select the Legal Structure

    Determine whether the business should operate through:

    • A Namibian private company
    • An external company
    • Another appropriate legal structure

    A private company is one of the common routes for establishing a separate Namibian legal entity Namibia investors can use for local operations. Investors should compare this option with other structures before proceeding.

    Step 3: Prepare Company Documents

    Prepare the required BIPA documents, identification records, ownership details and beneficial ownership information.

    Step 4: Complete Company Registration

    Submit the appropriate documents to BIPA and obtain confirmation of registration.

    Investors should also understand that Namibia has different registration options depending on the proposed organisation. For example, a close corporation registration in Namibia is different from registering a private company.

    Non-profit investors should separately investigate NGO registration in Namibia rather than assuming that ordinary company registration is appropriate.

    Step 5: Address Immigration Requirements

    If foreign shareholders, directors or employees will work in Namibia, determine the appropriate immigration status before commencing work.

    Step 6: Complete Tax Registration

    Assess the company’s obligations with NamRA and register for applicable taxes.

    Step 7: Open the Corporate Bank Account

    Approach the chosen bank with the company’s registration documents and supporting ownership and funding information.

    Step 8: Obtain Sector Licences

    Determine whether the business requires additional licences, permits, registrations or approvals before trading.

    Step 9: Establish Ongoing Compliance

    Create a compliance calendar covering beneficial ownership, tax returns, annual returns, licence renewals, accounting and other regulatory deadlines.

    Private Companies and Operating Infrastructure

    A foreign investor establishing a separate Namibian subsidiary may choose a private limited company structure. Information on private limited company registration in Namibia can help investors understand the registration route.

    A registered office is also an important consideration. Businesses that do not immediately maintain their own commercial premises may consider a virtual office in Namibia where appropriate.

    Ongoing corporate administration should not be overlooked. Changes involving directors, shareholders, beneficial ownership and statutory records can require timely action. Company secretarial services can help businesses maintain these records and compliance obligations.

    Common Mistakes Made by Foreign Investors in Namibia
    Common Mistakes Made by Foreign Investors in Namibia

    Common Mistakes Made by Foreign Investors in Namibia

    Foreign investors can encounter avoidable problems when they treat business registration as the entire market-entry process.

    Choosing a Structure Too Quickly

    Registering an external company or private company without first understanding the intended operating model can create unnecessary restructuring later.

    Assuming Ownership Equals Work Permission

    A foreign shareholder may have an ownership interest while still needing appropriate authorisation to work in Namibia.

    Ignoring Sector Regulations

    General company-registration rules do not necessarily answer whether a particular activity is licensed or subject to additional ownership conditions.

    Delaying Banking Preparation

    A certificate of incorporation does not guarantee immediate bank-account approval. Banks perform their own due diligence.

    Treating Beneficial Ownership as a One-Time Filing

    Ownership information must remain accurate and should be reviewed whenever there is a relevant change.

    Business Registration for Foreign Nationals

    The ability of foreign nationals Namibia investors to establish businesses makes the country accessible to international entrepreneurs, but accessibility should not be confused with automatic regulatory approval.

    BIPA confirms that people with valid identification documents, including foreign nationals with valid passports, can register businesses in Namibia. Investors should nevertheless confirm the applicable business registration requirements before submitting an application.

    Foreign entrepreneurs can also review the practical guide on how to register a company in Namibia as a foreigner when planning their market entry.

    This process is particularly relevant to investors asking whether they can establish a Namibian company without having Namibian citizenship.

    Can a Foreigner Register a Company in Namibia?

    Yes, foreign nationals can generally register businesses in Namibia, subject to the applicable legal, identification and regulatory requirements. A useful resource addressing whether a foreigner can register a company in Namibia can help investors understand the general position.

    However, foreign investors should distinguish between being legally able to register a company and being authorised to perform specific regulated activities or work in Namibia.

    Investors should also prepare the additional documentation that may apply specifically to international applicants. The requirements for registering a company in Namibia as a foreigner provide a useful checklist when preparing an application.

    Remote and International Business Models

    Not every foreign investor needs to establish a large physical operation immediately.

    An international entrepreneur may initially operate a business remotely while establishing the appropriate Namibian structure, provided the proposed activities comply with applicable laws and regulations. Businesses considering this model can review remote business setup in Namibia as part of their planning.

    The investor should nevertheless determine whether the business requires a Namibian registered office, local employees, sector licensing, tax registration or other local compliance arrangements.

    Business Registration Costs and Forms

    The cost of establishing a company depends on the selected legal structure and the services or registrations required.

    Investors should distinguish official registration fees from professional service fees, document certification, registered-office arrangements, tax services, licences and other setup expenses.

    Information on forms and fees for registering a private company in Namibia can help investors prepare an initial budget.

    The exact business registration requirements should also be reviewed before submitting documents. Requirements can vary according to the structure, ownership and nature of the business.

    How to Establish a Business in Namibia Successfully as a Foreigner
    How to Establish a Business in Namibia Successfully as a Foreigner

    How to Establish a Business in Namibia Successfully as a Foreigner

    To establish business Namibia operations successfully, foreign investors should begin with the commercial model and work backwards into the legal and regulatory requirements.

    For example, an overseas technology company opening a small Namibian office may have very different requirements from an international mining company establishing a substantial local operation.

    Similarly, an investor intending to import products, employ Namibian workers and sell directly to local consumers will face different operational considerations from a foreign professional-services company serving clients remotely.

    The correct structure should therefore reflect the actual business model.

    For investors who need assistance with the broader process, the business registration in Namibia guide provides another starting point.

    Frequently Asked Questions

    Can a foreigner register a company in Namibia?

    Yes. Foreign nationals can register businesses in Namibia, subject to applicable identification, registration and regulatory requirements. The appropriate structure may be a Namibian company or an external company, depending on the investor’s circumstances.

    Can a foreign-owned company be 100% foreign owned?

    A company can generally have 100% foreign ownership in Namibia, but investors should check whether the particular sector has additional ownership, licensing or participation requirements.

    Does registering a company give a foreigner the right to work in Namibia?

    No. Namibian company registration and immigration permission are separate matters. A foreign national intending to work or actively manage a business from Namibia should determine the appropriate immigration authorisation before commencing work.

    Final Considerations for Foreign Investors

    A successful foreign business setup in Namibia requires more than completing business registration Namibia formalities.

    Foreign investors should carefully select their legal entity, understand foreign company registration and branch registration Namibia options, establish beneficial ownership records, investigate sector-specific requirements and separate company ownership from immigration permission.

    The strongest approach is to treat incorporation, taxation, banking, immigration and licensing as connected but separate workstreams. Doing so can help foreign investors Namibia avoid delays and establish a compliant foundation for long-term operations.

    Investors who need clarification about their proposed structure, registration requirements or market-entry process can contact us for further assistance.

  • Namibia Tax Registration for New Companies in 2026

    Namibia Tax Registration for New Companies in 2026

    Namibia Tax Registration for New Companies in 2026

    NamRA tax registration for new companies in Namibia in 2026. Learn about TIN registration, VAT registration requirements, PAYE, ITAS and Namibia tax compliance.

    Starting a company in Namibia involves more than completing new company registration with the Business and Intellectual Property Authority (BIPA). Once incorporated, a business must consider NamRA tax registration, VAT, employee-related obligations and ongoing Namibia tax compliance.

    For new businesses, understanding the difference between company incorporation and business tax registration is essential. A BIPA registration establishes the legal entity, while the Namibia Revenue Agency (NamRA) manages the company’s tax affairs through the Integrated Tax Administration System (ITAS).

    For a broader overview of the process, the Namibia tax registration guide for new companies in 2026 provides additional context on NamRA, VAT and related compliance obligations.

    What Is Namibia Tax Registration?

    Namibia tax registration is the process through which a business becomes registered with the Namibia Revenue Agency for purposes of managing its applicable tax obligations.

    A newly incorporated company should not assume that BIPA registration automatically completes its tax registration. Depending on the company’s activities, it may need to deal separately with:

    • NamRA taxpayer registration
    • Taxpayer Identification Number (TIN) requirements
    • VAT registration
    • PAYE and employer-tax obligations
    • Social Security Commission registration
    • Income tax returns
    • Other applicable tax obligations

    NamRA uses the Integrated Tax Administration System (ITAS) to provide electronic tax administration services. Businesses can access the ITAS for Namibia platform for registration information, forms and e-filing resources.

    Step 1: Complete New Company Registration

    The first step for most companies is establishing the legal entity through BIPA. The incorporation process determines the company’s legal structure, registered name, directors or members and other foundational information.

    However, new company registration and company tax registration are separate compliance processes.

    After receiving the relevant BIPA registration documents, the business should prepare for registration with NamRA. Keeping company information consistent across BIPA and NamRA records is important because differences in names, addresses, directors or other details can create unnecessary administrative delays.

    A useful starting point is a complete guide to registering a company in Namibia in 2026, particularly for entrepreneurs working through incorporation and subsequent tax requirements.

    Businesses can also review the requirements for registering a company in Namibia before preparing their incorporation documents.

    Step 2: Register With NamRA

    One of the most important NamRA registration requirements for a new company is establishing its taxpayer record.

    NamRA’s ITAS system provides business registration facilities for companies and other legal entities. Businesses should identify the relevant tax registrations before commencing operations rather than assuming that one registration covers every possible tax obligation.

    Companies can review the NamRA registration process in Namibia to understand the basic steps involved in establishing a taxpayer record.

    The company should retain copies of:

    • BIPA registration documents
    • Identification documents for relevant representatives
    • Company and ownership information
    • Banking information where required
    • NamRA registration documents
    • Tax correspondence
    • Submitted applications and confirmations

    These records can become important when filing returns, applying for additional tax registrations or responding to a compliance query.

    NamRA also provides a dedicated business section on ITAS covering companies and close corporations for non-mining activities.

    Understanding the Taxpayer Identification Number

    A Taxpayer Identification Number, commonly referred to as a TIN or tax identification number, identifies a taxpayer within the NamRA tax administration system.

    TIN registration Namibia requirements can differ depending on the type of taxpayer and the tax obligations involved. Companies should therefore provide accurate legal and contact information when completing the applicable NamRA registration process.

    While companies have their own registration requirements, individuals operating or earning taxable income may need to follow a separate individual taxpayer registration process in Namibia.

    A company’s TIN should be kept with its core corporate records and provided where legitimately required for tax administration, banking, contracting or other business processes.

    Entrepreneurs should avoid treating the TIN as the end of tax compliance. Registration establishes the taxpayer relationship, but the company remains responsible for filing and payment obligations applicable to its activities.

    VAT Registration Namibia: Know the Threshold

    VAT is one of the most important areas to assess when starting a business.

    Under the current framework described in the provided 2026 guidance, compulsory VAT registration applies when the value of taxable supplies exceeds N$1 million in any consecutive 12-month period.

    The standard VAT rate is 15%.

    Businesses should monitor both actual turnover and credible expectations about future taxable supplies. Waiting until after major contracts have already been invoiced can create unnecessary compliance complications.

    VAT Registration Requirements

    Businesses approaching the VAT threshold should review their sales records, contracts, purchase orders and financial forecasts.

    The VAT registration requirements should be treated as a separate workstream from general NamRA registration.

    Where a business becomes liable for VAT, it must apply within the applicable statutory period. The provided 2026 guidance identifies a 21-day application period after becoming liable.

    Businesses should therefore establish an internal VAT trigger. For example, when a significant new contract is signed, management can immediately review the company’s projected taxable supplies for the relevant 12-month period.

    The Namibia tax reference and rate card for 2026 can also be useful when reviewing broader tax rates and developments, although businesses should confirm the current enacted position before making filing or financial decisions.

    What Is Annual Taxable Turnover?

    The term annual taxable turnover is particularly important for VAT planning.

    A company should not simply wait until its accounting year ends before considering whether it has reached the relevant threshold. VAT assessment can require examination of taxable supplies over a consecutive 12-month period.

    For example, consider a consulting company with several signed contracts expected to generate N$1.2 million in taxable supplies. Even if the business has only recently begun invoicing customers, management should immediately review its VAT position.

    A good compliance system therefore monitors:

    • Monthly taxable sales
    • Signed contracts
    • Purchase orders
    • Expected revenue
    • Taxable and exempt supplies
    • VAT registration status
    • VAT filing deadlines

    This approach is more effective than discovering a VAT liability after invoices have already been issued.

    Voluntary VAT Registration

    Not every company below the compulsory threshold is automatically required to register for VAT.

    The VAT framework allows voluntary registration in specified circumstances. Businesses considering voluntary registration should assess their expected taxable supplies, customer base, input VAT position and administrative capacity.

    A smaller company dealing mainly with consumers may have different commercial considerations from a business supplying large VAT-registered corporate customers.

    Before choosing voluntary registration, management should document the commercial reason for doing so and confirm that the company satisfies the applicable requirements.

    PAYE Registration Namibia for Employers
    PAYE Registration Namibia for Employers

    PAYE Registration Namibia for Employers

    A new company that hires employees may also have employer-related tax obligations.

    PAYE registration Namibia should be considered before the first payroll is processed. Employers need to understand their responsibilities for employee remuneration, deductions, reporting and payment.

    Businesses can review how to register as an employer for PAYE in Namibia when preparing their employer-tax compliance process.

    For companies that also need assistance with the wider process of establishing operations, business setup services in Namibia can provide a broader starting point.

    This is particularly important for businesses that move rapidly from incorporation to hiring.

    For example, a technology company might incorporate in January and employ five workers in February. The company’s compliance checklist should address employer-tax obligations before the first salaries are processed rather than treating payroll registration as an afterthought.

    Businesses can also review how to register a company in Namibia in 2026 for broader information about incorporation, compliance and operating considerations.

    Social Security Registration for New Employers

    Tax registration is not the only compliance responsibility created by employing staff.

    A company employing workers should also consider its obligations with the Social Security Commission (SSC). Employer and employee registration requirements are separate from NamRA registration.

    Companies should establish a payroll onboarding procedure covering:

    1. Employer registration.
    2. Employee registration.
    3. Payroll information.
    4. Monthly remuneration records.
    5. Required SSC reporting.
    6. Supporting documentation.

    This prevents the common mistake of registering the company but failing to register employees individually.

    Build a Namibia Tax Compliance Calendar
    Build a Namibia Tax Compliance Calendar

    Build a Namibia Tax Compliance Calendar

    Successful Namibia tax compliance depends on what happens after registration.

    A new company should create a compliance calendar covering all recurring obligations. The calendar should identify:

    Compliance areaWhat to monitor
    NamRA registrationTaxpayer record and registration details
    Income taxReturns, assessments and payments
    VATTaxable supplies, returns and payments
    PAYEEmployee remuneration and applicable deductions
    SSCEmployee registration and recurring reports
    RecordsInvoices, receipts, contracts and accounting records
    ITASElectronic filings and correspondence

    The person responsible for each obligation should also be clearly identified.

    A director may oversee the company’s overall compliance, while an accountant, bookkeeper or payroll administrator handles individual filings. The important point is that every deadline should have a responsible person.

    For companies that require ongoing administrative support, company secretarial services can also help with maintaining corporate records and recurring company administration.

    Keep Accurate Tax Records

    Namibia tax requirements extend beyond registration forms.

    A new business should maintain organized records from the first day of trading. These can include:

    • Sales invoices
    • Supplier invoices
    • Bank statements
    • Contracts
    • Payroll records
    • VAT calculations
    • Tax returns
    • Proof of tax payments
    • BIPA documents
    • NamRA correspondence
    • SSC records

    Accurate records make it easier to prepare returns and respond to questions from regulators.

    They also provide management with better information for budgeting and cash-flow planning.

    Businesses should also understand that income tax registration is a specific part of the wider tax process. Companies can review how to register a business for income tax in Namibia when setting up their tax compliance records.

    Certain structures and transactions may create additional tax-registration requirements. For example, businesses dealing with trusts can review trust tax registration with NamRA.

    Monitor Tax Changes in 2026

    Tax rules can change through legislation, regulations, administrative guidance and government policy.

    Companies should therefore avoid relying indefinitely on old registration guides, tax rates or thresholds. A useful example is the continuing discussion around corporate income tax rates for companies whose financial years commence from 2026.

    The 2026 Namibia tax reference from PwC highlights proposed changes while distinguishing proposals from enacted provisions. This distinction is important because businesses should base their tax calculations on rules that are actually applicable.

    For questions concerning registration and taxpayer compliance, businesses can also consult NamRA’s taxpayer compliance information.

    Companies may also need official evidence of their tax standing when dealing with tenders, contracts or other commercial requirements. In such cases, businesses can review how to apply for a NamRA certificate of good standing.

    Common Mistakes New Companies Should Avoid

    New businesses can reduce compliance problems by avoiding several common mistakes.

    Assuming BIPA Registration Covers Everything

    BIPA incorporation establishes the company but does not eliminate separate NamRA, VAT, PAYE or SSC obligations.

    Waiting Until Revenue Is High

    Businesses should monitor projected taxable supplies rather than waiting for a year-end accounting figure.

    Ignoring Employee Registration

    Hiring the first employee creates additional compliance responsibilities. Payroll and statutory registration should be coordinated from the beginning.

    Failing to Keep Records

    Poor records make tax returns harder to prepare and can complicate future compliance reviews.

    Using Outdated Tax Information

    Thresholds, rates and procedures can change. Businesses should verify current requirements before submitting registrations or returns.

    Businesses with foreign owners should also establish the correct tax treatment before commencing operations. Depending on the structure and transactions involved, this may include non-resident withholding tax on services or non-resident shareholders tax registration.

    Final Checklist for New Companies

    Before a newly registered company begins full-scale trading, management should confirm that it has:

    • Completed BIPA new company registration.
    • Established its taxpayer record with NamRA.
    • Obtained or confirmed its applicable tax identification number.
    • Assessed VAT exposure.
    • Determined whether compulsory or voluntary VAT registration applies.
    • Considered PAYE and employer-tax requirements.
    • Registered with SSC where applicable.
    • Established an accounting and record-keeping system.
    • Created a statutory compliance calendar.
    • Assigned responsibility for every recurring filing.
    • Retained copies of all registration confirmations.

    The goal of new business tax planning is not simply to obtain a registration number. It is to create a system that keeps the business compliant as its revenue, employees and operations grow.

    The appropriate company structure should also be considered at the incorporation stage. Depending on the circumstances, entrepreneurs may choose a close corporation registration in Namibia or a private limited company registration in Namibia.

    Non-profit organisations have different registration considerations and can review the NGO registration process in Namibia where applicable.

    Frequently Asked Questions

    Does BIPA registration automatically register a company for tax?

    No. BIPA company incorporation and NamRA tax registration are separate processes. A new company should establish its taxpayer record with NamRA and assess additional obligations such as VAT, PAYE and SSC registration.

    What is the VAT registration threshold in Namibia?

    Under the 2026 framework provided, compulsory VAT registration applies when taxable supplies exceed N$1 million in any consecutive 12-month period. Businesses should monitor both actual and expected taxable supplies.

    Does every new company need VAT registration?

    No. VAT registration depends on the company’s taxable supplies and the applicable compulsory or voluntary registration rules. A company below the compulsory threshold may need to consider whether it qualifies for voluntary registration based on its circumstances.

    Conclusion

    NamRA tax registration should be one of the first compliance priorities after establishing a new company in Namibia. Incorporation creates the legal entity, while tax registration establishes the business within Namibia’s tax administration system.

    By completing the appropriate TIN registration Namibia process, assessing VAT exposure, understanding PAYE obligations, registering employees where required and maintaining accurate records, entrepreneurs can establish a stronger foundation for long-term Namibia tax compliance.

    Businesses should always verify the latest requirements directly with NamRA and other relevant authorities because tax laws, thresholds, rates and administrative procedures can change.

    For entrepreneurs who need a physical business address without maintaining their own traditional office, a virtual office in Namibia may also be relevant to the wider business setup process.

    Foreign entrepreneurs can review how to register a company in Namibia as a foreigner and whether a foreigner can register a company in Namibia before starting the incorporation process. Those planning to manage their operations from outside Namibia can also consider remote business setup in Namibia.

    Businesses preparing incorporation paperwork can review the forms and fees for registering a private company in Namibia as part of their planning. Foreign applicants should additionally check the requirements to register a company in Namibia as a foreigner.

    For a broader overview of the registration process, see how to register a business in Namibia. Businesses that need assistance can also contact us.

  • Namibia Business Registration Costs and BIPA Fees 2026

    Namibia Business Registration Costs and BIPA Fees 2026

    Namibia Business Registration Costs and BIPA Fees 2026

    Learn about Namibia business registration costs and BIPA fees in 2026, including private company fees, close corporation fees, registration forms, name reservation, professional costs and ongoing compliance.

    Understanding Namibia business registration costs requires more than looking at the basic fee charged by the Business and Intellectual Property Authority (BIPA). Entrepreneurs must consider BIPA registration fees, name reservation, company documents, beneficial ownership requirements, professional services, and ongoing compliance.

    BIPA is responsible for registering companies, close corporations and other business entities in Namibia. Its published fee schedules provide the statutory charges, while accountants, legal practitioners, notaries and business registration providers may charge separate professional fees.

    For the latest official charges, entrepreneurs should consult the BIPA Company Application Fees before submitting an application.

    What Are the Main Business Registration Costs in Namibia?

    The total cost of setting up a business depends on the legal structure selected and the complexity of the application.

    The main business registration fees can generally be divided into:

    • Name reservation fees
    • Entity registration fees
    • Registration of constitutional documents
    • Share-capital-related charges for private companies
    • Certified identification and supporting documents
    • Professional and accounting fees
    • Notarial costs
    • Beneficial ownership documentation
    • Post-registration compliance costs

    This means the official BIPA fees Namibia entrepreneurs see on a fee schedule should not automatically be treated as the complete cost of establishing a business.

    A useful budget should distinguish between prescribed fees payable to BIPA and additional costs associated with preparing and submitting a compliant application. Entrepreneurs can review the requirements for registering a company in Namibia before preparing their application.

    BIPA Registration Fees for Private Companies

    A private company is commonly used when a business requires a more formal corporate structure, multiple shareholders or plans to accommodate investors.

    The core private company fees include the applicable name reservation charge and the fee for registering the company’s memorandum and articles. Additional charges can apply according to the company’s nominal share capital or no-par-value shares.

    According to a recent overview of Namibia Business Registration Costs and BIPA Fees 2026, entrepreneurs should account for both the fixed and variable components when calculating company registration costs.

    Name Reservation Fee

    The name reservation fee is paid when an applicant submits a proposed company name for approval. Reserving a name does not itself create a legal entity.

    Entrepreneurs should therefore distinguish between:

    1. Reserving a company name.
    2. Preparing the required incorporation documents.
    3. Completing the registration of memorandum and other documents.
    4. Receiving confirmation of registration.
    5. Meeting post-registration compliance obligations.

    The total cost will depend on the legal structure and the documents required for the application. Businesses can also review how to register a business in Namibia for an overview of the registration process.

    Memorandum and Articles

    A private company requires constitutional documentation, including its memorandum of association and articles. These documents establish important aspects of the company’s structure, ownership and governance.

    Where professional assistance is used to prepare, review, certify or notarise these documents, those professional charges are separate from the statutory BIPA registration fees. Applicants can also review the BIPA company registration documents in Namibia to understand the supporting paperwork involved.

    Close Corporation Fees in Namibia

    A close corporation (CC) remains an option for entrepreneurs who want a relatively straightforward business structure.

    The official BIPA Close Corporation Fees schedule provides the applicable charges for CC-related applications. The CC1, for example, relates to the registration of a founding statement, while other forms are used for amendments and related changes.

    The basic statutory registration budget should therefore be distinguished from the complete cost of professional assistance. Entrepreneurs considering this structure can review close corporation registration in Namibia for additional guidance.

    CC Registration Documents

    The close corporation registration process can require documents such as:

    • CC1 founding statement
    • Approved business name
    • Certified identification documents
    • Accountant’s consent documentation
    • Supporting ownership information
    • Other prescribed application documents

    The founding statement registration is an important part of establishing the CC because it records key information about the entity and its members.

    Entrepreneurs should verify the latest charges directly with BIPA because fee schedules and administrative requirements can change.

    BIPA Application Fees and Other Charges
    BIPA Application Fees and Other Charges

    BIPA Application Fees and Other Charges

    Not every payment associated with establishing or maintaining a business relates to incorporation.

    BIPA publishes different categories of charges covering business registration and intellectual property matters. Its fees and downloads section includes information relating to areas such as trademarks, copyright, industrial designs and patents.

    This distinction is important for businesses that intend to protect their intellectual property after registration.

    For example, registering a company name does not necessarily provide the same protection as registering a trademark. Entrepreneurs should consider intellectual property protection separately when developing their business registration and branding strategy.

    BIPA Business Registration Forms

    Correct documentation is just as important as paying the applicable fees.

    The BIPA Business Registration information provides guidance on the documents and procedures associated with registering different types of entities.

    Depending on the entity, applicants may need specific BIPA registration forms, certified documents and professional confirmations.

    Incorrect forms, incomplete information or missing supporting documents can delay the application. For this reason, entrepreneurs should check the applicable requirements before paying fees or submitting their application.

    Registration of an External Company

    Foreign companies establishing a presence in Namibia may need to consider external company registration rather than simply registering a new local entity.

    An external company application has its own requirements and fees. This can be particularly relevant for international businesses establishing branches or operating structures in Namibia.

    The BIPA application fee information should be checked for the applicable external-company charges before an application is submitted.

    Foreign businesses should also consider tax registration, beneficial ownership, local representation and sector-specific licensing requirements where applicable. Foreign entrepreneurs can review how to register a company in Namibia as a foreigner before choosing an appropriate structure.

    Additional guidance is available on whether a foreigner can register a company in Namibia and the requirements to register a company in Namibia as a foreigner.

    Beneficial Ownership Requirements

    Business registration costs should also account for beneficial ownership compliance.

    Applicants may need to provide information identifying the individuals who ultimately own or control a business. This requirement is important because BIPA’s registration and amendment processes can depend on complete beneficial ownership information.

    Businesses should keep ownership information accurate and update it when circumstances change.

    For companies with multiple shareholders, corporate shareholders or international ownership structures, preparing beneficial ownership information can require additional time and professional assistance.

    Annual Compliance Costs After Registration
    Annual Compliance Costs After Registration

    Annual Compliance Costs After Registration

    Registration is only the beginning of the business’s compliance obligations.

    After incorporation, companies and close corporations may have continuing obligations involving:

    • Annual duties
    • Annual returns or submissions
    • Beneficial ownership declarations
    • Changes to directors or members
    • Changes to registered addresses
    • Changes to ownership
    • Tax compliance
    • Sector-specific licences and permits

    Consequently, entrepreneurs should include annual compliance when calculating their long-term business registration costs.

    A business that focuses only on its initial registration fee may underestimate its actual first-year operating and compliance budget. Ongoing administration can be supported through company secretarial services, particularly when a business needs assistance with recurring statutory obligations.

    BIPA Fees vs Professional Registration Costs

    One of the most important distinctions entrepreneurs should understand is the difference between statutory fees and professional service charges.

    BIPA registration fees are the prescribed amounts payable for specific applications and registrations. A professional business registration provider may separately charge for:

    • Company name searches
    • Document preparation
    • Form completion
    • Certified copies
    • Notarial services
    • Accounting assistance
    • Beneficial ownership preparation
    • Submission and follow-up
    • Post-registration support

    For example, a business registration service may offer a fixed package that includes BIPA fees together with document preparation and administrative support.

    The total package price should therefore be compared by looking at exactly what is included rather than comparing headline prices alone.

    A complete guide to forms and fees for registering a private company in Namibia can help entrepreneurs understand the distinction between statutory requirements and professional registration services.

    Businesses can also compare business setup services in Namibia when they need assistance beyond the basic BIPA filing.

    Choosing Between a CC and Private Company

    The cheapest registration option is not necessarily the best structure for every entrepreneur.

    A close corporation may be suitable for certain owner-managed businesses, while a private company can provide a more appropriate structure where the business expects investors, shareholders or more complex governance arrangements.

    Before deciding, consider:

    Ownership

    How many people will own the business, and will additional investors join later?

    Investment

    Will external investors need shares in the business?

    Governance

    Does the business require a formal corporate governance structure?

    Growth

    Could the business expand substantially or require a different ownership structure in the future?

    Compliance

    Can the owners manage the entity’s ongoing statutory and tax obligations?

    The appropriate structure should be selected based on the business’s long-term requirements rather than simply the lowest initial company registration costs. Entrepreneurs establishing a private company can also review private limited company registration in Namibia before making a decision.

    Other legal structures may have different requirements. For example, organisations operating for charitable or community purposes can review NGO registration in Namibia where relevant.

    Business Registration Service Pricing in Namibia
    Business Registration Service Pricing in Namibia

    Business Registration Service Pricing in Namibia

    Entrepreneurs who do not want to prepare and submit their own documents can use a professional business registration service.

    Prices vary significantly between providers because services may include different combinations of:

    • BIPA statutory fees
    • Name reservation
    • Registration forms
    • Document preparation
    • Certification
    • Accounting services
    • Beneficial ownership documentation
    • Tax registration
    • Compliance support

    For comparison, published commercial pricing can differ substantially between providers. One example is Business Registration Pricing in Namibia, which demonstrates how service providers may package registration assistance at fixed prices.

    When comparing quotations, ask whether the advertised price includes BIPA’s statutory charges or whether those charges are added separately.

    Businesses that need a registered address or administrative presence can also consider a virtual office in Namibia, depending on their circumstances.

    NamRA and BIPA Registration

    BIPA registration and tax registration are related but separate processes.

    The Namibia Revenue Agency (NamRA) handles tax administration, while BIPA handles business and intellectual property registration.

    The NamRA guide to registering your business explains how BIPA registration interacts with tax-related requirements.

    Entrepreneurs should therefore avoid assuming that registering a company with BIPA automatically completes every regulatory obligation.

    Depending on the nature of the business, additional registrations may be required with NamRA, the Social Security Commission, local authorities or industry-specific regulators. Businesses can review NamRA registration in Namibia for additional tax-registration information.

    Tax obligations can vary according to the taxpayer and business structure. For example, separate guidance may be relevant for individual taxpayer registration in Namibia or business income tax registration.

    Where a business structure involves a trust, entrepreneurs may also need to consider registering a trust for tax purposes with NamRA.

    How to Budget for Namibia Business Registration
    How to Budget for Namibia Business Registration

    How to Budget for Namibia Business Registration

    A practical registration budget should contain several separate lines.

    Before Registration

    Budget for:

    • Name reservation
    • BIPA registration fees
    • Company or CC documentation
    • Certified identification
    • Accounting or legal assistance
    • Notarial services where required

    During Registration

    Allow for:

    • Form preparation
    • Document corrections
    • Additional prescribed charges
    • Beneficial ownership documentation
    • Professional follow-up

    After Registration

    Set aside funds for:

    • Annual BIPA compliance
    • Tax compliance
    • Beneficial ownership updates
    • Accounting
    • Licensing
    • Annual returns and statutory submissions

    This approach gives entrepreneurs a more realistic understanding of the total cost of starting and maintaining a registered business.

    Tax compliance can extend beyond basic registration. Depending on the business and its transactions, additional requirements may include applying for a NamRA certificate of good standing, non-resident withholding tax registration or non-resident shareholders tax registration.

    Businesses employing staff should also consider registering as an employer for PAYE in Namibia.

    For businesses whose owners or management are based outside Namibia, remote business setup services may provide a practical way to coordinate registration and administration.

    Frequently Asked Questions

    How much does it cost to register a business in Namibia?

    The cost depends on the entity type, applicable BIPA fees, professional services and supporting documentation. A basic statutory fee is only part of the total Namibia business registration cost.

    What is the difference between BIPA fees and registration service fees?

    BIPA fees are prescribed statutory charges paid for specific applications. A registration service fee covers professional or administrative assistance such as preparing forms, documents, certifications, submissions and follow-up. Some providers combine both into one package.

    Do BIPA fees cover tax registration?

    No. BIPA registration and tax administration are separate processes. Businesses should assess their obligations with NamRA and any other relevant regulators after establishing the entity.

    Final Considerations

    Understanding BIPA registration fees, company registration fees and the wider cost of establishing a business helps entrepreneurs avoid unexpected expenses.

    Whether you choose a CC, private company or external company, the correct approach is to calculate the statutory registration charges separately from professional services and ongoing compliance.

    Always confirm the latest prescribed fees, forms and registration requirements with BIPA before submitting an application, particularly where the business has foreign ownership, multiple shareholders or sector-specific regulatory requirements.

    For businesses that need further assistance with registration, tax or compliance, contact us to discuss the appropriate requirements.

Free Consultation

Talk to a consultant

Tell us about your business and we’ll get back to you within a few minutes.

Message Sent!

Thank you for reaching out. We have received your inquiry and our consulting team will get back to you within a few minutes.